Ledger Wallet App Setup Guide: Desktop and Mobile

Auf dieser Seite
Auf dieser Seite
- Why You Need the Ledger Wallet App
- Requirements to Setup your Ledger Wallet Crypto App
- Prepare the device and protect the recovery phrase
- How to Set Up Ledger Wallet on Desktop
- How to Set Up Ledger Wallet on Mobile
- Add an account and verify your first receive
- Ledger Wallet App Overview
- Is Ledger Wallet Safe to Use?
- Bottom Line
- FAQs
Most people buy a hardware wallet because they do not want their crypto living entirely on a phone, browser extension, or exchange. Then comes the slightly strange part. Ledger asks you to connect that offline device to an online app. It sounds backwards until you see the division of work. Ledger Wallet is where you can see balances, create accounts, and prepare an action. Your hardware wallet stays separate, holding the keys and deciding whether anything is approved. This article explains the Ledger Wallet crypto app setup and how to connect it to a hardware wallet, verify addresses, and avoid common setup mistakes.
Why You Need the Ledger Wallet App
A Ledger hardware wallet keeps your private keys offline, but it is not designed to be the place where you check balances, search for assets, or prepare every transaction. That is what Ledger Wallet, previously called Ledger Live, is for. Think of it as the interface, while your Ledger device remains the part that gives final approval.
For example, if you already hold Bitcoin in another wallet or on an exchange, Ledger Wallet helps you create a Bitcoin account and view its receiving address. You can then send BTC to that address, after checking it matches the address shown on your Ledger device. The app makes the process easier to manage, but it never takes control of the funds or your private keys.
The app needs an internet connection because it reads blockchain data and broadcasts transactions. However, being connected does not make your hardware wallet a hot wallet. Ledger Wallet can prepare a request, but your private keys remain on the hardware device, when you sign using the device. Previously approved token allowances can let a contract move the approved tokens later without another device confirmation.
It also lets you add accounts, install network apps, track your holdings, receive crypto, and prepare sends, swaps, or staking transactions. For DeFi, you can use supported dApps through Ledger Wallet or connect your hardware wallet to interfaces such as MetaMask and Rabby. You do not install Aave on the Ledger device. Aave is mainly used for lending and borrowing, while ETH staking uses a staking provider or validator, with your Ledger device still approving the transaction.
Requirements to Setup your Ledger Wallet Crypto App
Now that you understand what Ledger Wallet does, here is what you need before setting it up.
- A Ledger hardware wallet
- The Ledger Wallet crypto app on your desktop or mobile device. You can download it directly from Ledger’s official website.
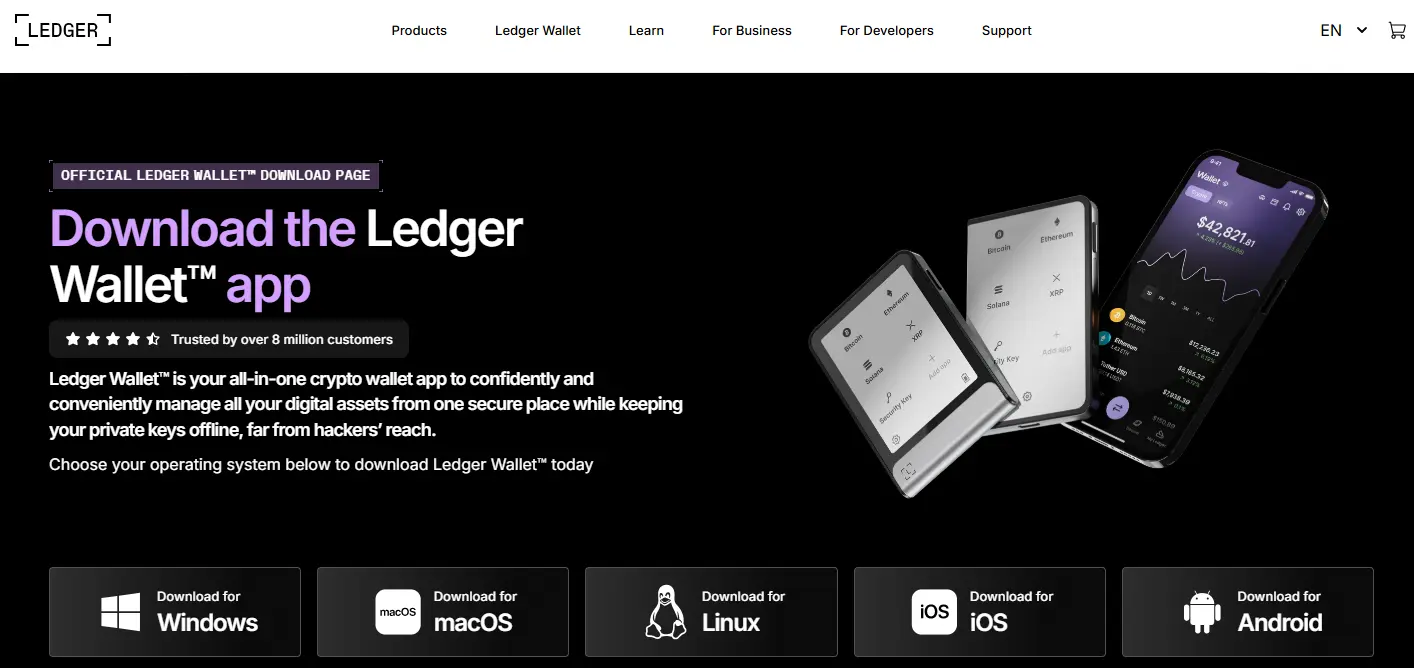
- A compatible USB data cable for desktop setup; mobile connections depend on the Ledger model and phone. Bluetooth is available on compatible models, while Nano S Plus can connect to supported Android phones by USB.
- The latest firmware installed on your Ledger device
- An active internet connection
Prepare the device and protect the recovery phrase
If this is a new device, follow Ledger’s official setup instructions to initialize it, choose a PIN, and record the recovery phrase privately. An existing wallet can be restored on the hardware device. Never type the phrase into Ledger Wallet, a website, a phone, or a computer, and never send it to someone claiming to be support. Do not use a device supplied with a prewritten recovery phrase or preset PIN.
The phrase can restore access to the wallet, so keep its backup offline and protected. Ledger’s recovery phrase guide, updated in June 2026, explains its role. Complete the app’s genuine-device check and follow its official firmware instructions before funding a new setup.
For phone compatibility, check your exact model. Ledger lists Nano S Plus as a USB device; it does not acquire Bluetooth support by installing the mobile app.
How to Set Up Ledger Wallet on Desktop
Use the current Ledger app with a model and operating system listed as supported on Ledger’s download page. Some models, such as the Nano S Plus, do not have Bluetooth, so they can only connect to the Ledger Wallet crypto app through USB. Even if your Ledger device supports Bluetooth, desktop setup still uses a wired connection. The steps are simple:
Step 1: Start by downloading and installing the Ledger Wallet desktop app from Ledger’s official website. It is available for Windows, macOS, and Linux.
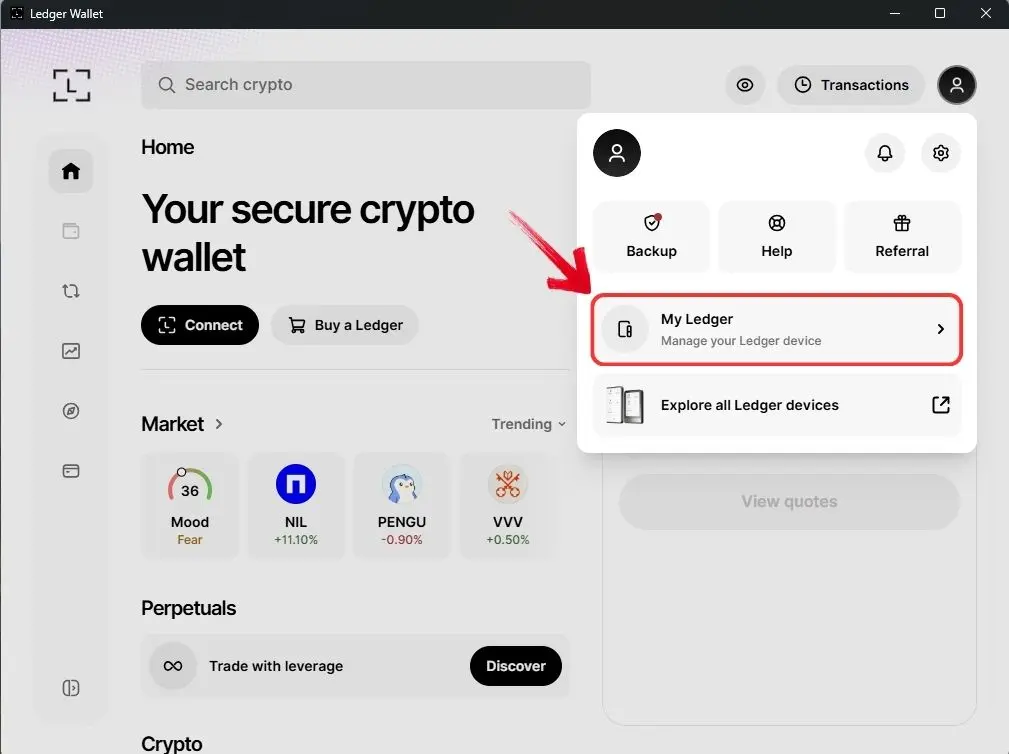
Step 2: Open Ledger Wallet on your computer, click the “Profile” icon, and select “My Ledger” from the drop-down menu.
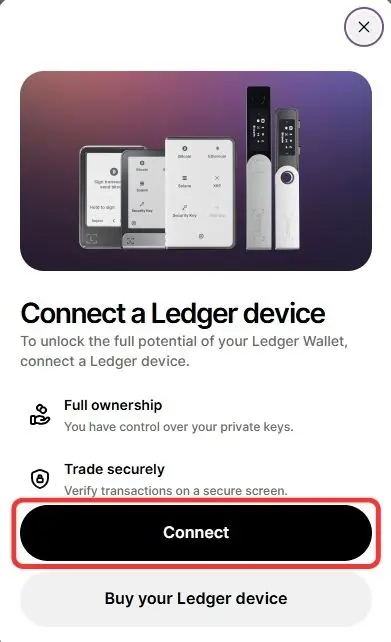
Step 3: A Ledger connection pop-up will appear. Click “Connect” to continue.
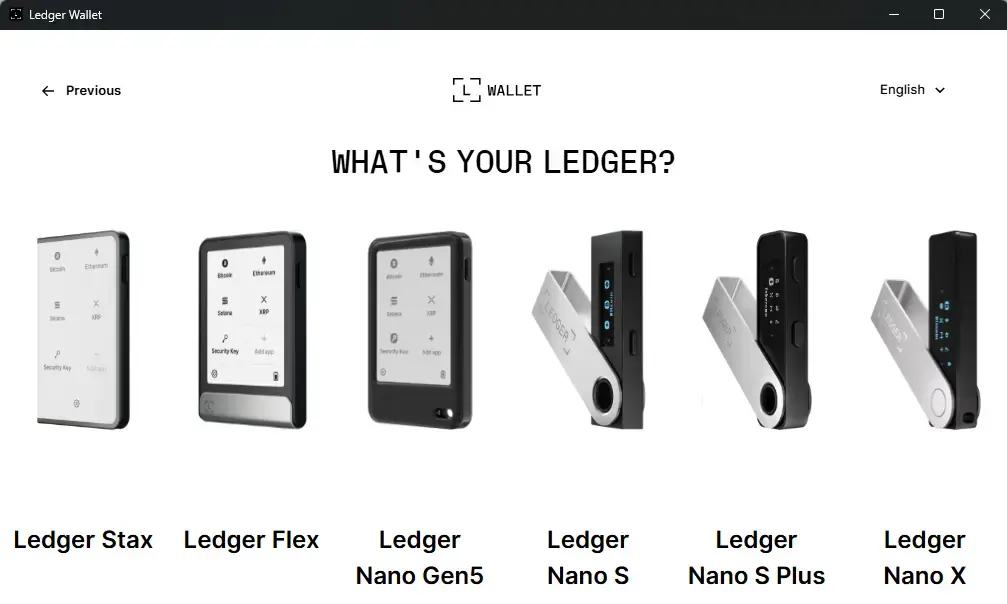
Step 4: On the next screen, choose the Ledger device you want to connect. Hover over your device, then click “Select”.
Step 5: Make sure your Ledger hardware wallet is connected to the computer through USB. Ledger Wallet will detect it and send a connection request to the device.
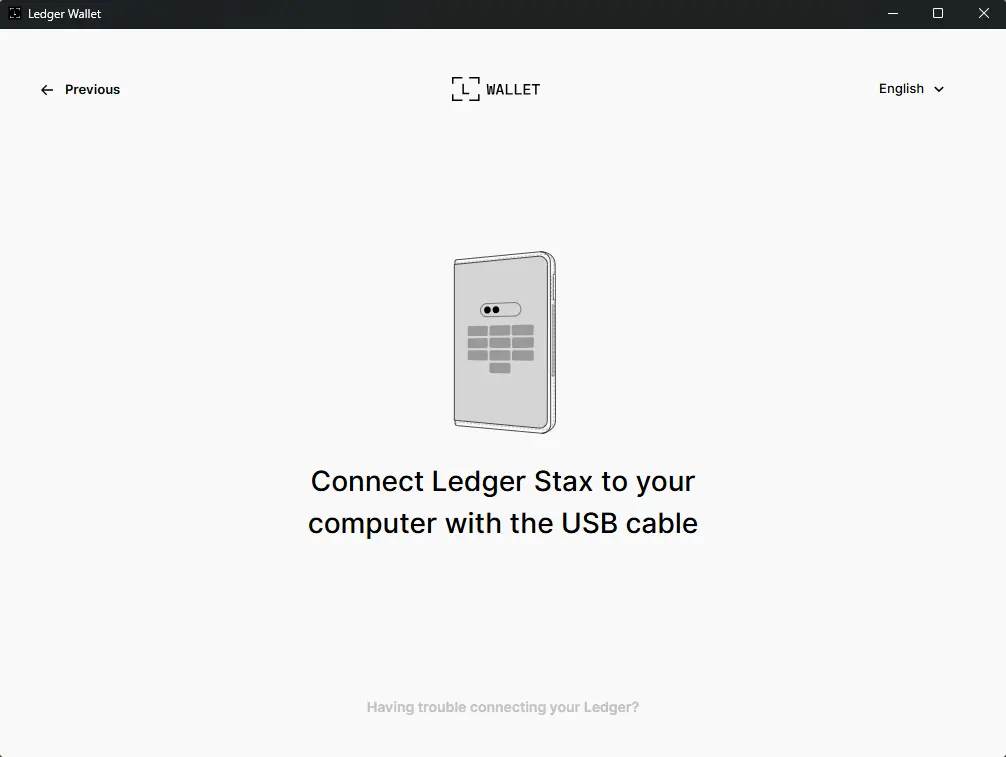
That is all you need for the desktop connection. If managing crypto from your phone suits you better, the mobile instructions below show Bluetooth pairing. A supported Android USB connection is an alternative for compatible models such as Nano S Plus.
How to Set Up Ledger Wallet on Mobile
Most Bluetooth-enabled Ledger hardware wallets can connect to the Ledger Wallet crypto app without a cable. They use Bluetooth Low Energy, or BLE, which is designed for short-range, low-power connections. The Bluetooth link sends requests between your phone and Ledger device, while your private keys remain on the hardware wallet. This setup works with Bluetooth-enabled Ledger devices, including Ledger Stax and the compact Ledger Nano X.
Here is how to connect a Bluetooth-compatible Ledger device through the mobile app. Screens and menu labels may change with app updates:
Step 1: Start by installing the Ledger Wallet app on your phone. It is available for both iOS and Android through their respective app stores.
Step 2: Open the app, then tap “Connect” on the home screen.
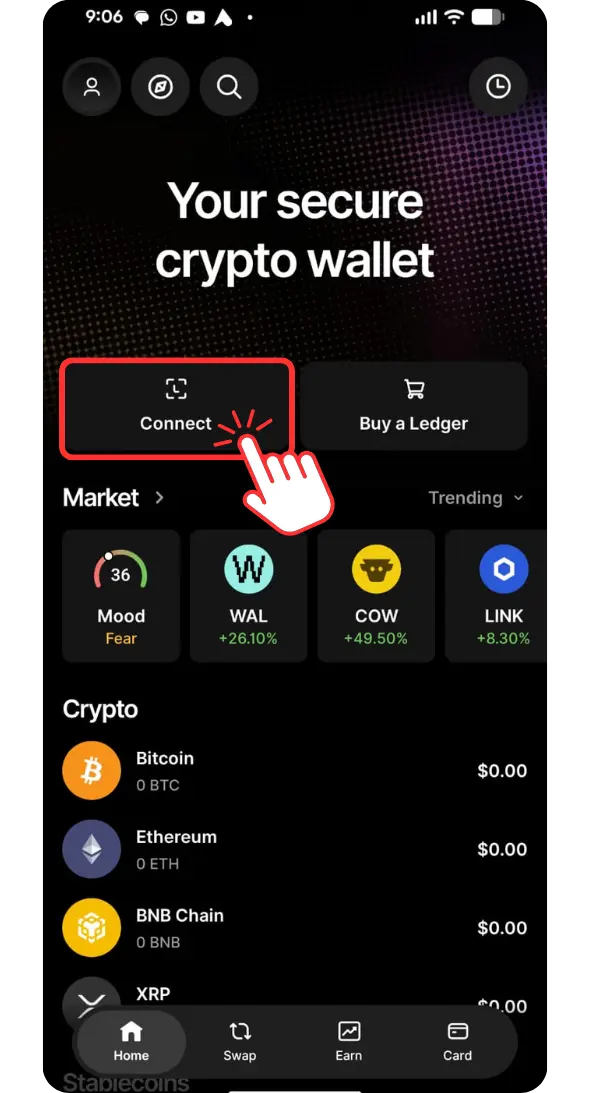
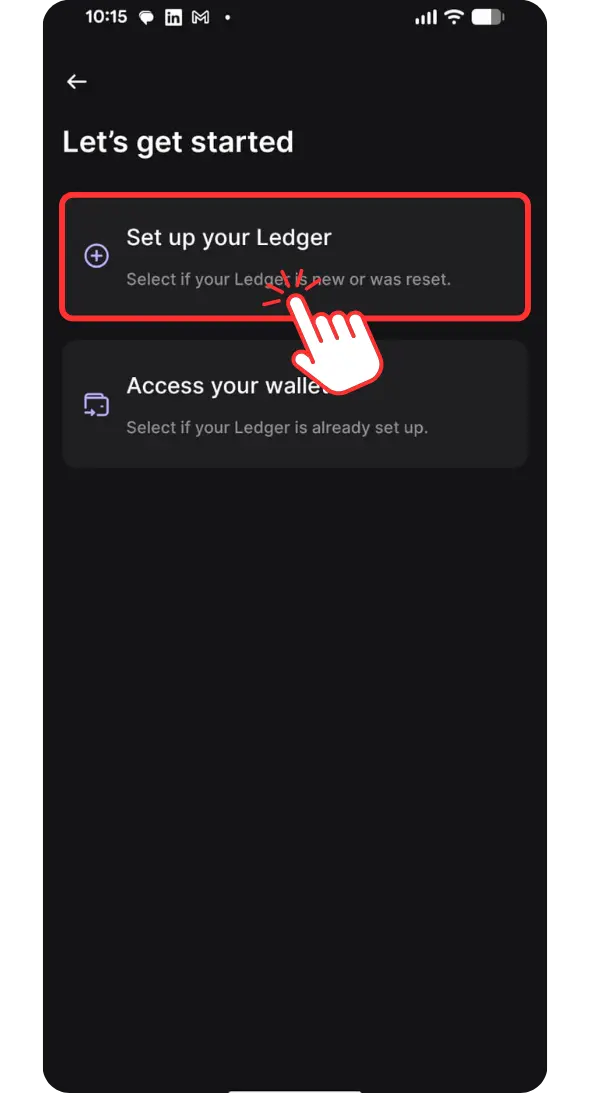
Step 3: On the next screen, tap “Set up your Ledger” to begin connecting the app with your hardware wallet.
Step 4: Select the Ledger device you want to connect, then tap it to continue.
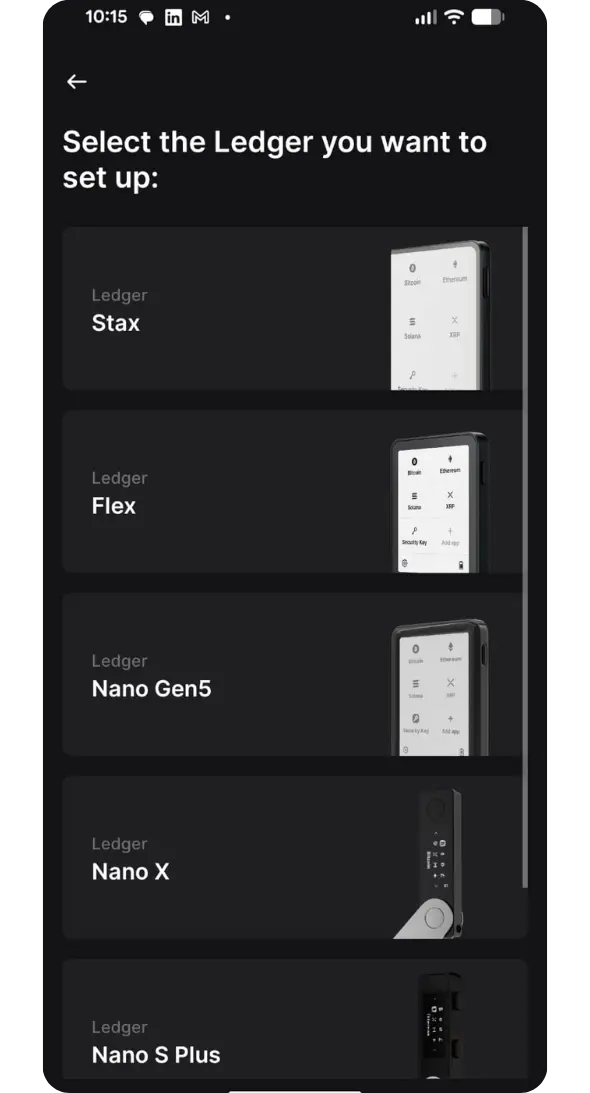
Step 5: Ledger Wallet will look for the device through Bluetooth and send a connection request to your hardware wallet. Unlock the device and follow its prompts to complete the pairing.
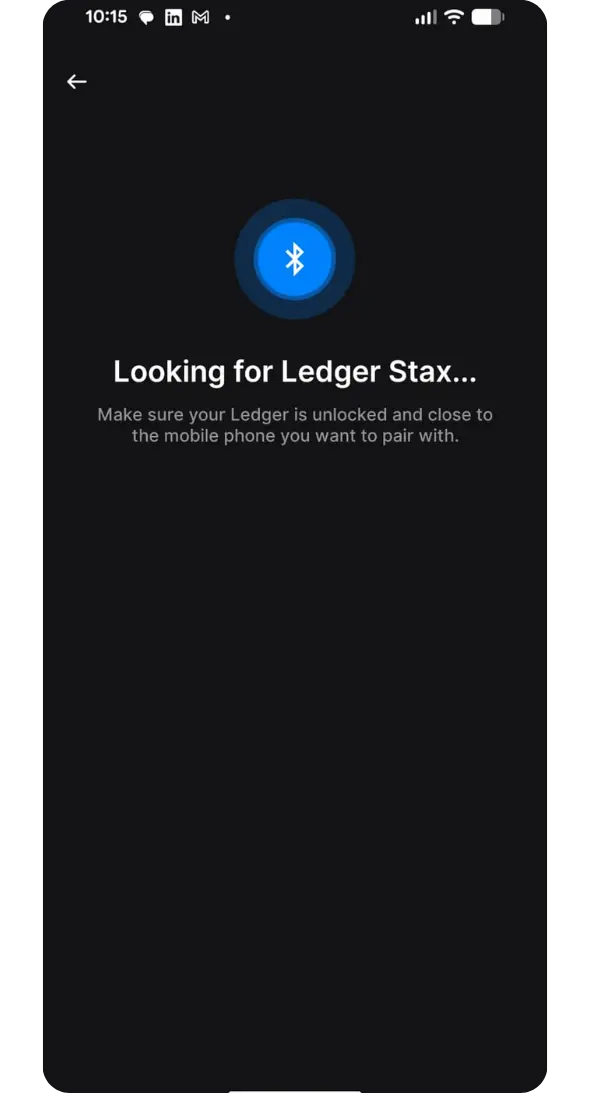
Once the connection is complete, Ledger Wallet becomes the place where you can view your accounts and prepare the actions you want to take with your crypto.
Add an account and verify your first receive
- In the app’s device-management section, install the network app you need and add the corresponding account.
- Choose Receive, select the correct asset and network, and connect and unlock the hardware device.
- Compare the receiving address in the app with the full address shown on the device. Stop if they differ.
- When sending from an exchange or another wallet, select the same supported network and include any required destination tag or memo.
- Consider a small test transfer and check its arrival before sending the remainder, allowing for network and withdrawal fees.
Your assets are recorded on their blockchain. The hardware device protects the signing keys; the app is an interface for accounts and transactions.
Ledger Wallet App Overview
Once your Ledger device is connected, Ledger Wallet becomes more than a place to check balances. These are the main sections you will see and what they actually let you do.
Stake
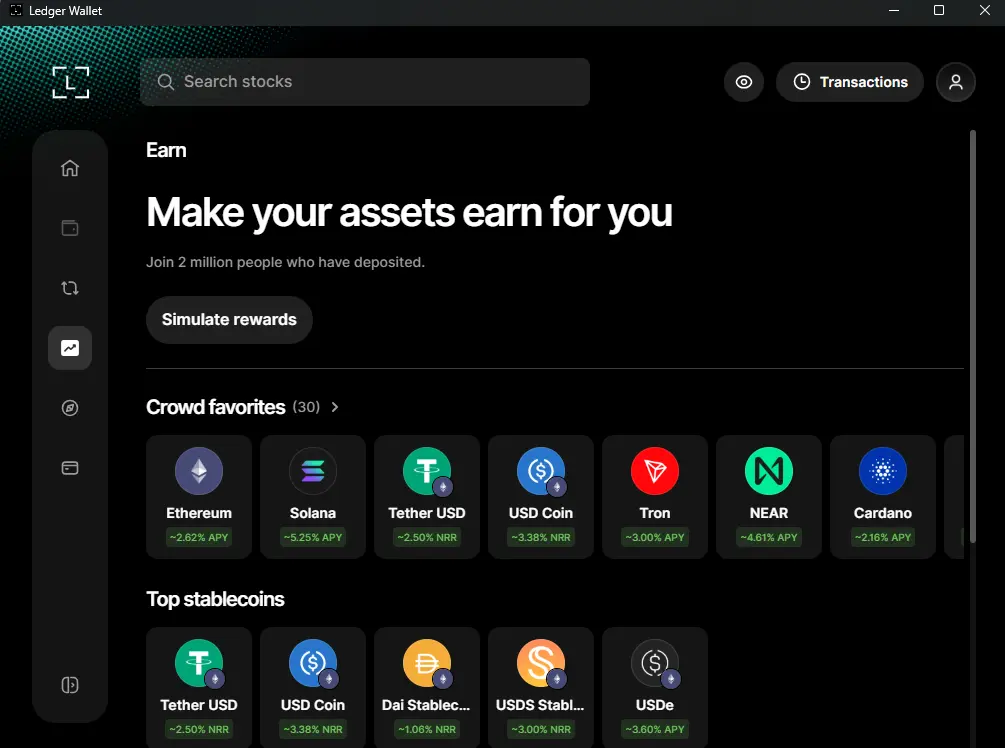
The Stake section is where you can put eligible proof-of-stake assets, such as ETH or SOL, to work while keeping your private keys on your Ledger device. Ledger Wallet shows the available staking routes, including validators and third-party providers, then sends the transaction to your hardware wallet for approval. The app makes staking easier to access, but the terms still come from the network or provider. Rewards, lock-up periods, unbonding times, and slashing risk can differ depending on the asset you choose.
Earn
Earn is broader than staking. It shows yield opportunities, including stablecoin yield and selected portfolio strategies, so you can compare what may be available for assets you already hold. These offers often come from third-party providers, rather than Ledger itself, and the returns are not guaranteed. The useful part is having these options within the same app as your accounts. The important part is understanding where your crypto is going and what conditions apply before you approve anything on your Ledger device.
Swap
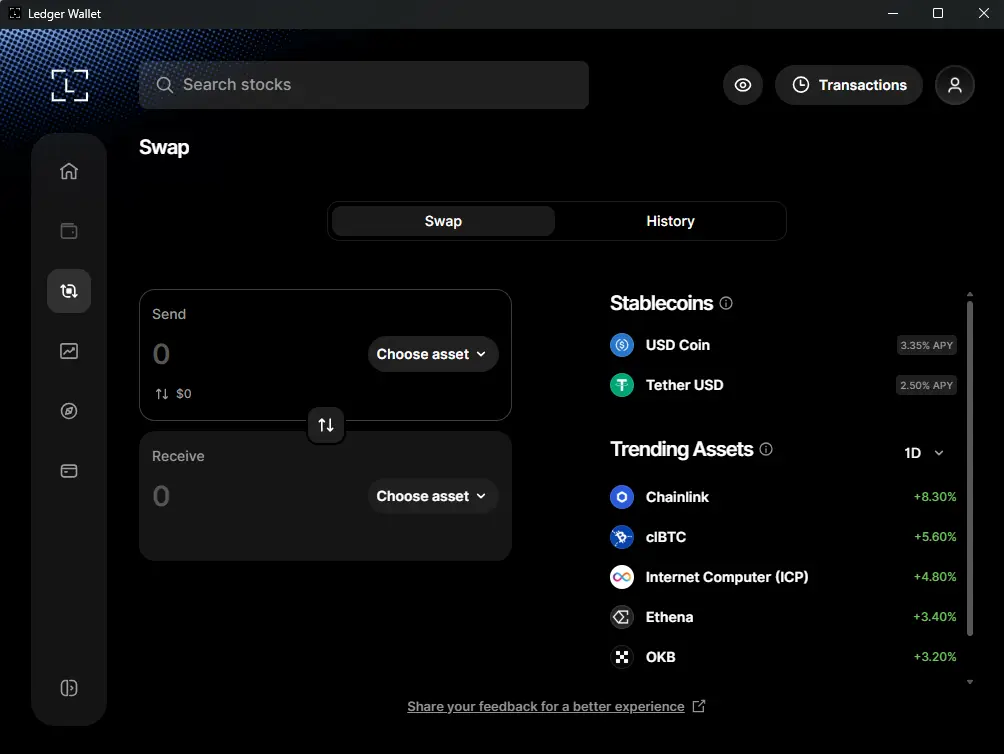
The Swap section lets you exchange one crypto asset for another through integrated providers, including some cross-chain swaps. It can be convenient when you want to compare quotes without first moving funds to a centralised exchange. Ledger Wallet prepares the swap, but your hardware wallet still needs to approve it before it is completed. Rates, provider fees, spreads, and network fees can differ between options, so the quoted amount matters more than the simple fact that a swap is available.
Ledger Card
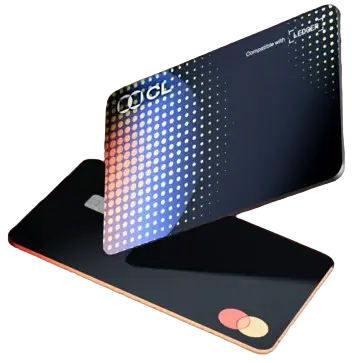
The Card section shows crypto cards that work with Ledger Wallet, such as the CL Card or Spend card, depending on your country. You can move crypto from your Ledger account to the card and use it for everyday purchases, usually after the provider converts it to local currency. These cards are provided by third parties, not Ledger itself. More importantly, crypto moved to a card account is no longer under your direct self-custody, so treat it more like spending money than long-term storage.
Is Ledger Wallet Safe to Use?
A genuine Ledger device keeps signing keys separate from the internet-connected app, but this is not a guarantee against theft or loss. The app can connect to the internet, show your balance, and prepare transactions, but it does not hold your private keys or approve payments by itself. Those stay with your Ledger device.
Hardware protection does not remove every risk. A fake website, a malicious dApp, or sharing your recovery phrase can bypass the protection a hardware wallet is meant to provide.
Review token permissions as well as individual transactions. Ledger’s token approval guide explains how an allowance can remain active and why disconnecting a dApp does not revoke it. A secure device cannot make a malicious approval harmless.
Bottom Line
If you came here wondering whether an online app defeats the point of a Ledger, it does not. Ledger Wallet handles the parts that would be frustrating on a tiny hardware screen, while your device remains the final authority over your crypto. Once they are connected, the setup is less about creating another wallet and more about giving your Ledger a practical way to receive, manage, and use the assets already under your control.
FAQs
Yes. Ledger Wallet is the new name for the app previously called Ledger Live.
You can download the app, but you need a Ledger hardware wallet to create and manage Ledger-secured accounts.
Yes. Add the relevant account, copy its receiving address, verify it on your Ledger device, then send crypto to that address.
Bluetooth only carries the connection and transaction request. Your private keys remain inside the Ledger device. Check what you sign: an existing token allowance can authorize later transfers without a fresh device confirmation.
Official setup and security references checked September 9, 2026. The screenshots are from August 2026; interface labels and product availability can change.