How to Trade on Aster DEX Mobile – Step-by-Step Guide


In questa pagina
- •Aster DEX mobile lets Android users trade perpetual and spot markets directly from their phones with a clean and responsive interface.
- •A Web3 wallet like MetaMask and a small amount of native tokens for gas fees are required to connect, fund, and start trading.
- •The platform offers up to 100x leverage, access to 93+ markets, and low trading fees, making it suitable for both new and active traders.
It all began with a post from CZ on June 1, 2025, suggesting that the crypto market was ready for a dark pool-style perpetual DEX, one that could bring greater privacy and efficiency to derivatives trading. Just 18 days later, Aster DEX launched with stealth perpetual orders, aligning closely with that idea. Since then, the platform has gained recognition in the perpetual DEX space, recording over $90B in daily trading volume.
Beyond its web interface, it also gives Android users the ability to trade perpetuals directly through its mobile version. This guide explains how to set up and trade on Aster DEX mobile, covering everything from connecting your wallet to placing your first order.
Aster DEX Mobile Requirements
Before we get into the steps on how you can set up and get started with Aster DEX mobile, there are a few important things to point out:
1. Mobile Requirements:
This walkthrough uses Android. Aster also provides an iOS download; use the links on the official Aster website to choose your version. Read our full Aster DEX review
to learn more about Aster DEX and its features.
2. Web3 Wallet:
When trading on Aster DEX; whether through the web interface or the mobile app, you’ll need a Web3 wallet that is compatible with the networks supported by Aster DEX. Currently, Aster DEX mobile only supports BNB Chain, Ethereum, and Arbitrum.
To use Aster DEX, you’ll need a wallet that supports any of these networks. For this guide, we’ll be using MetaMask, as it supports the EVM networks used in this Android walkthrough.
3. Gas Fees:
While Aster DEX is generally quite affordable, to get started on the mobile app you’ll first need to transfer funds from one of the supported networks. Since this is an on-chain transaction, you’ll need to hold a small amount of the native token to pay for gas fees.
For example, if you decide to use the Binance Smart Chain, you’ll need to hold some BNB tokens to cover network gas costs, which usually range between $0.01 and $0.10.
Network Setup Guides for Aster DEX
Download and Set Up MetaMask (Web3 Wallet)
To begin, let’s download and set up your Web3 wallet. The process is simple and only takes a few minutes, so let’s get straight into it.
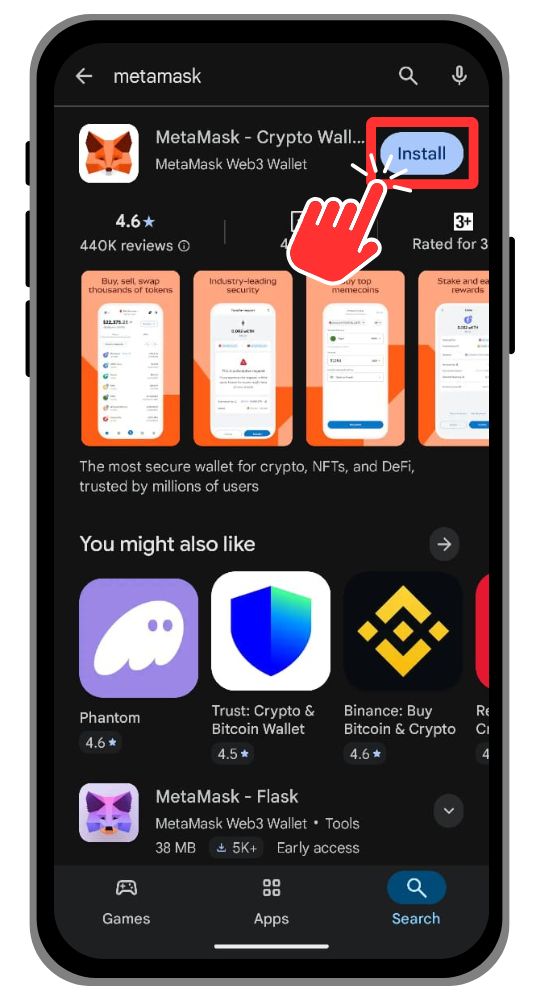
Step 1: Head over to the Google Play Store and search for “MetaMask”.
Step 2: You’ll see “MetaMask – Crypto Wallet” as the first search result. Tap the “Install” button to begin downloading the app.
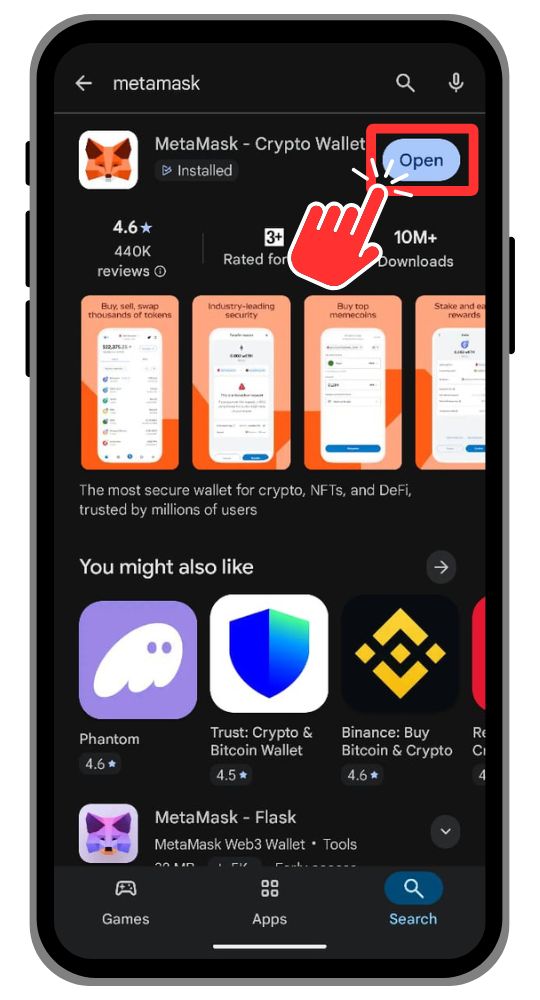
Step 3: Once the installation is complete, tap “Open” to launch MetaMask.
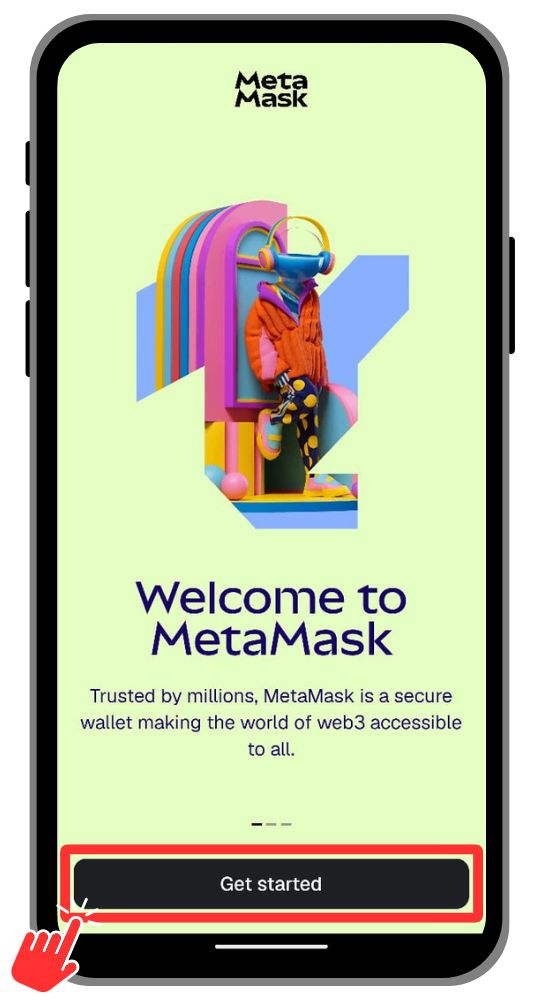
Step 4: You’ll be greeted with the MetaMask welcome page. Tap “Get Started” to continue.
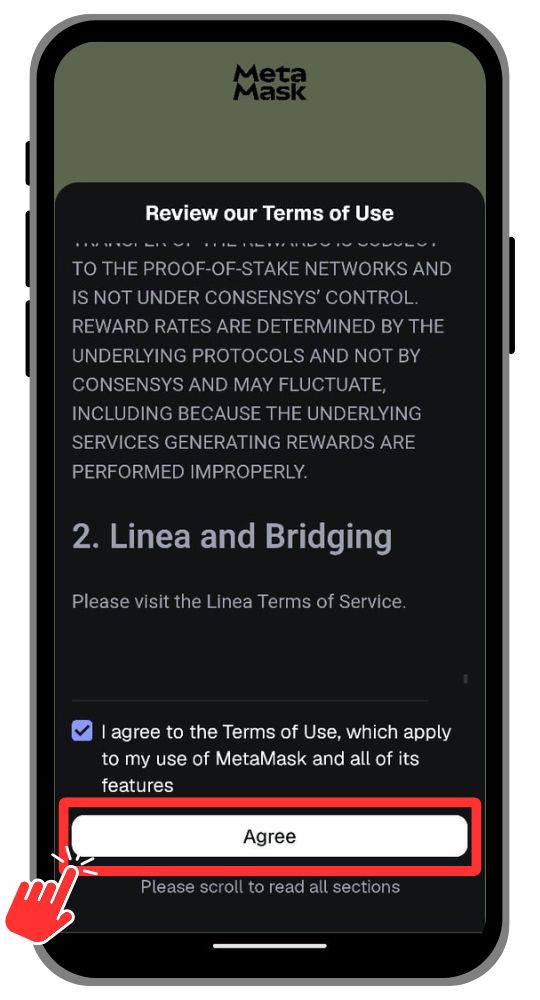
Step 5: Review MetaMask’s terms and conditions, then tap “Agree” to proceed.
Step 6: MetaMask will now display your 12-word Secret Recovery Phrase. Write it down and store it safely, this is the only way to recover your wallet if you ever lose access.
You now have your MetaMask wallet installed and set up. Make sure to keep your seed phrase secure, as MetaMask is a self-custodial wallet, meaning your recovery phrase is the only key to access your wallet and funds.
Download Aster DEX Mobile App
Next, we’ll download the Aster DEX mobile app from the Google Play Store. The steps are quite similar to MetaMask, so let’s go through them quickly.
Step 1: Open the Google Play Store on your Android device and type “Aster DEX” in the search bar.
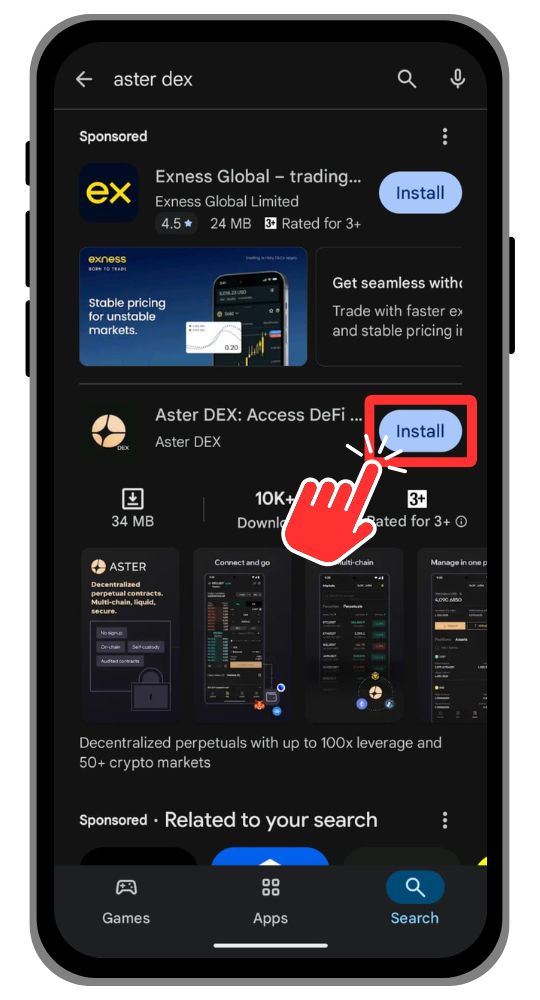
Step 2: Here, you will see “Aster DEX: Access DeFi markets”as the first search result. Tap the “Install” button to begin downloading the app.
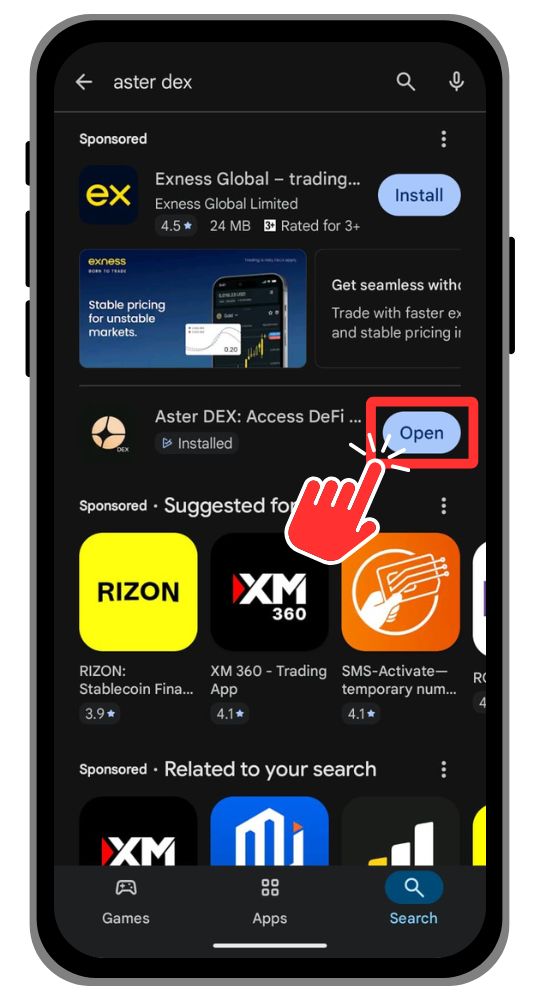
Step 3: Once the download is complete, tap “Open” to launch the app.
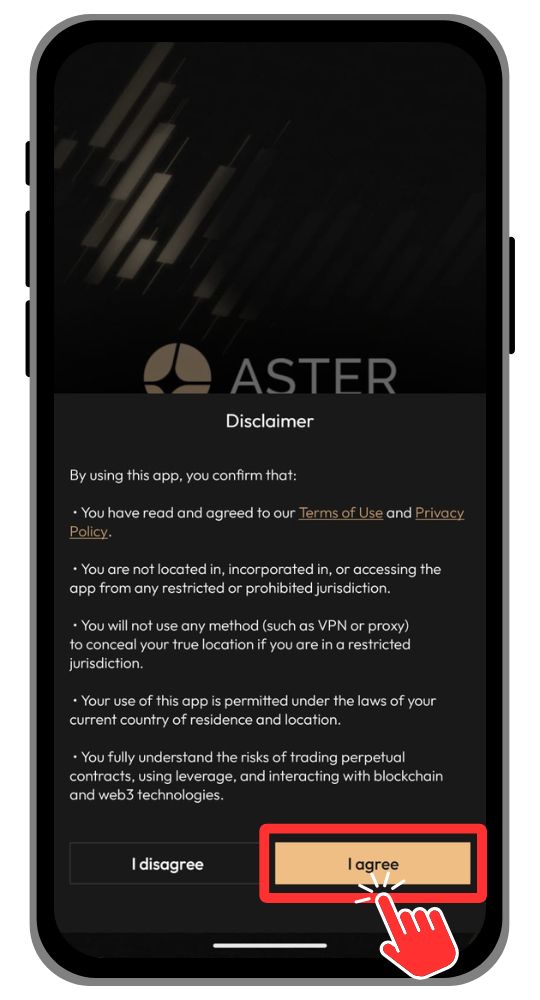
Step 4: Once Aster DEX finishes installing, you’ll see a disclaimer on launch. Review it and tap the “I Agree” button to continue.
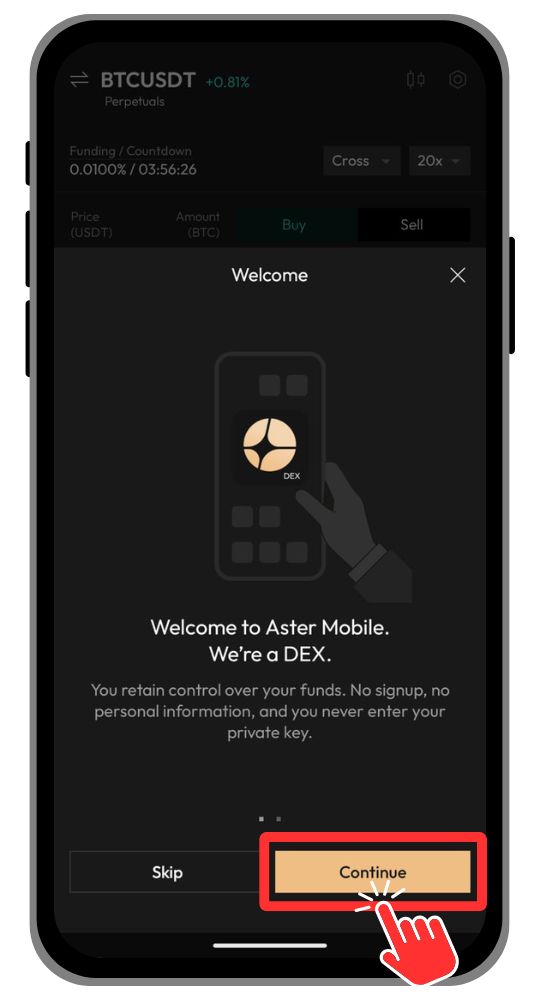
Step 5: Next, you’ll reach the Aster DEX mobile welcome screen. Tap “Continue” to proceed.
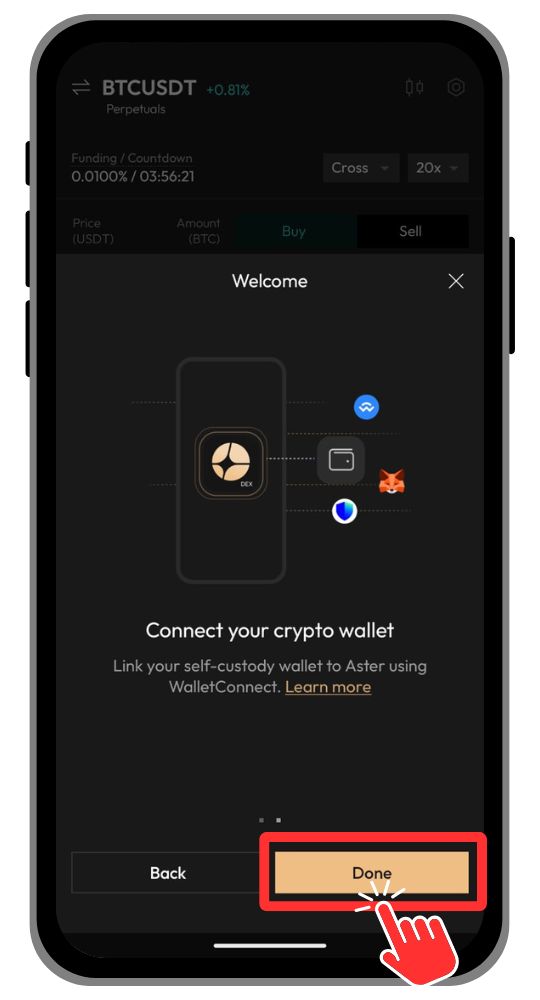
Step 6: Finally, tap “Done” to open the Aster DEX mobile homepage.
Connect MetaMask to Aster DEX Mobile
Once both apps are installed, the next step is to connect your Web3 wallet (MetaMask) to Aster DEX mobile. This connection allows you to trade directly through your wallet without sharing custody of your funds. Let’s go through the steps:
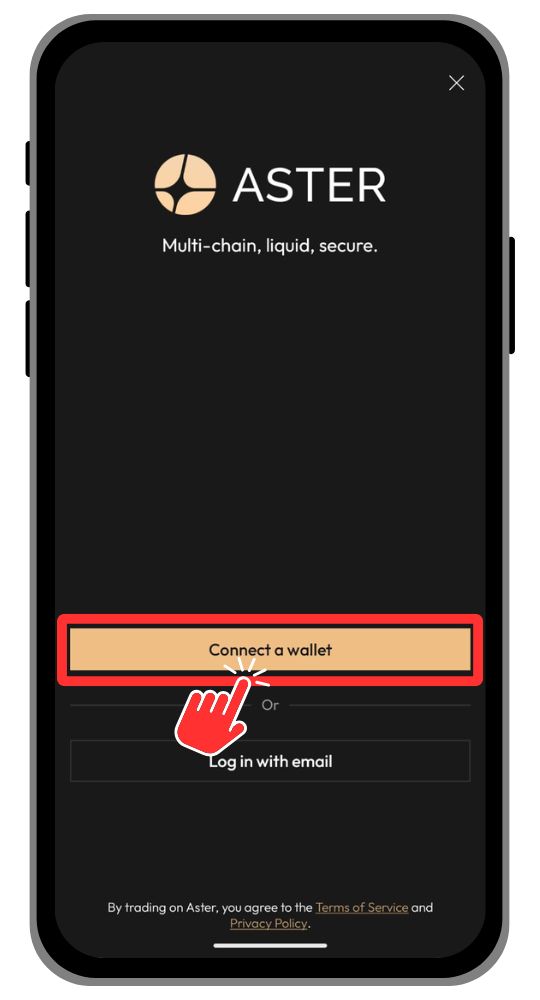
Step 1: Open the Aster DEX app on your Android device and tap on “Connect a Wallet”.
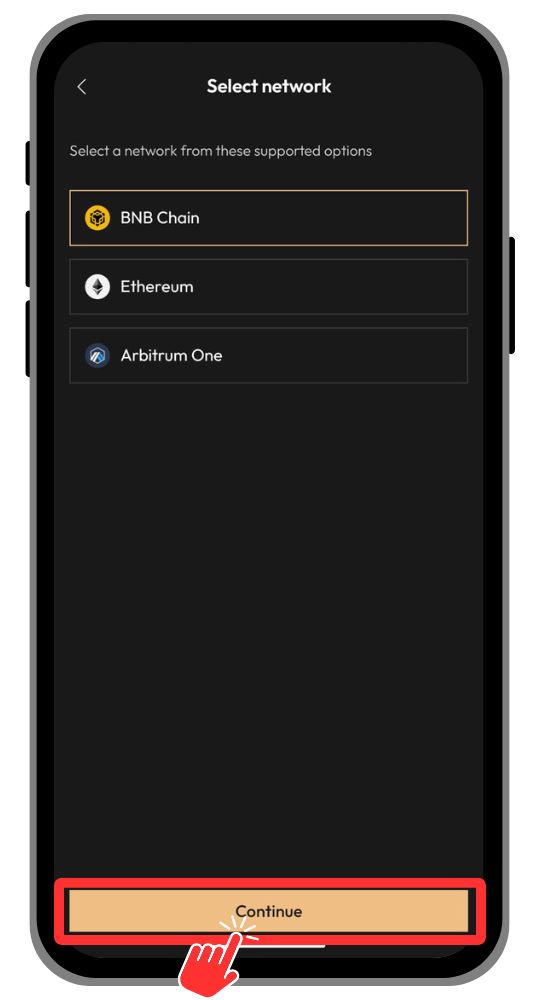
Step 2: Aster DEX mobile currently supports BNB Chain, Ethereum, and Arbitrum. Tap on the network you prefer, then select “Continue”.
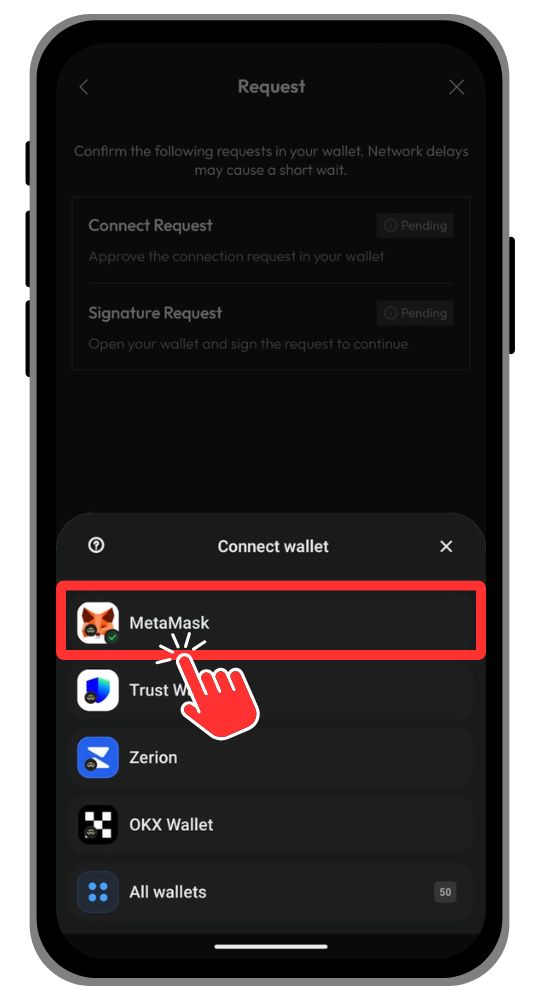
Step 3: A list of available wallets will appear at the bottom of your screen. Select MetaMask to connect and start using Aster DEX Mobile.
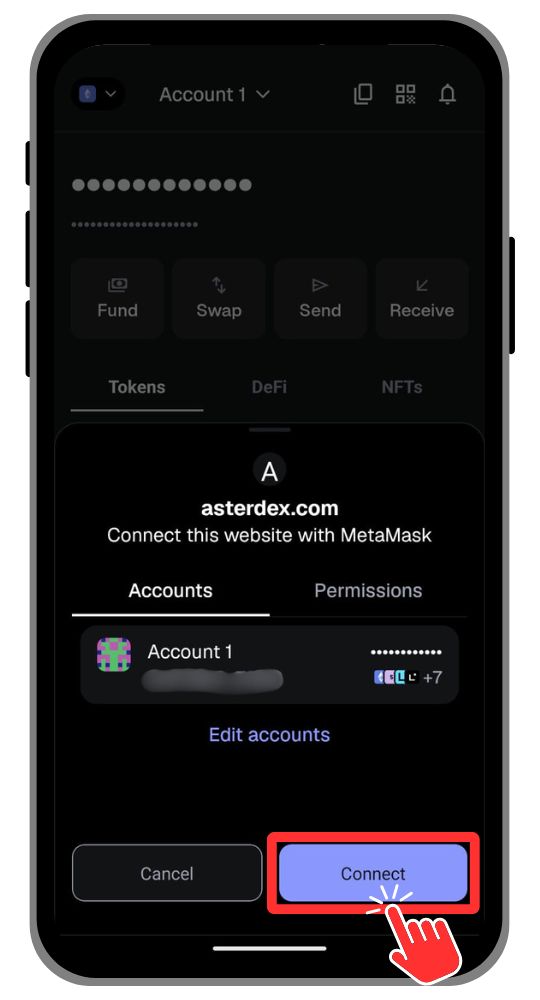
Step 4: The MetaMask app will automatically open and prompt you to connect. Tap “Connect” to establish a secure link between your MetaMask wallet and Aster DEX mobile.
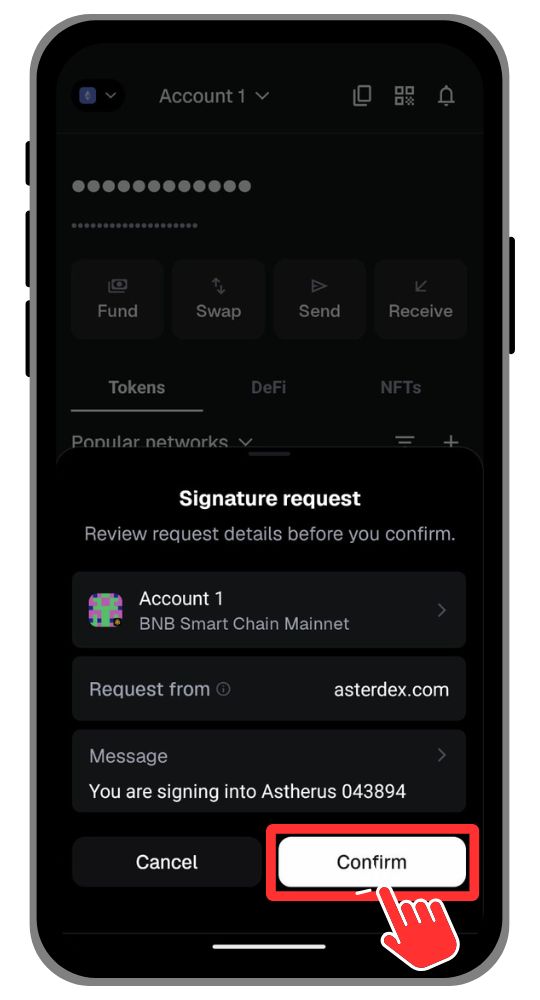
Step 5: You’ll then receive a signature request in MetaMask to authorize the connection for uninterrupted trading. Tap “Confirm” to approve.
Deposit Funds to Aster DEX Mobile
Now that everything is set up, the next step is to fund your Aster DEX mobile wallet so you can start trading. Here’s how to make your first deposit:
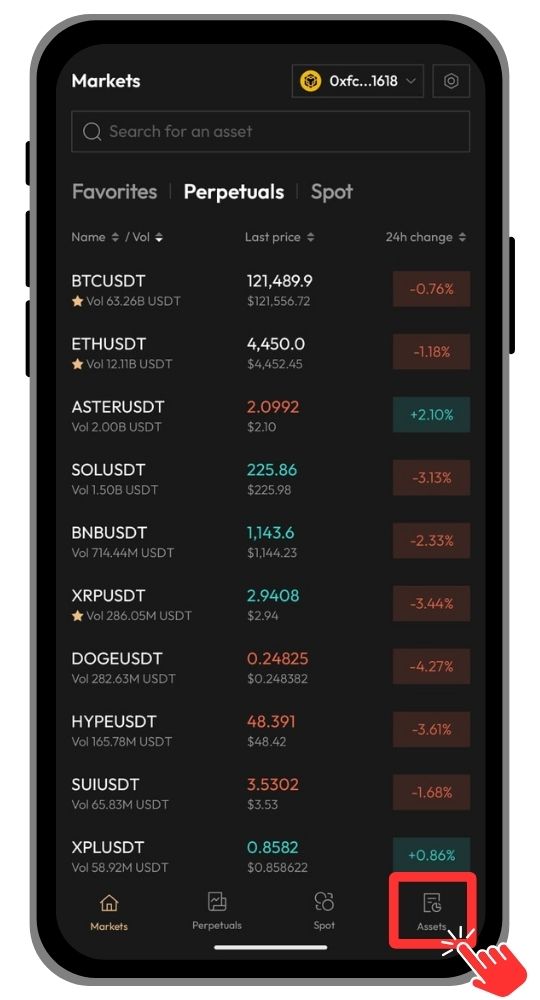
Step 1: Open the Aster DEX mobile app and tap on the “Assets” icon located in the bottom-right corner of the menu.
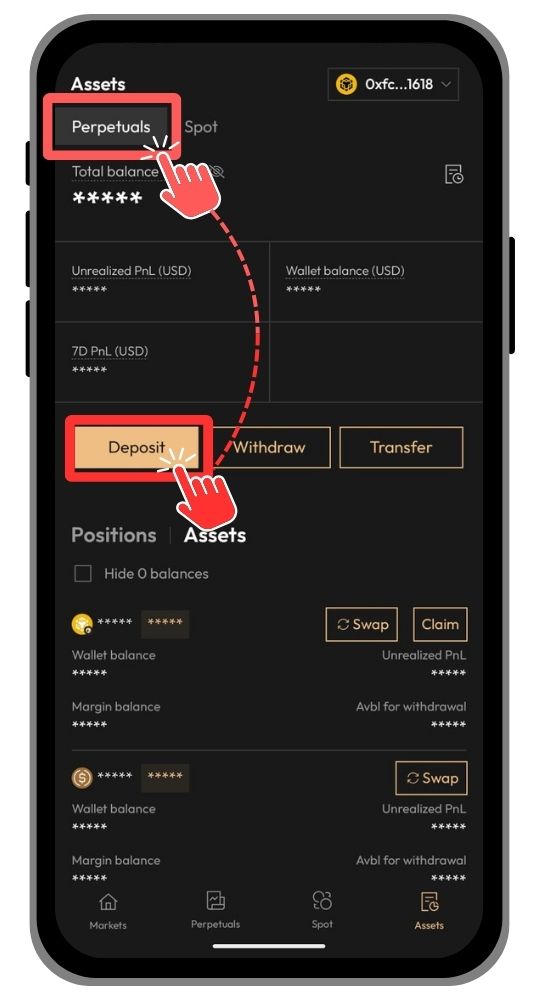
Step 2: In the “Perpetuals” tab, tap the “Deposit” button to begin the process.
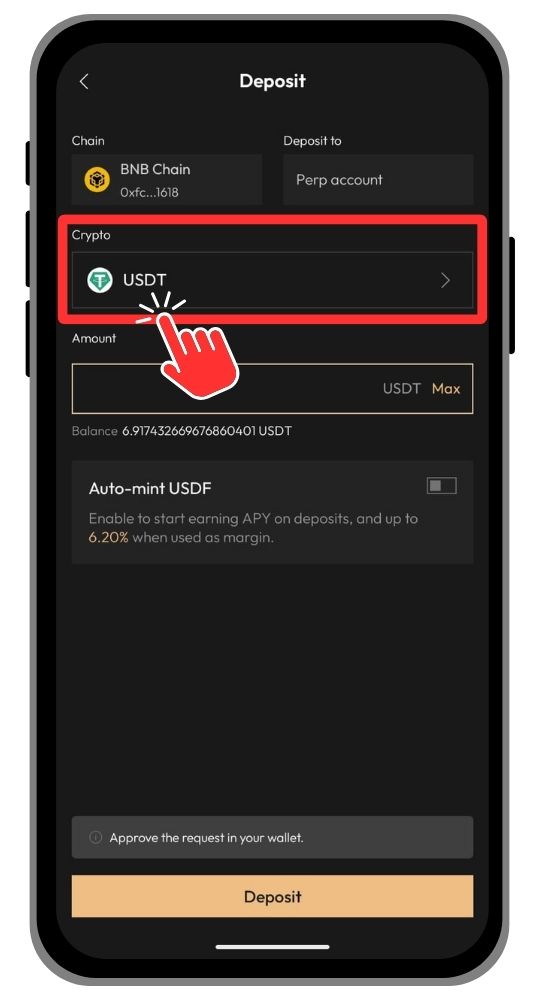
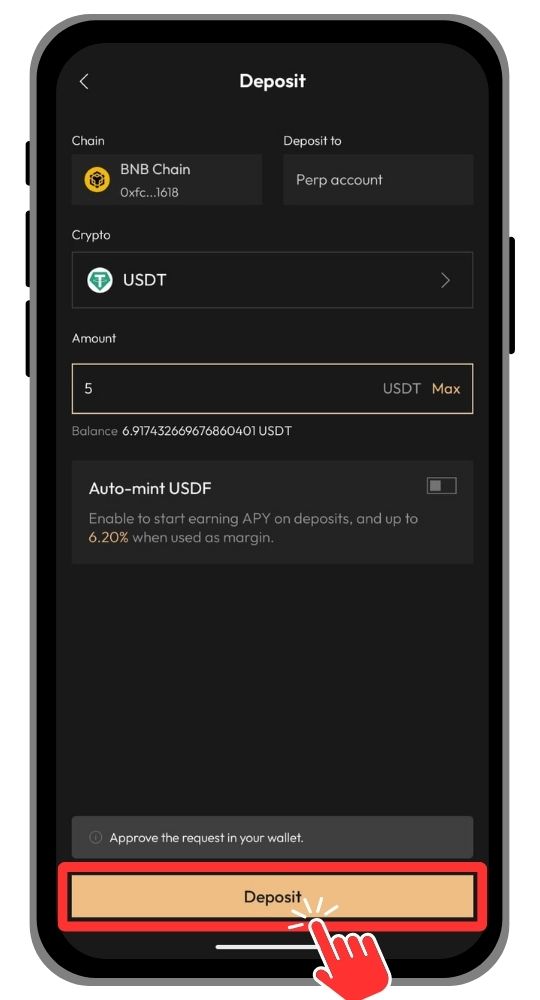
Step 3: The Chain field will be set to BNB Chain by default. Tap on the “Crypto” field to select the token you want to deposit.
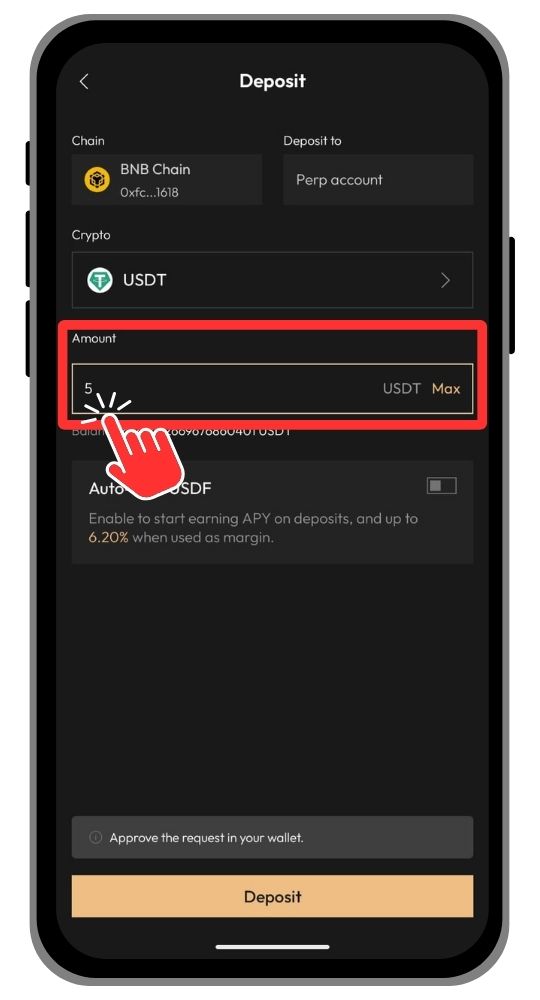
Step 4: Tap on the “Amount” field and enter the amount you’d like to transfer to Aster DEX.
Step 5: Once ready, tap the “Deposit” button to initiate the transfer from your Web3 wallet to Aster DEX.
Step 6: The MetaMask app will automatically open. Tap “Confirm” to approve the deposit transaction.
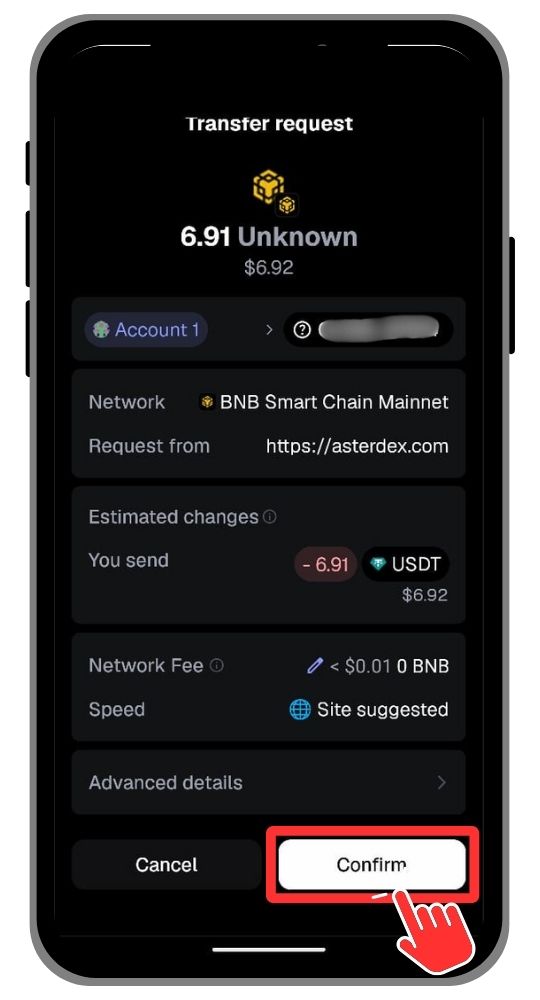
After the transaction is confirmed on-chain, your funds will appear in your Aster DEX mobile balance, ready for trading.
How to Trade on Aster DEX Mobile
Aster DEX has shown considerable growth in trading activity, with daily perpetual trading volumes crossing $90B. The platform currently offers access to over 93 perpetual contracts and 8 cryptocurrencies for spot trading, all available through the Aster DEX mobile app.
With all the setup steps completed, you’re now ready to place your trades on the Aster DEX mobile app. In this section, we’ll explain how to trade on Aster DEX mobile, including both perpetual and spot markets, and guide you through the process of making your first trade directly from your Android device.
Perpetual Trading on Aster DEX Mobile App
On Aster DEX, you can trade across 93+ perpetual contracts, mostly dominated by USDT pairs, with leverage of up to 100x. The platform features a low-fee structure; 0.035% for takers and 0.010% for makers on perpetual contracts. Here’s how you can start trading perpetual contracts on the Aster DEX mobile app.
Step 1: Open the Aster DEX mobile app and tap on the “Perpetuals” tab.
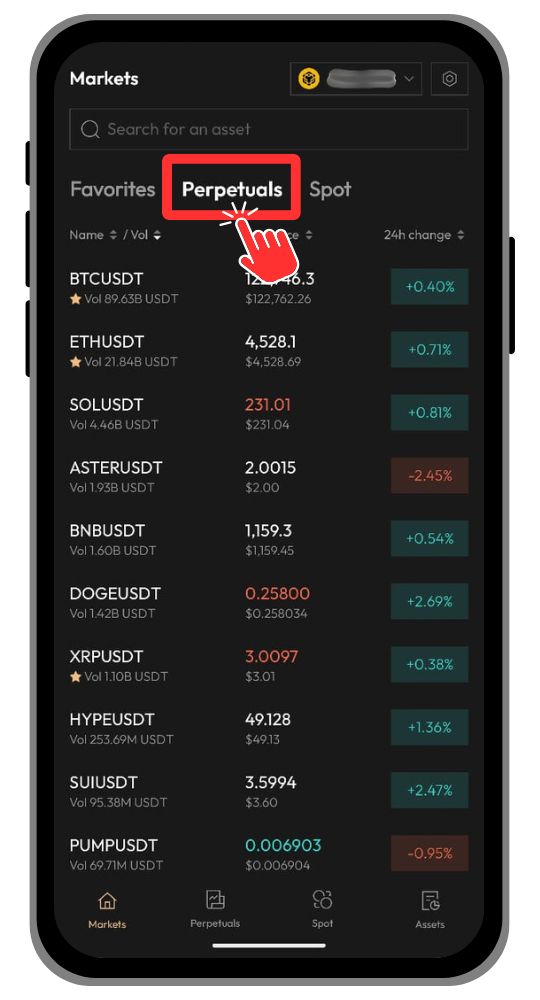
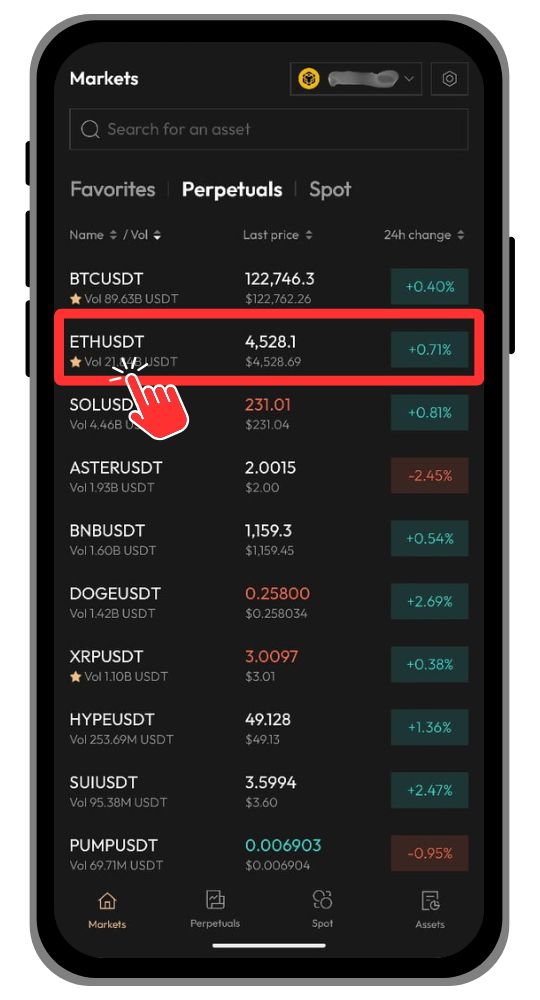
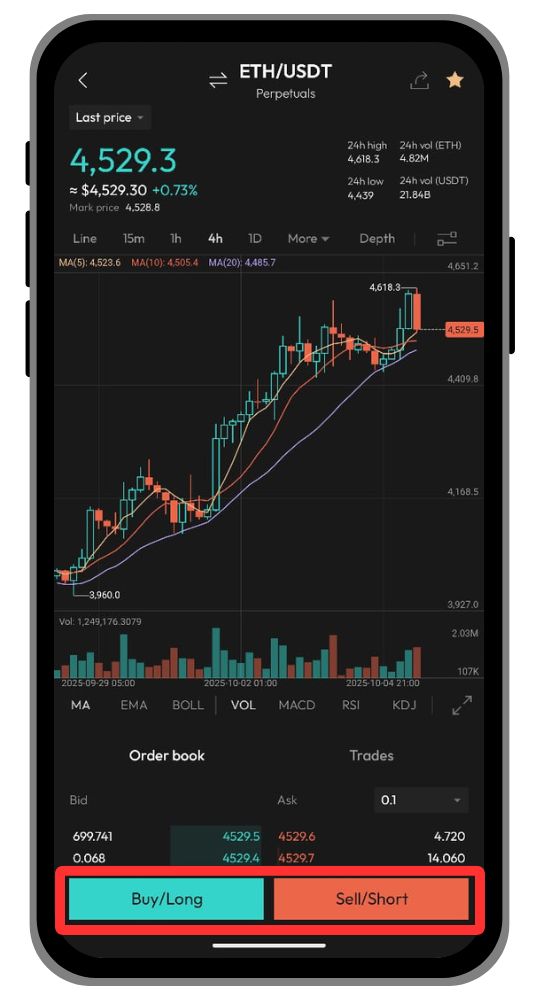
Step 2: In the Perpetuals tab, select a trading pair such as BTC/USDT, ETH/USDT, or any other available pair. Simply tap the pair to open its trading screen.
Step 3: On the next screen, you’ll see the chart and order book. Tap “Buy/Long” or “Sell/Short” to begin setting up your trade.
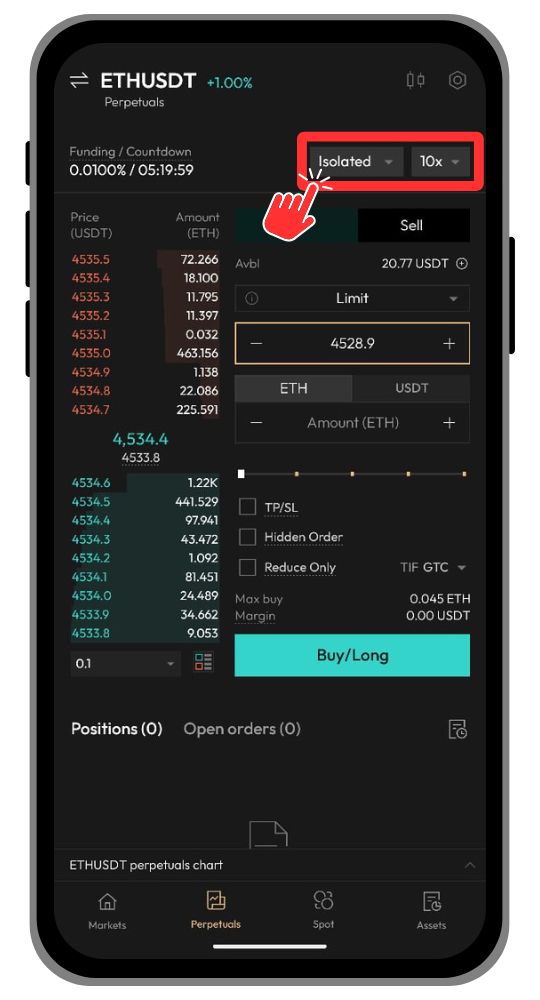
Step 4: The next screen contains all your trading tools. From the top-right corner, you can select your Margin Mode and Adjust Leverage as needed.
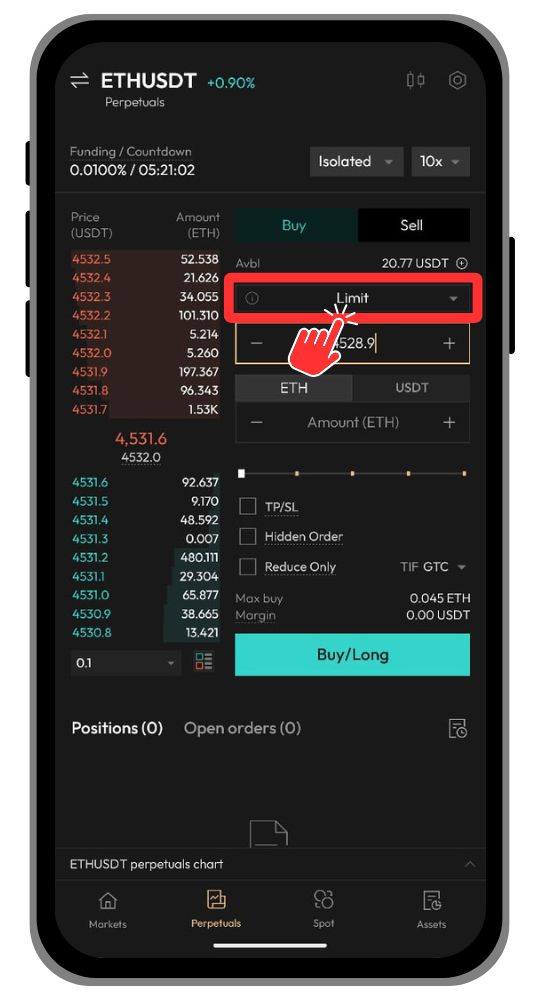
Step 5: Choose your Order Type; Aster DEX offers both Limit and Market orders, along with advanced order options.
Step 6: Enter your desired price in the “Price” field.
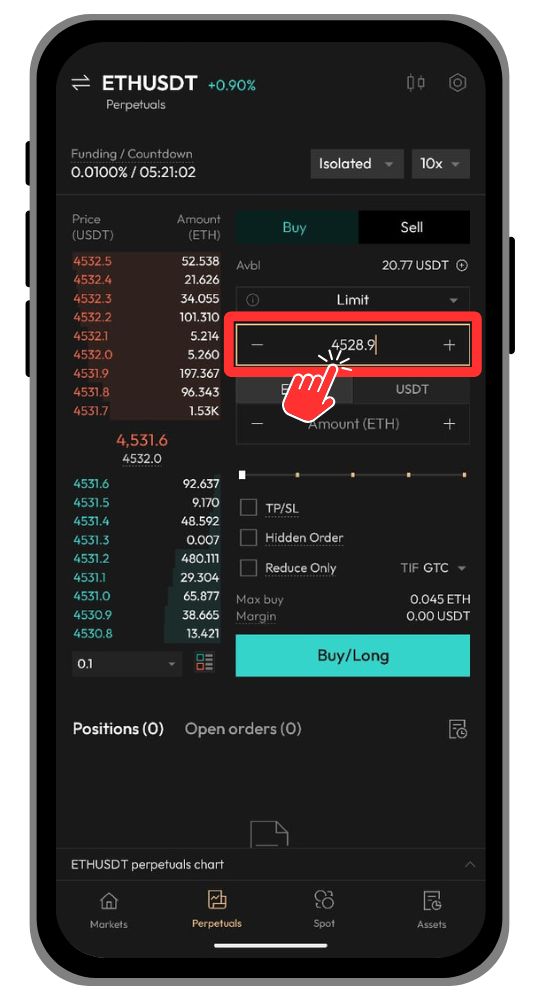
Step 7: Use the toggle or input box to set the amount you want to use for your position.
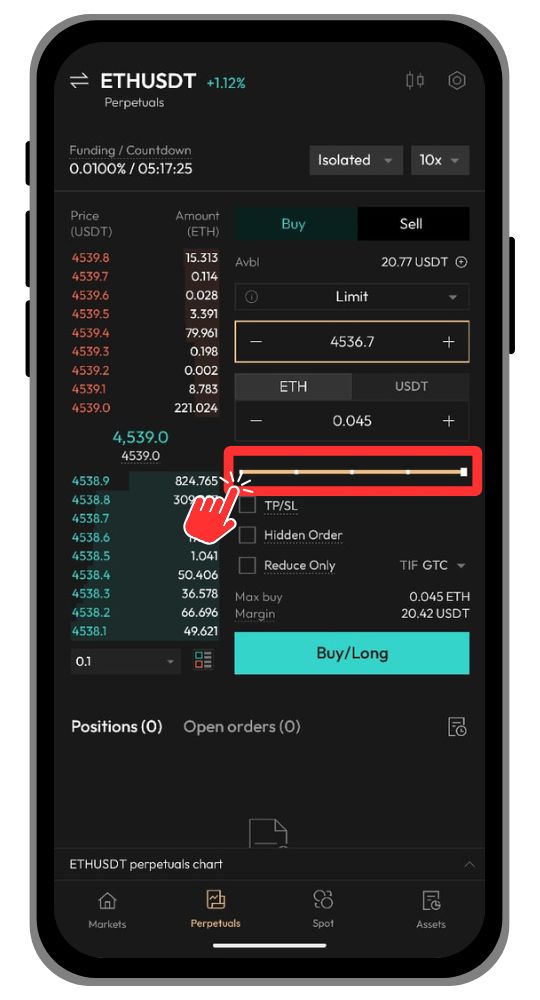
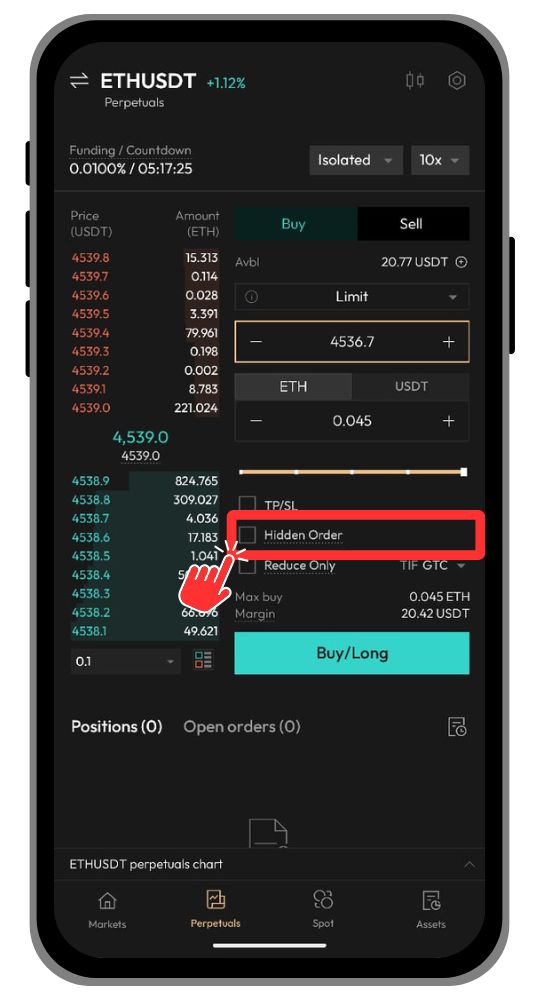
Step 8: Aster DEX is the first DEX to introduce Hidden Orders. You can enable this feature by tapping the “Hidden Order” checkbox before confirming your trade.
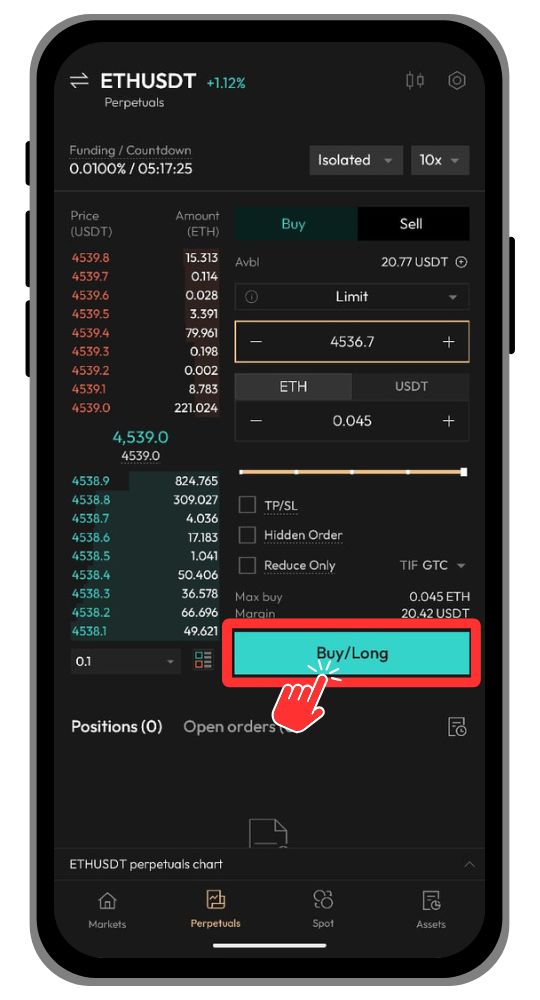
Step 9: Review all details and tap “Buy/Long” or “Sell/Short”, depending on your position direction.
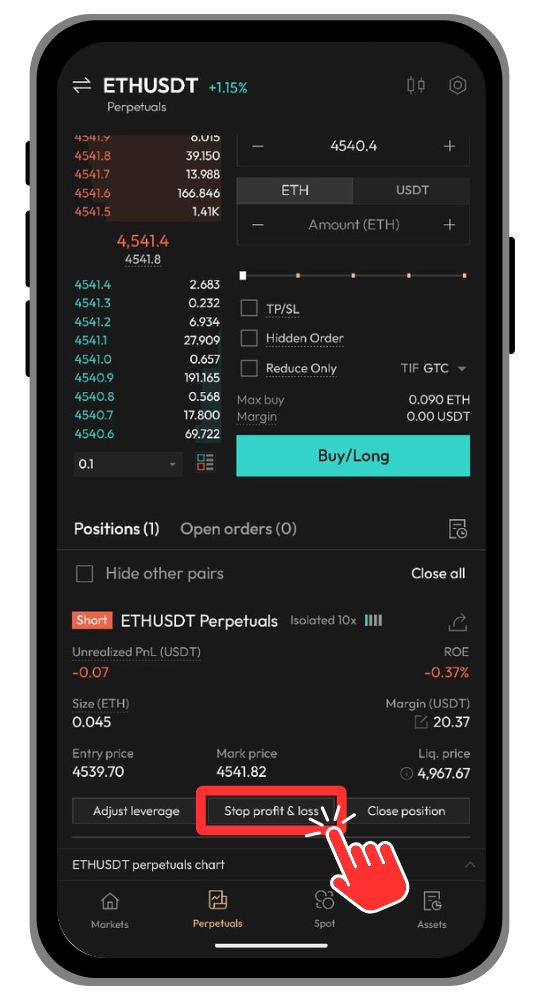
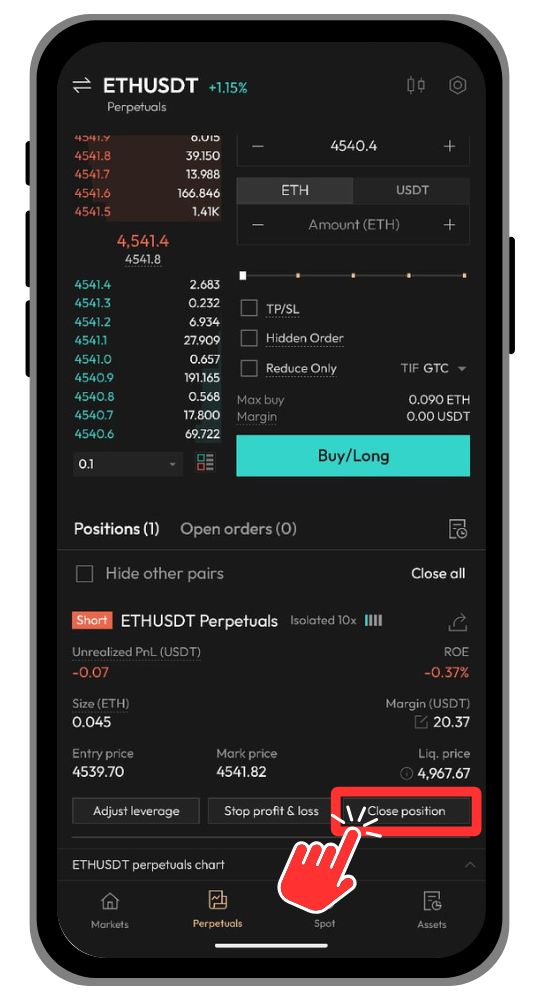
Step 10: Once your order is filled, it will appear in the “Positions” tab below.
Step 11: To manage your trade, tap on “Stop Profit & Loss” to set a stop-loss or take-profit.
Step 12: To close your position instantly, tap the “Close Position” button, this will execute at the current market price.
Spot Trading on Aster DEX Mobile App
Aster DEX offers a smaller selection for spot trading, with 9+ cryptocurrencies currently available. However, it maintains a low-fee structure; 0.04% maker fee and 0.10% taker fee. Here’s how you can buy and hold crypto through spot trading on the Aster DEX mobile app.
Step 1: Open the Aster DEX mobile app and tap on the “Spot” tab.
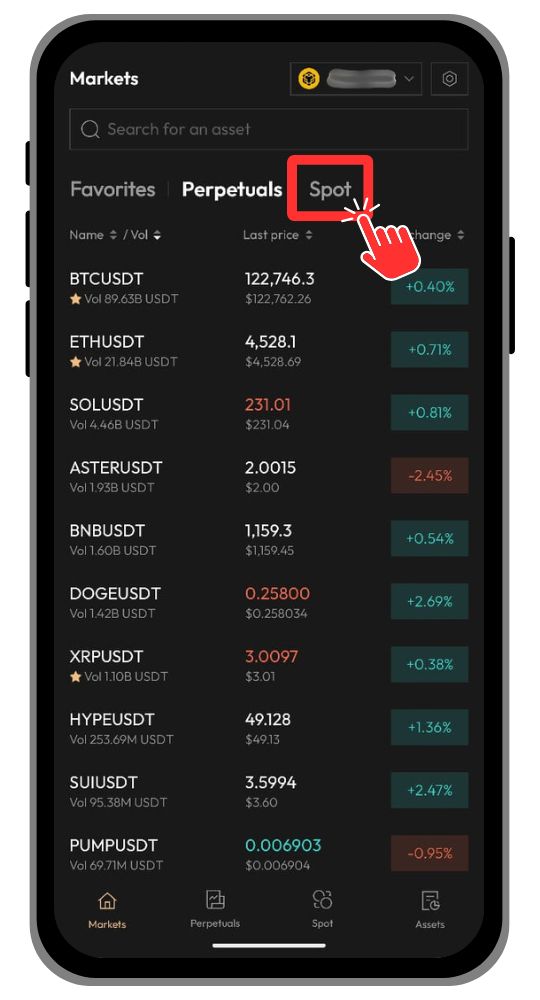
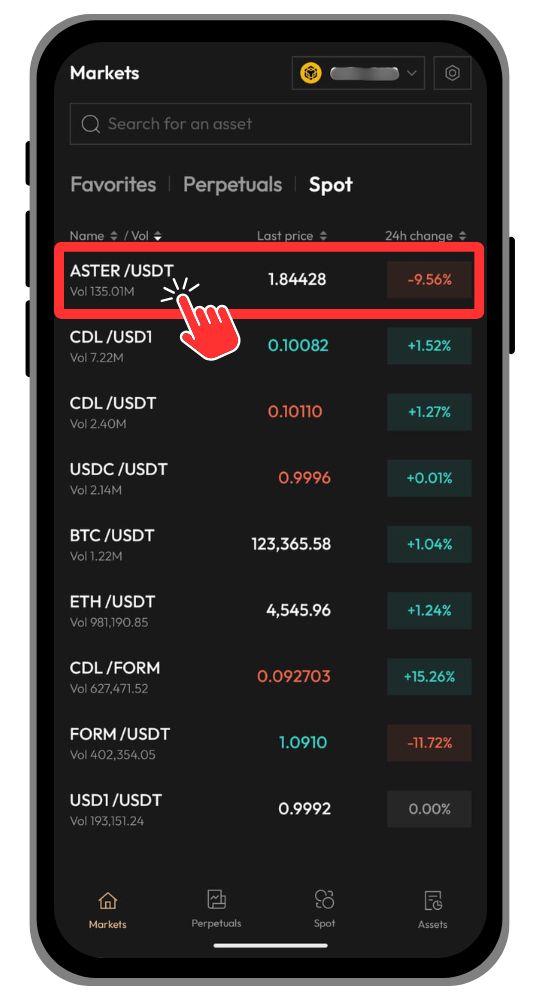
Step 2: In the Spot tab, choose a trading pair such as BTC/USDT, ETH/USDT, or any other available option. Tap the pair to open its trading screen.
Step 3: On the next screen, you’ll see the chart and order book. Tap “Buy” or “Sell” to begin a spot trade.
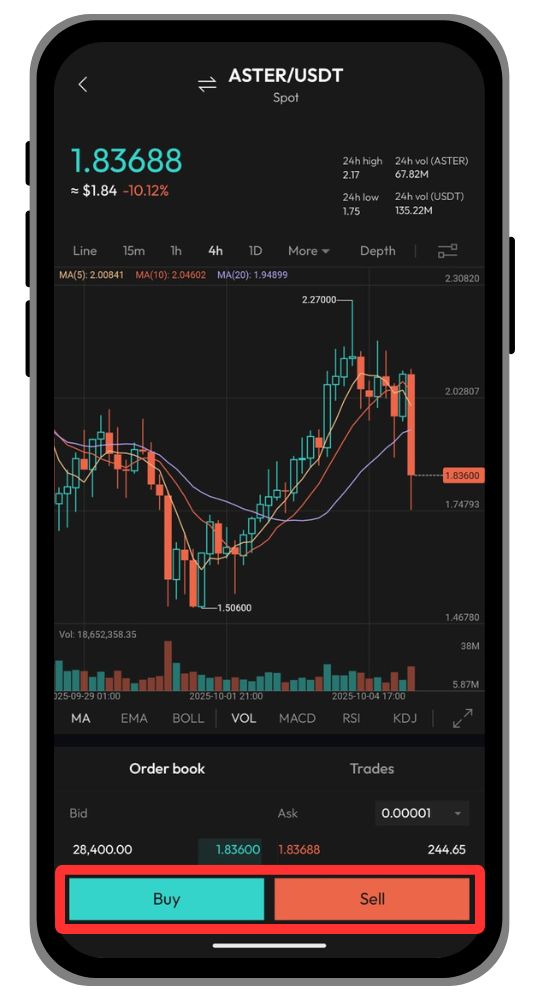
Step 4: The trading screen provides all the tools required for spot trading. Select your order type from the available options.
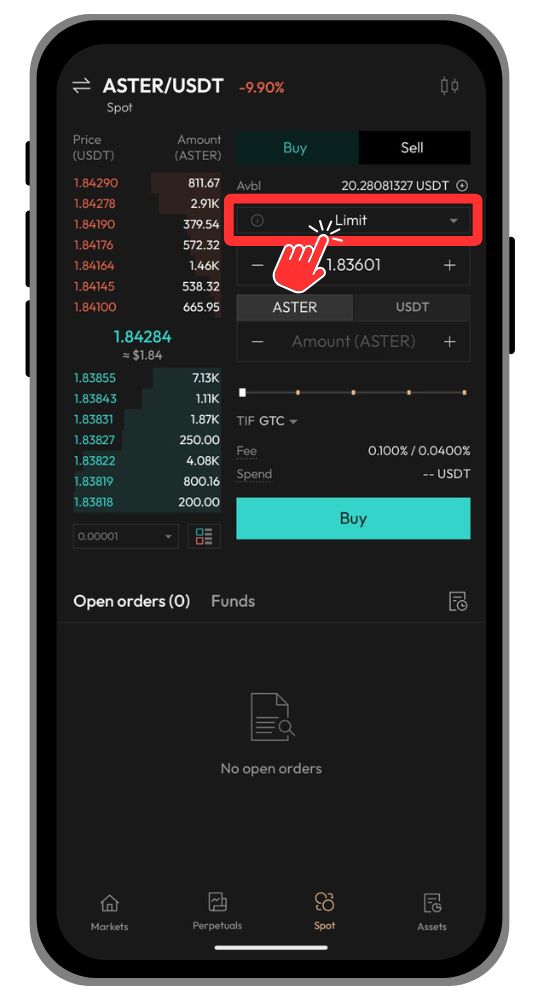
Step 5: Enter your preferred price in the “Price” field.
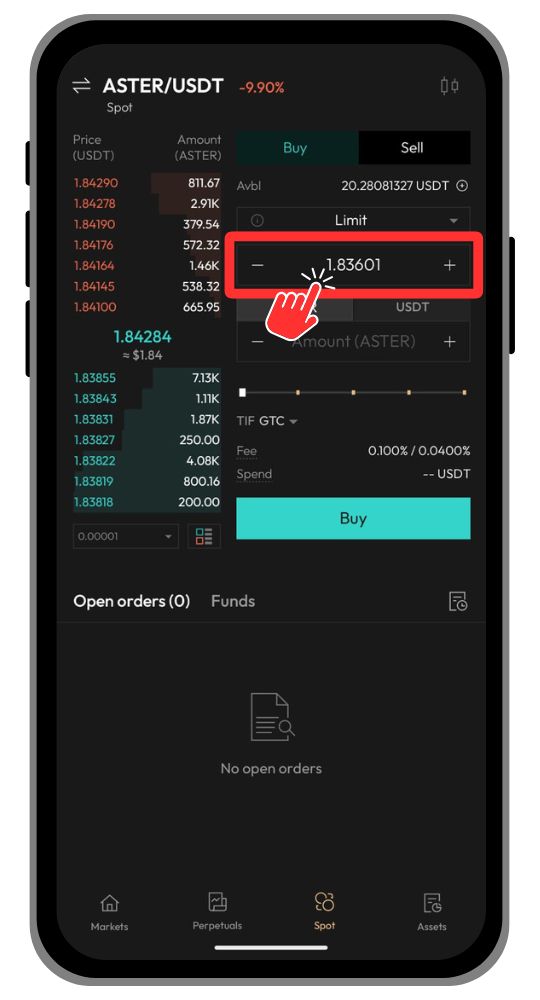
Step 6: Use the amount field or toggle to define how much of the asset you wish to buy or sell.
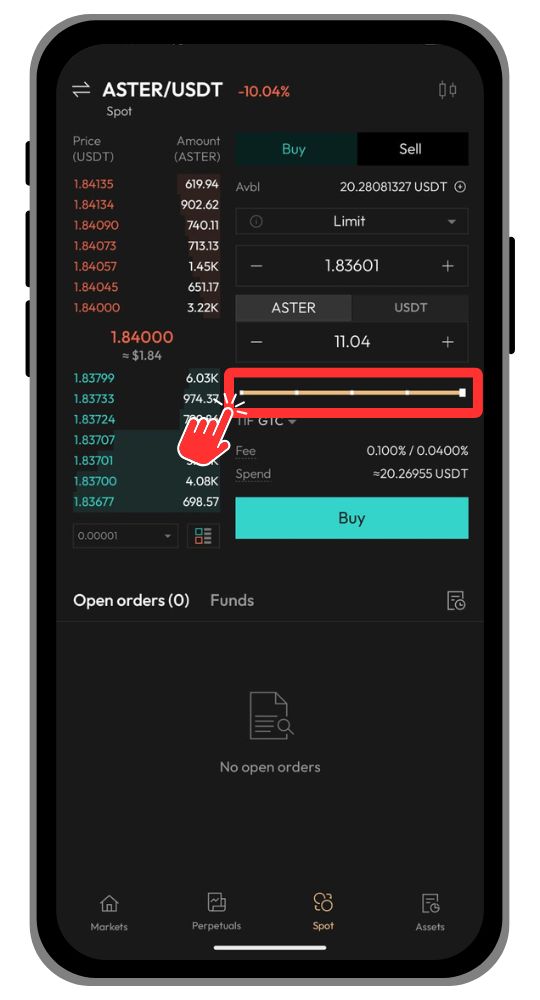
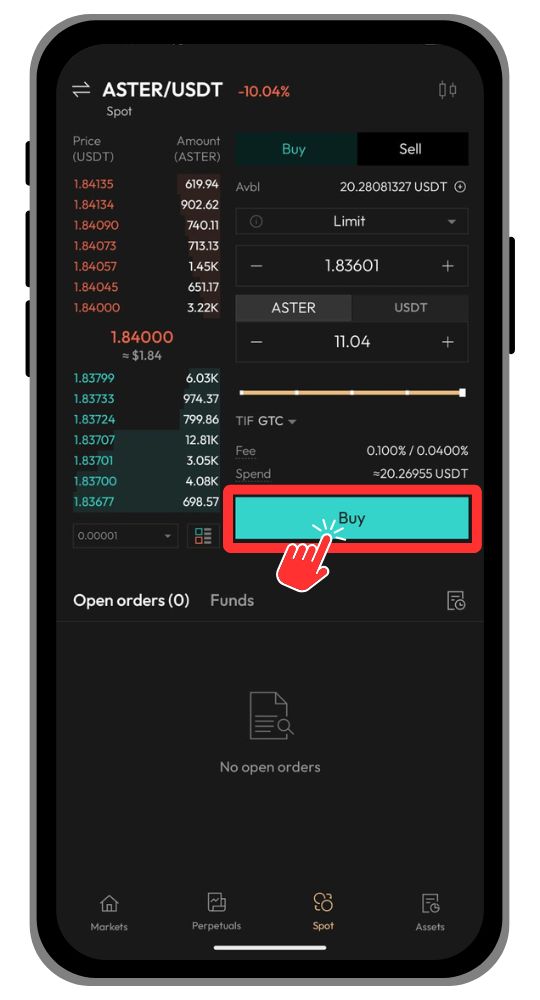
Step 7: Review your order details carefully, then tap “Buy” or “Sell” to confirm your transaction.
Bottom Line
Aster DEX has quickly made its mark in the perpetual DEX space, evolving from a concept once hinted at by CZ into one of the top platforms by trading volume. Its mobile app adds another layer of accessibility, allowing users to trade perpetuals and spot markets directly from their Android devices. The interface is simple, the setup is quick, and the overall experience is beginner-friendly yet powerful enough for advanced traders.
FAQs
Aster provides Android and iOS download options. Follow the official website’s app links; the screenshots in this guide show Android.
You can connect any Web3-compatible wallet that supports Aster DEX networks, including MetaMask, Trust Wallet, and WalletConnect-supported wallets. For this guide, MetaMask is recommended due to its multi-chain compatibility.
Hidden Orders allow traders to place orders that are not visible in the public order book, helping reduce slippage and prevent other traders from reacting to your positions. This feature is currently available for perpetual contracts only.