How to Deposit Funds on Hyperliquid (Step-by-Step Guide)


이 페이지에서
Perpetual DEX platforms, like Hyperliquid, are relatively new concepts, and performing basic tasks on them can sometimes feel confusing. In this guide, we’ll walk you through the entire process to help you deposit funds on Hyperliquid. This step-by-step guide is designed to ensure clarity and make the process simple for everyone.
How to Deposit to Hyperliquid
We’ll walk you through the entire deposit process: creating a wallet, buying USDC, and depositing it into your Hyperliquid account. Since the process is slightly technical, we’ve made sure to include detailed steps to clear up any doubts along the way.
Step 1: Setting Up a Wallet
First and foremost, you’ll need a Web3 wallet compatible with the Arbitrum network. One of the most popular choices is MetaMask. Head over to the MetaMask website and download their wallet extension for your browser.
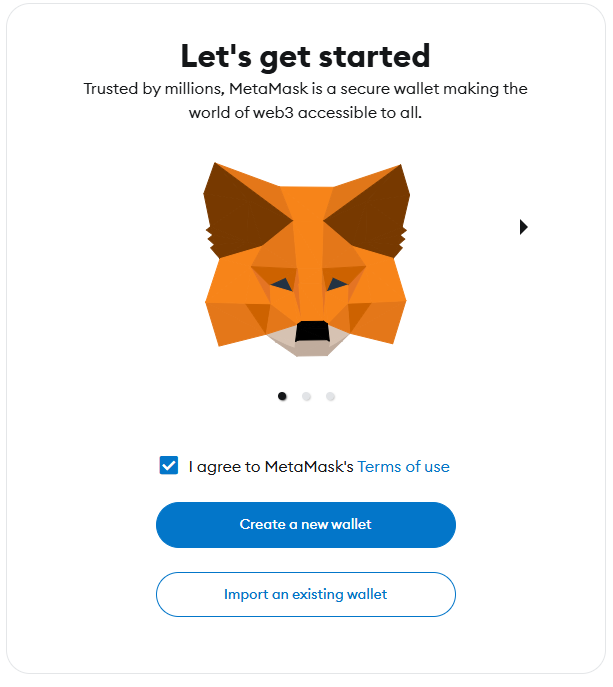
Need help? Check out our guides on adding MetaMask to Chrome and Firefox.
Step 2: Adding Arbitrum to MetaMask
MetaMask supports all EVM-compatible blockchains, and adding Arbitrum is simple using its network details. Open your wallet and add Arbitrum to MetaMask.
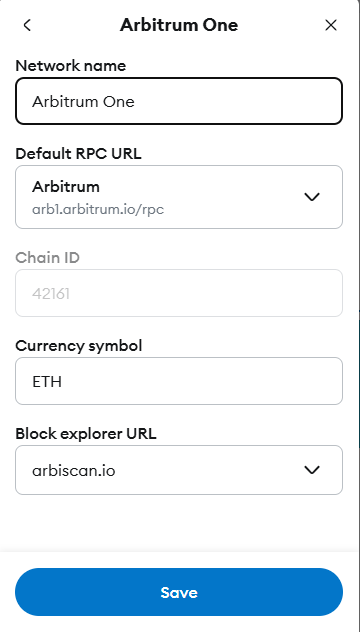
Need help? Refer to our guide on how to add Arbitrum to MetaMask.
Step 3: Funding Your Arbitrum Wallet
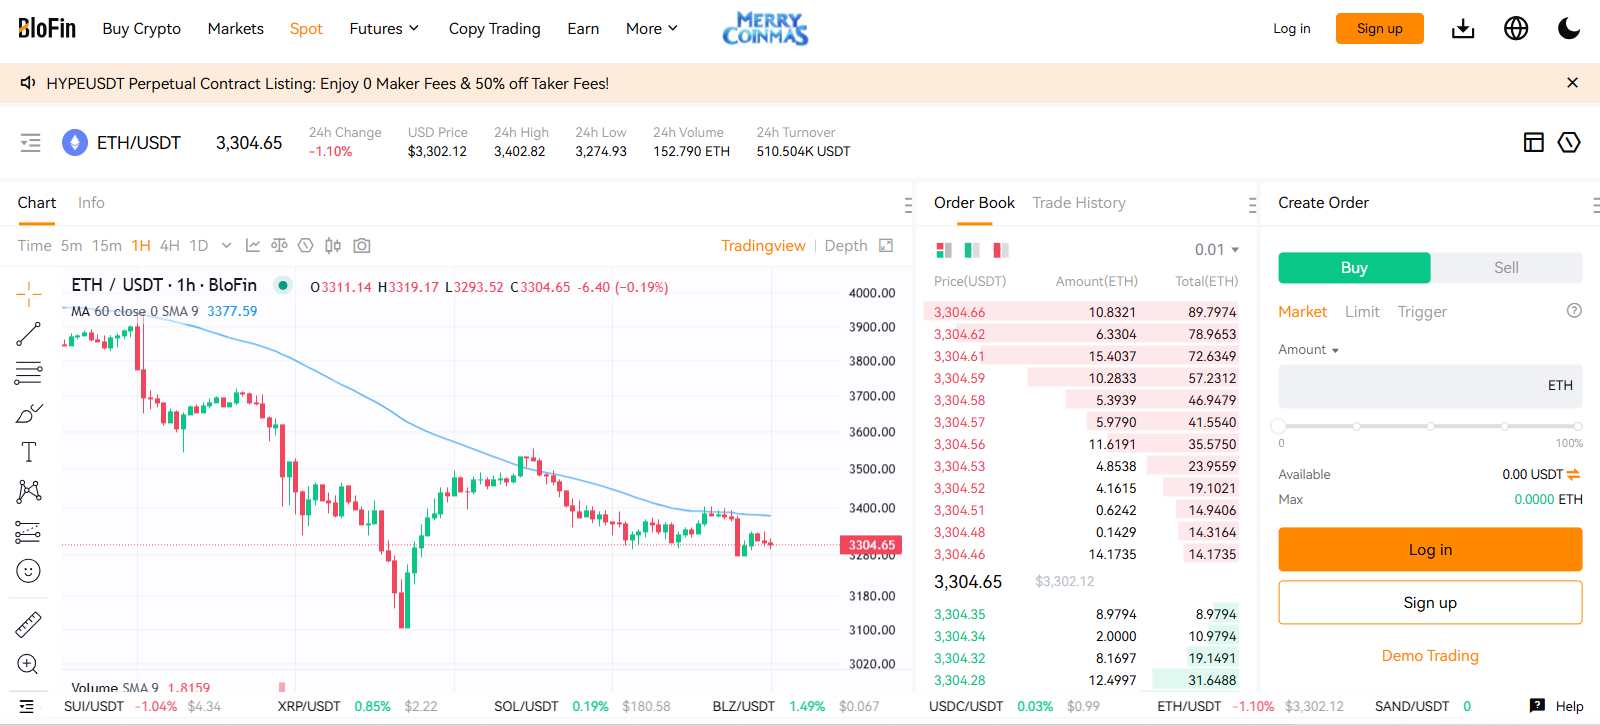
Next, you need to fund your wallet with ETH. Head over to a centralized exchange like BloFin and purchase some $ETH.
Step 4: Transferring ETH to MetaMask
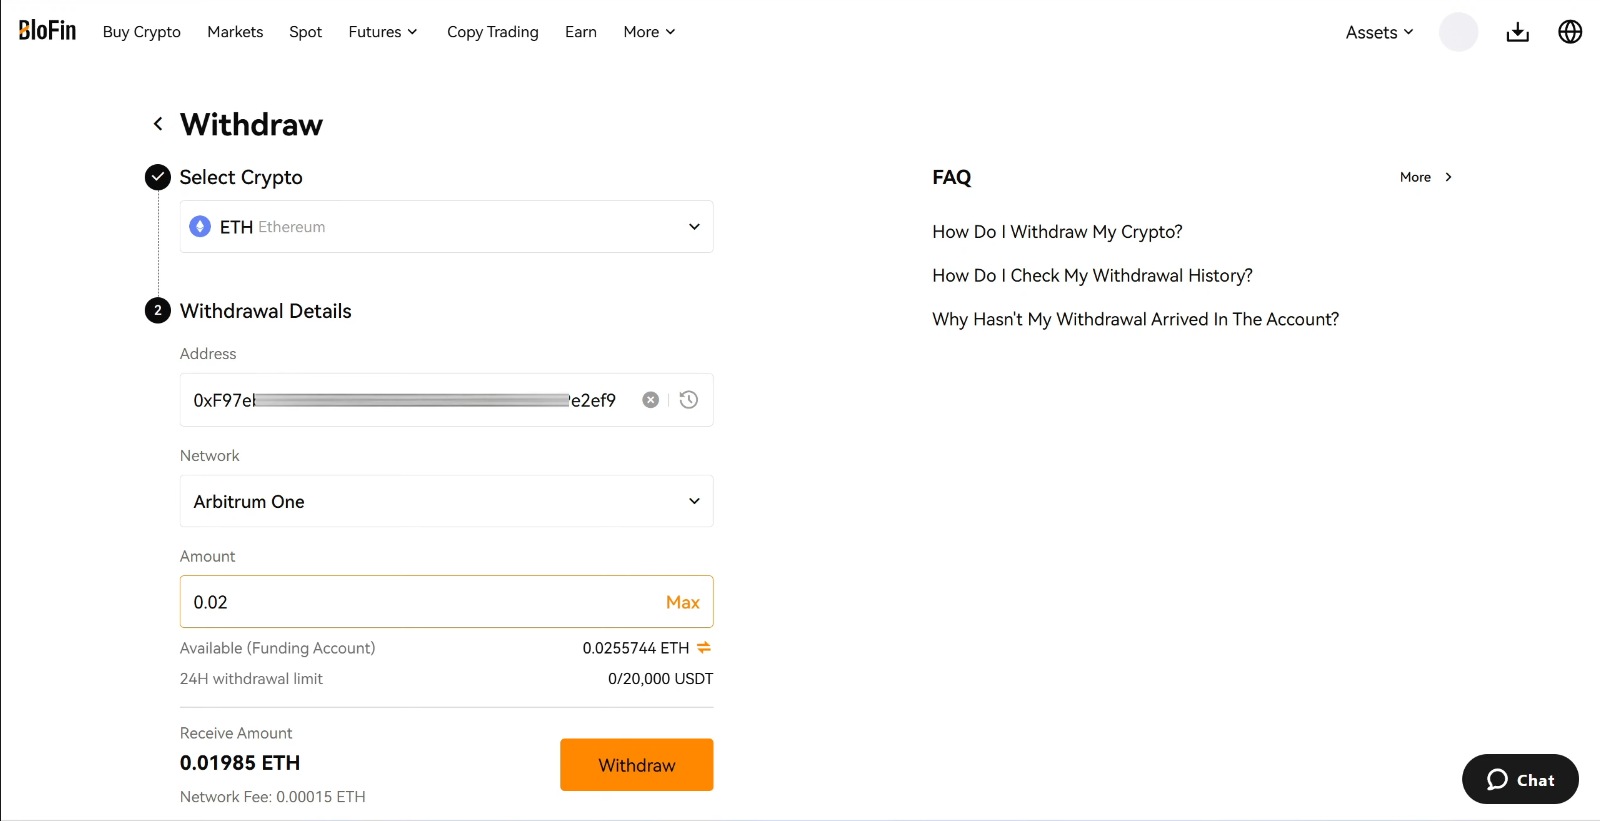
The next step is transferring $ETH. For example, transfer $100 worth of ETH using the BloFin exchange, which supports the Arbitrum network. Open your MetaMask wallet and copy the Arbitrum network receiving address.
Why?:
- Arbitrum transactions require ETH for gas fees (typically just a few cents).
- The remaining ETH will be swapped for USDC later.
- Blofin supports the Arbitrum network, which is crucial for this transfer. Transferring ETH from other networks to your Arbitrum wallet is not possible.
Step 5: Swapping ETH for USDC
Now, use MetaMask’s Swap feature to exchange ETH for USDC. Leave a small amount in ETH for gas fees, and swap the rest for USDC, which will be used for trading on Hyperliquid.
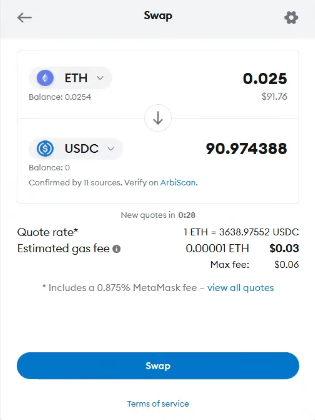
Need help? Refer to our MetaMask Swap guide.
Step 6: Connecting MetaMask to Hyperliquid
1. With funds ready, visit Hyperliquid and connect your MetaMask wallet by clicking the “Connect” button in the top-right corner of the app.
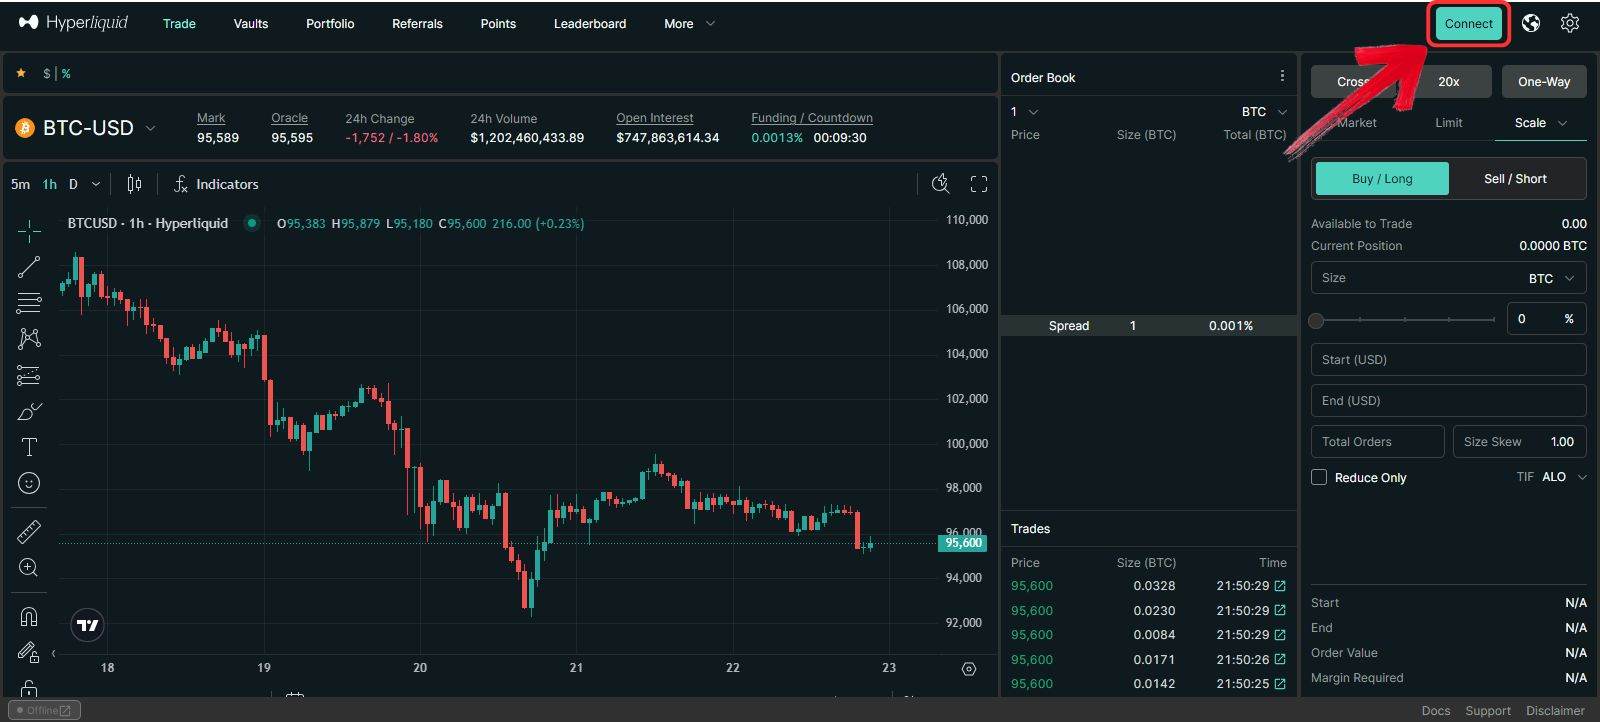
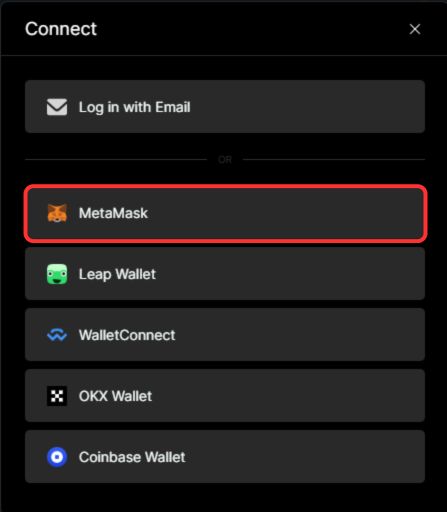
2. A list of wallets will appear; select “MetaMask”.
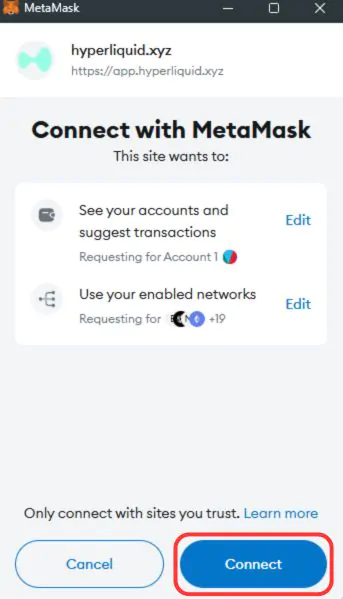
3. This will open the MetaMask Wallet extension. Click “Connect” to link MetaMask to Hyperliquid.
Don’t have an account yet? Use our referral link to sign up on Hyerpliquid.
Step 7: Enabling Trading on Hyperliquid
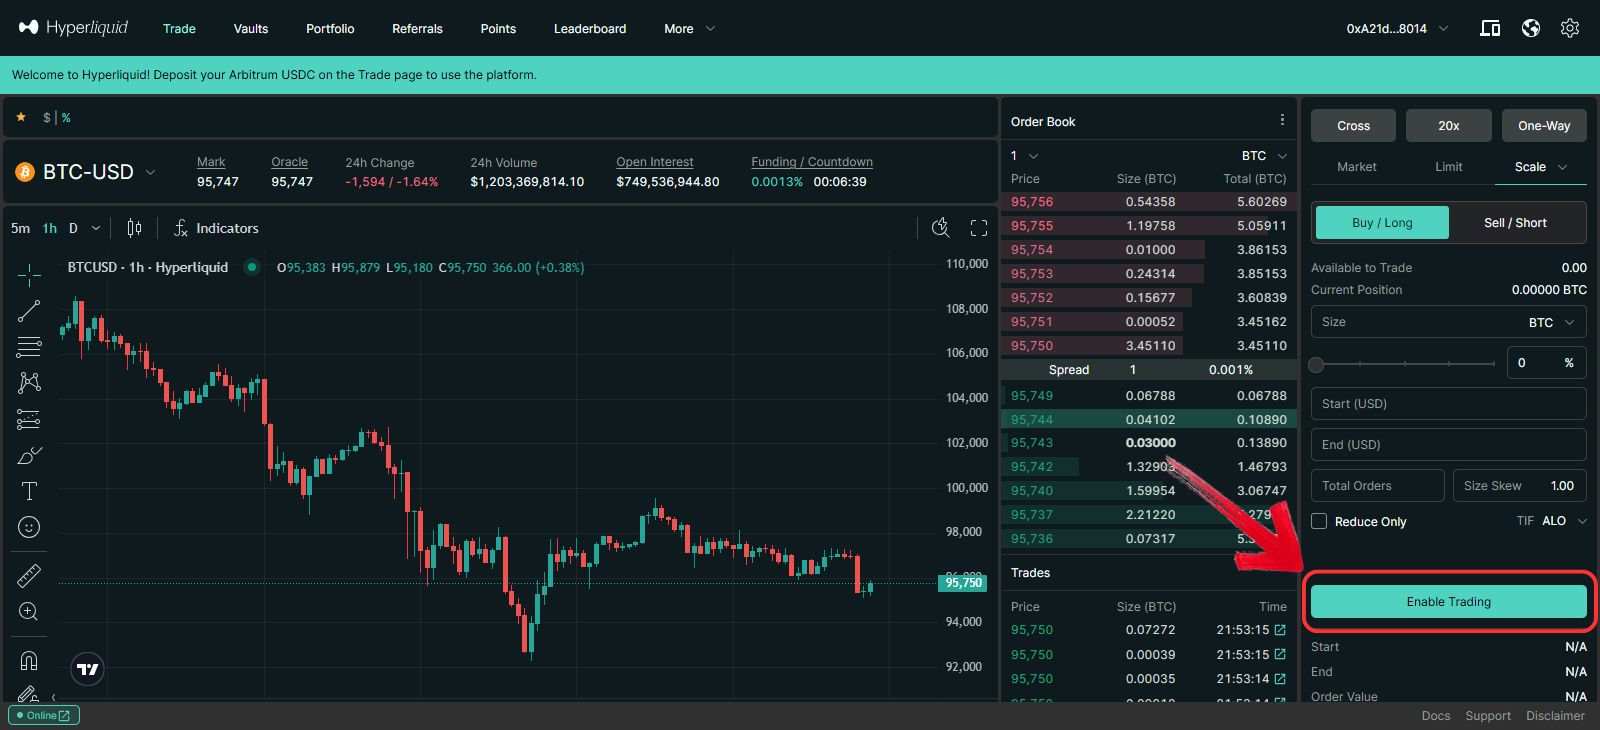
1. To start trading, click the “Enable Trading” button.
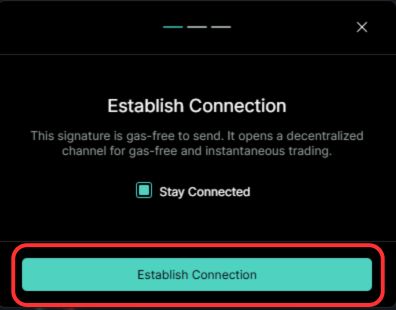
2. A pop-up will appear; click “Establish Connection”.
3. Then click on “Confirm” on the MetaMask extension to provide your signature. This enables Hyperliquid to access your MetaMask funds for transactions.
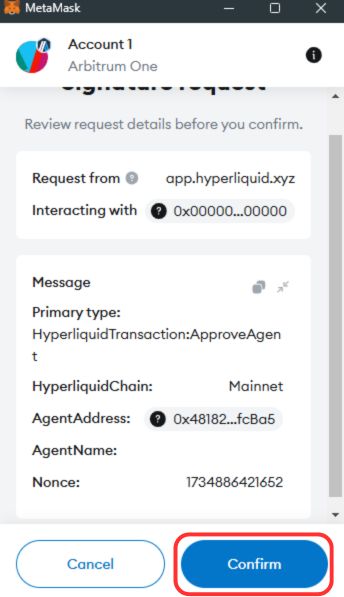
Step 8: Depositing USDC to Hyperliquid
1. Finally, click the “Deposit” button in the top-right corner.
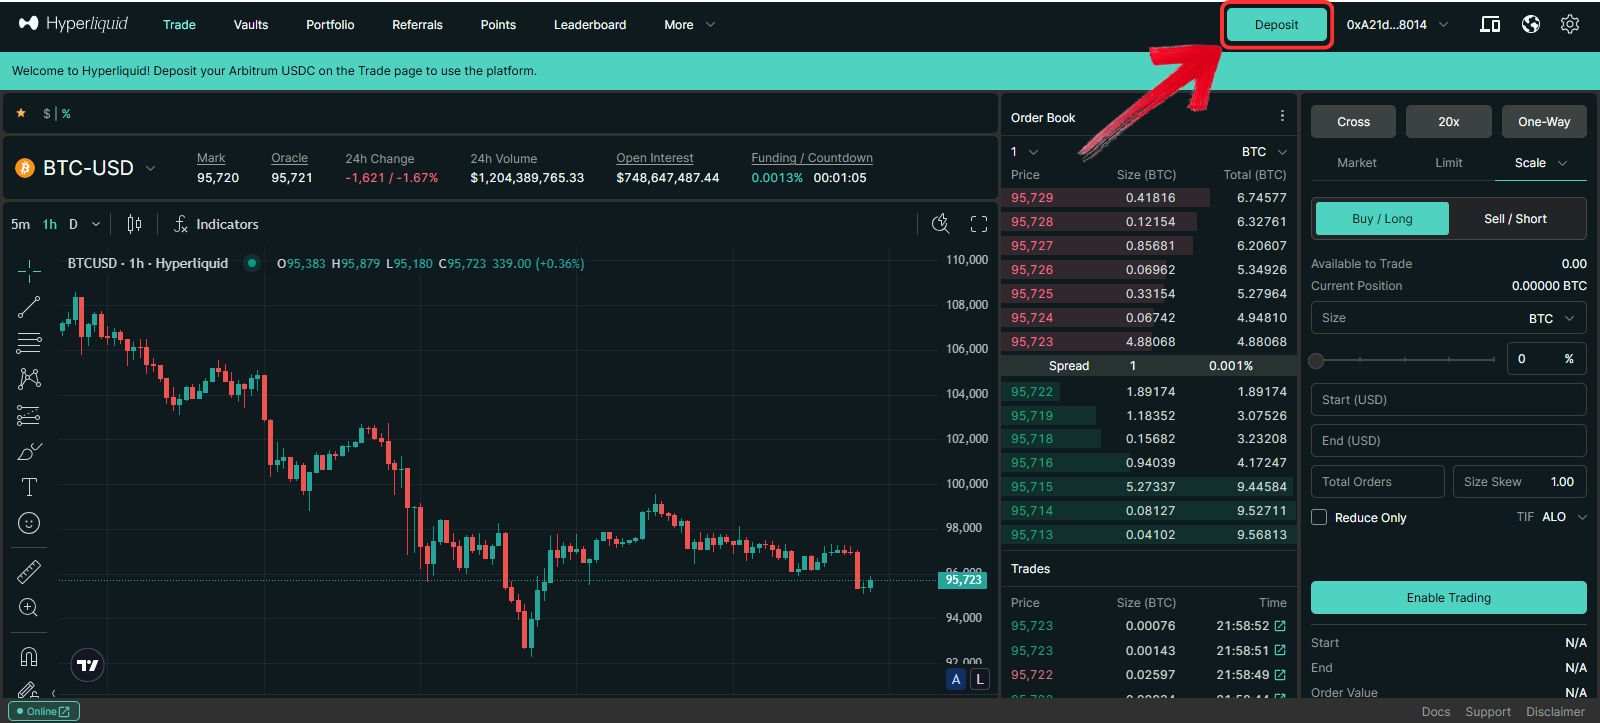
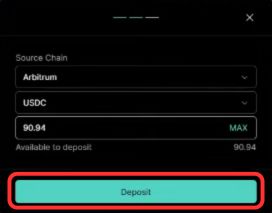
2. A deposit pop-up will appear. Enter the amount of USDC you wish to transfer from your MetaMask wallet to Hyperliquid.
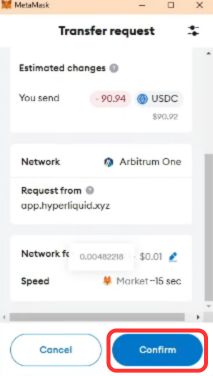
3. The MetaMask extension will pop up—click “Confirm”, and the funds will be deposited into your Hyperliquid account.
With your funds transferred, you can now begin trading on Hyperliquid, whether on Spot or Futures markets. Alternatively, you can explore passive income options through their vaults and copy trading.
For a visual walkthrough, check out our complete step-by-step guide on YouTube!
What’s Next?
Once your funds are deposited on Hyperliquid, you can explore the platform in-depth. Here’s what you can expect:
1. Spot Trading:
Hyperliquid offers a decentralized spot trading platform where you can trade 316 cryptocurrencies with complete autonomy over your funds. You can also purchase their native token, $HYPE.
2. Futures Trading:
Access Hyperliquid’s futures trading platform to trade 183 futures contracts with leverage of up to 40x.
3. Vaults:
- HLP Staking: Stake your USDC through Hyperliquid’s HLP vault to earn rewards from your idle assets.
- Copy Trading: Follow and copy the trades of experts in the field. You earn from their successful trades while sharing just 10% of the profits.
Bottomline
Hyperliquid is growing rapidly, with 24-hour trading volumes reaching billions of dollars daily. If you want to start your journey, this guide will help you seamlessly deposit funds on Hyperliquid—from acquiring funds to completing the final step of depositing them into your account.
FAQs
Yes, you can use other Arbitrum-compatible wallets like Trust Wallet or Rabby Wallet. However, MetaMask remains the most popular choice due to its extensive features and widespread adoption.
ETH is required to pay for gas fees on the Arbitrum network. Without sufficient ETH, you won’t be able to perform any transactions, including depositing USDC into Hyperliquid.
No, Hyperliquid does not support direct deposits from centralized exchanges. You’ll need to first transfer funds to your MetaMask wallet on the Arbitrum network before depositing them into Hyperliquid.