Adding new networks to MetaMask can often be confusing for new users. They may struggle with questions like whether a network is EVM-compatible or what specific network details are required. In this guide, you will learn how to add the Cronos Network to MetaMask extension on Google Chrome to send and receive tokens, and interact with the Cronos network.
What is Cronos?
Cronos is a game-changing blockchain that bridges the Ethereum and Cosmos ecosystems. Built with Cosmos SDK, it runs parallel to the Crypto.org Chain and features an Ethereum Virtual Machine for smart contract execution. Cronos uses CRO as its native token, which also serves as the currency for the Crypto.org chain.
With its focus on interoperability, low fees, and support for DeFi and NFTs, Cronos aims to bring blockchain innovations to the masses. To interact with Cronos-based DApps, users need to add the Cronos network to their MetaMask wallet.
Cronos Network Details
Here are the Cronos network details which will be used during the steps to add the Cronos network to MetaMask.
Warning: Always verify network details to avoid falling prey to scams by bad actors.
- Network name: Cronos
- Network URL: https://evm-cronos.crypto.org
- Chain ID: 25
- Currency symbol: CRO
- Block explorer URL: https://cronos.org/explorer
How to Add Cronos to MetaMask
The Cronos network can be added to your MetaMask through several different methods. In this section, we will discuss the most secure methods to ensure the safety of your funds while adding the Cronos network to your MetaMask.
How to Add Cronos to MetaMask Manually
The primary and widely used method is using the manual method to add the Cronos network to the MetaMask Google Chrome extension. This method requires you to gather the network details in advance and mastering it will equip you to add other networks to MetaMask as well.
Step 1: Open the MetaMask extension in your Chrome browser by clicking on the MetaMask icon.

Step 2: Click the “Network” dropdown located at the top left corner of the MetaMask wallet interface.
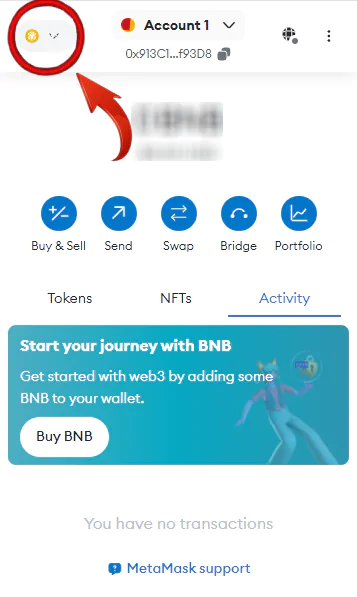
Step 3: From the dropdown menu, select “Add Network” to add a new network to your MetaMask wallet.
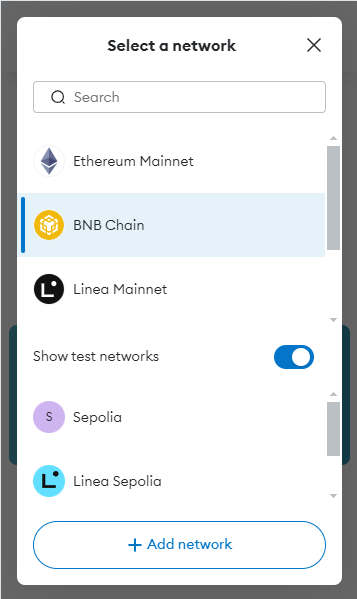
Step 4: MetaMask will open a new tab. At the bottom of the page, locate and click on “Add a network manually” to proceed.
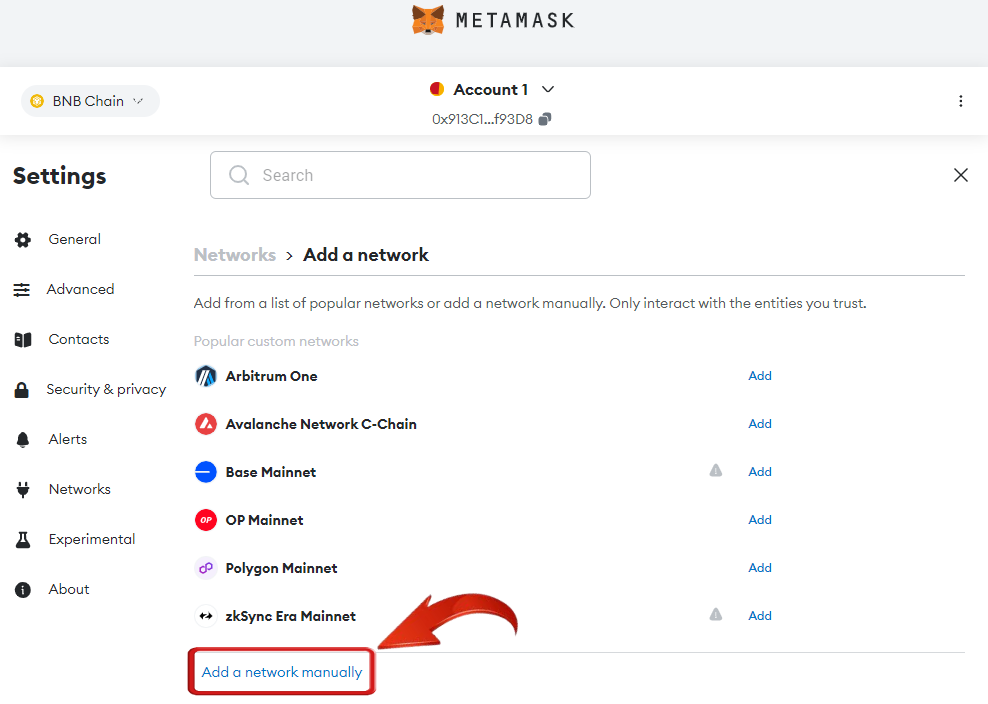
Step 5: Here, you will enter the Cronos network details in the provided placeholders. Here are all the necessary details to successfully add the Cronos network to your MetaMask wallet.
- Network name: Cronos
- Network URL: https://evm-cronos.crypto.org
- Chain ID: 25
- Currency symbol: CRO
- Block explorer URL: https://cronos.org/explorer

Step 6: Once you’ve entered the details, just click “Save” to add the base network to MetaMask.
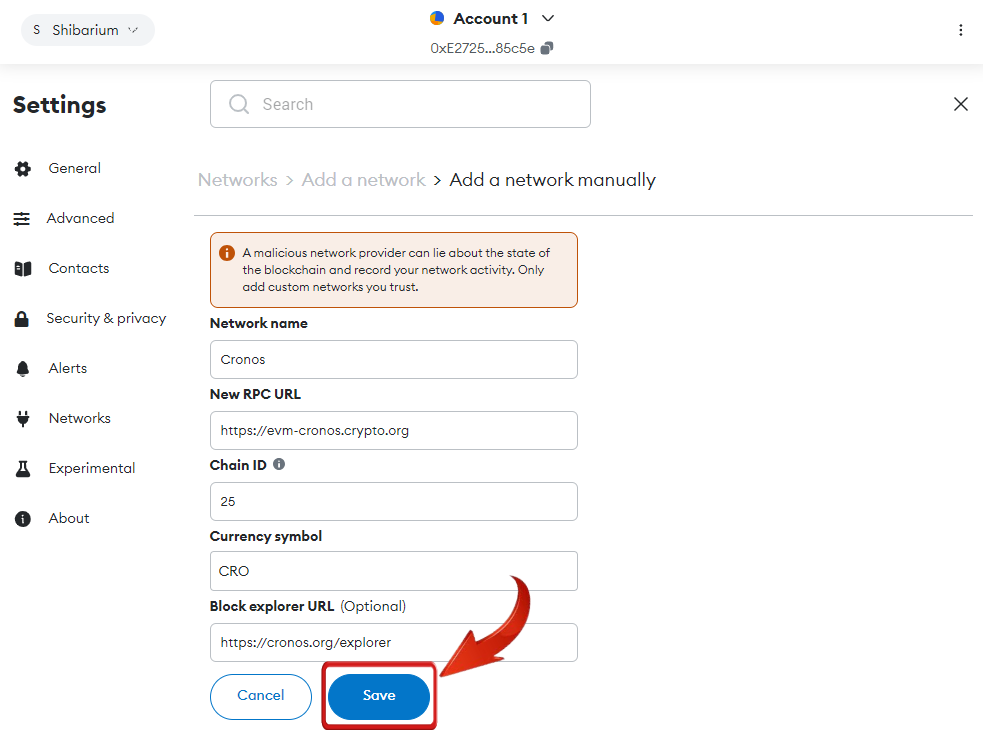
With these straightforward steps, you will successfully add the Cronos network to MetaMask and also prepare yourself to add other EVM-compatible networks such as Base network.
How to Add Cronos to MetaMask using Blockchain Explorer
If users are uncomfortable using network details found on the internet, an alternative is to use the official Cronos blockchain explorer to add the Cronos network to MetaMask. If you prefer this method, simply follow these steps:
Step 1: Open Chrome and navigate to the Cronos blockchain explorer.
Step 2: Scroll down to find the “Add Cronos to MetaMask” option at the bottom right corner, and click on it.
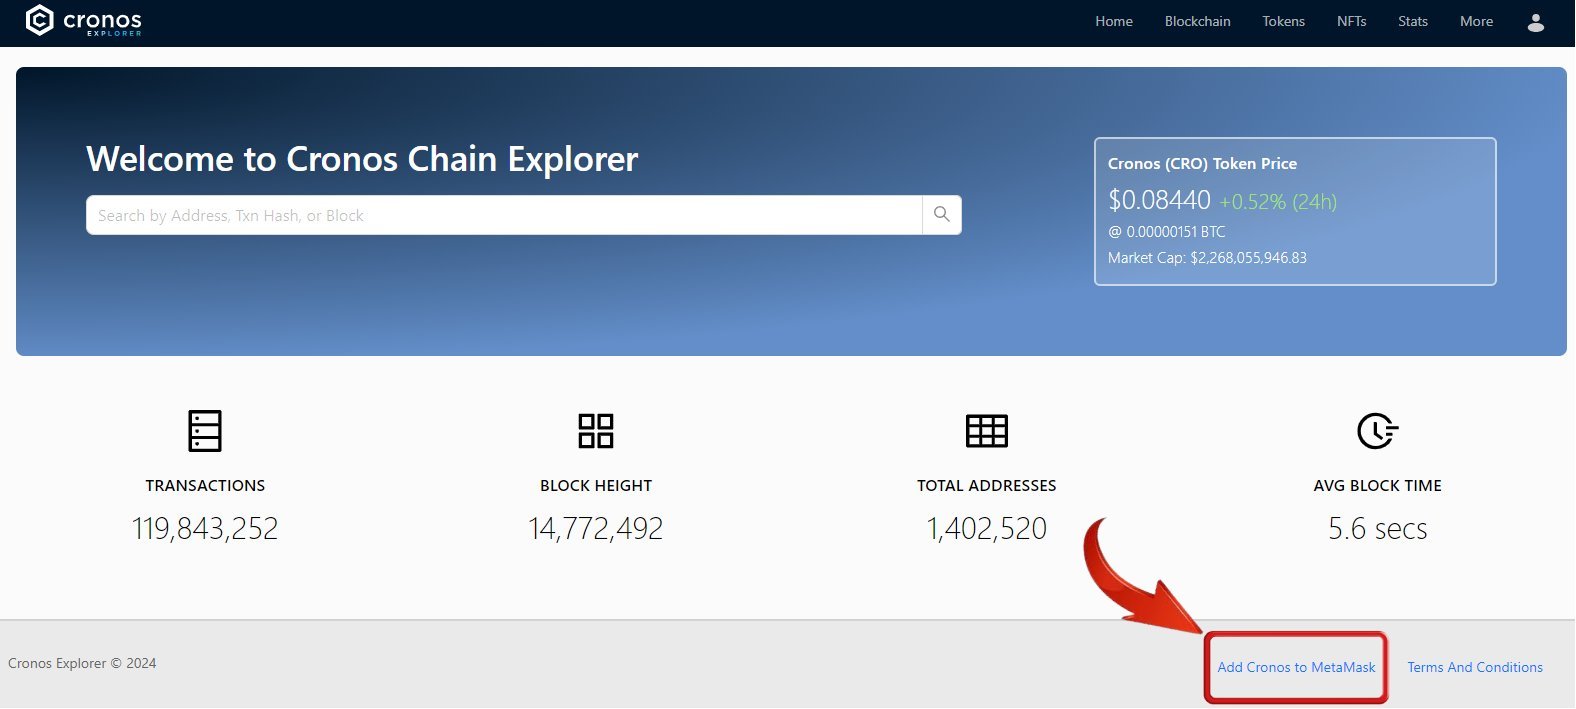
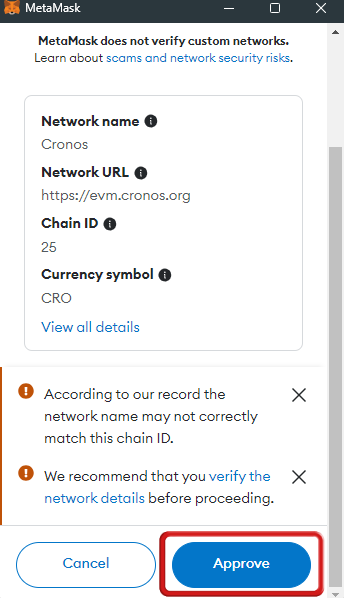
Step 3: The MetaMask extension will pop up, asking for your approval to add Cronos to your MetaMask extension, click on “Approve”.
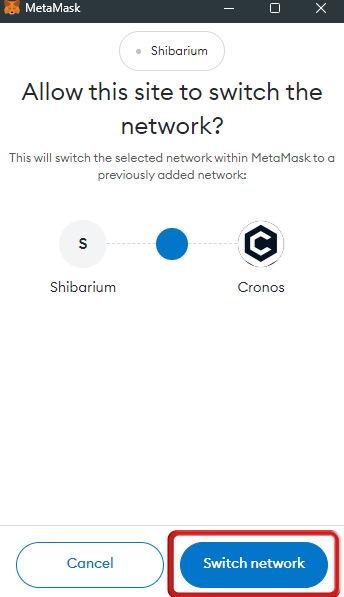
Step 4: The next MetaMask screen will ask if you would like to switch the network to Cronos. If you wish to do so, click on “Switch Network”.
How to Add Cronos to MetaMask on Mobile
Transferring and holding your funds on MetaMask is relatively safe, and its accessibility on mobile devices makes it even more convenient. However, since adding the Cronos Network on your phone involves a different method, you’ll want to take a slightly different approach for mobile configuration. Here’s a step-by-step guide on how to add Cronos to MetaMask on mobile:
Step 1: Launch the MetaMask wallet on your mobile device.
Step 2: Select the “Network” drop-down menu at the top of the screen.
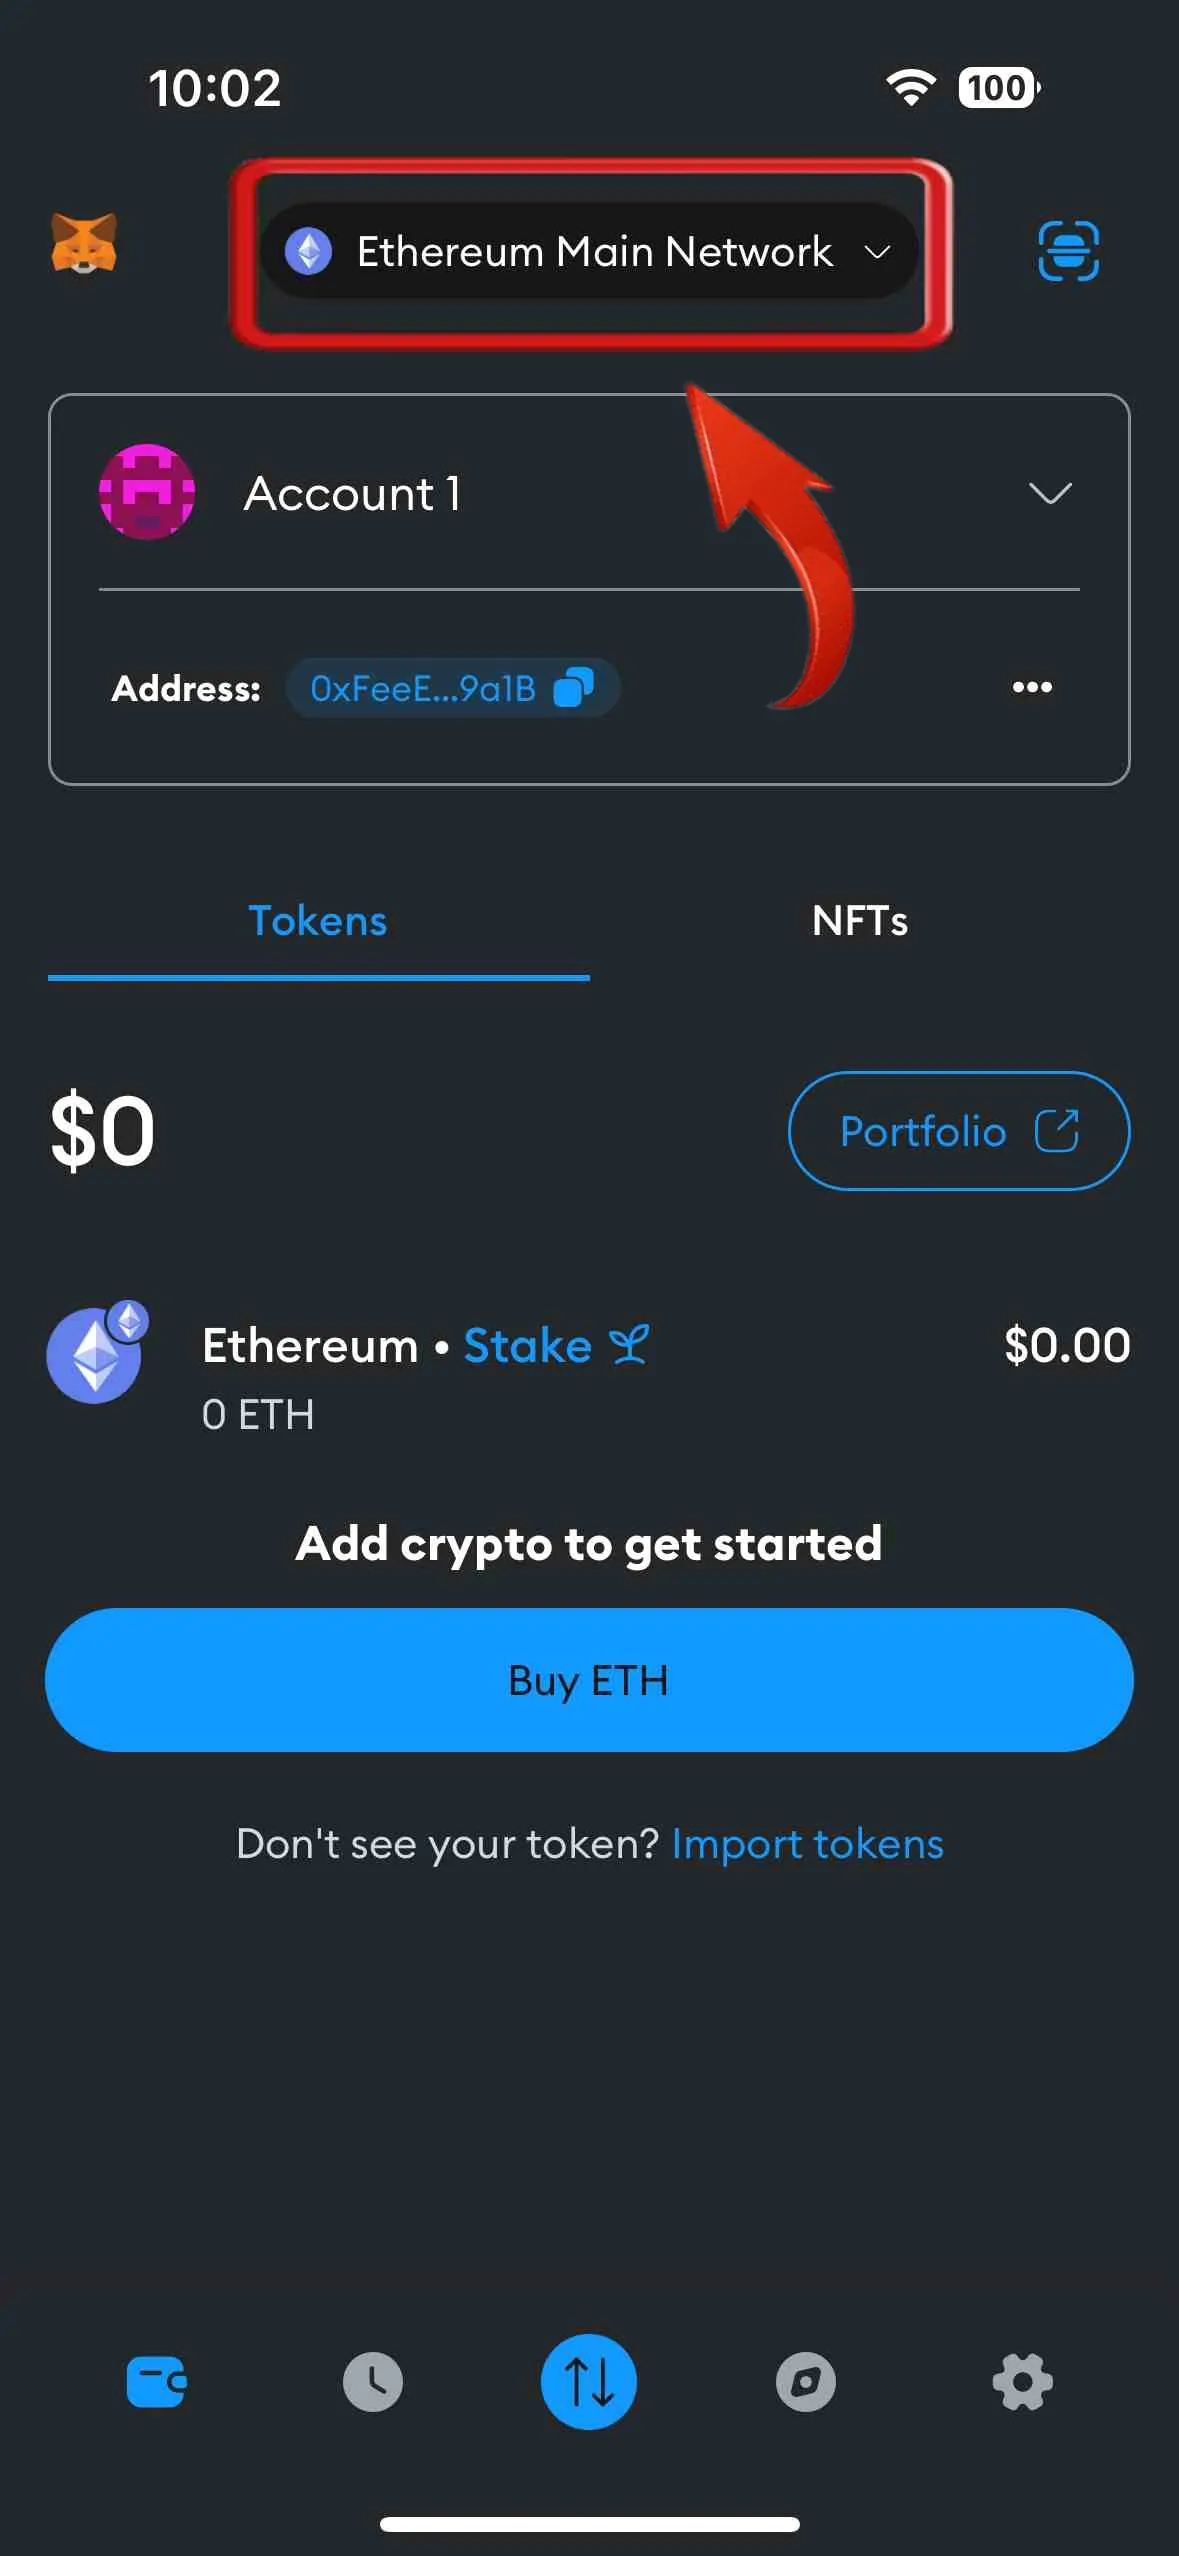
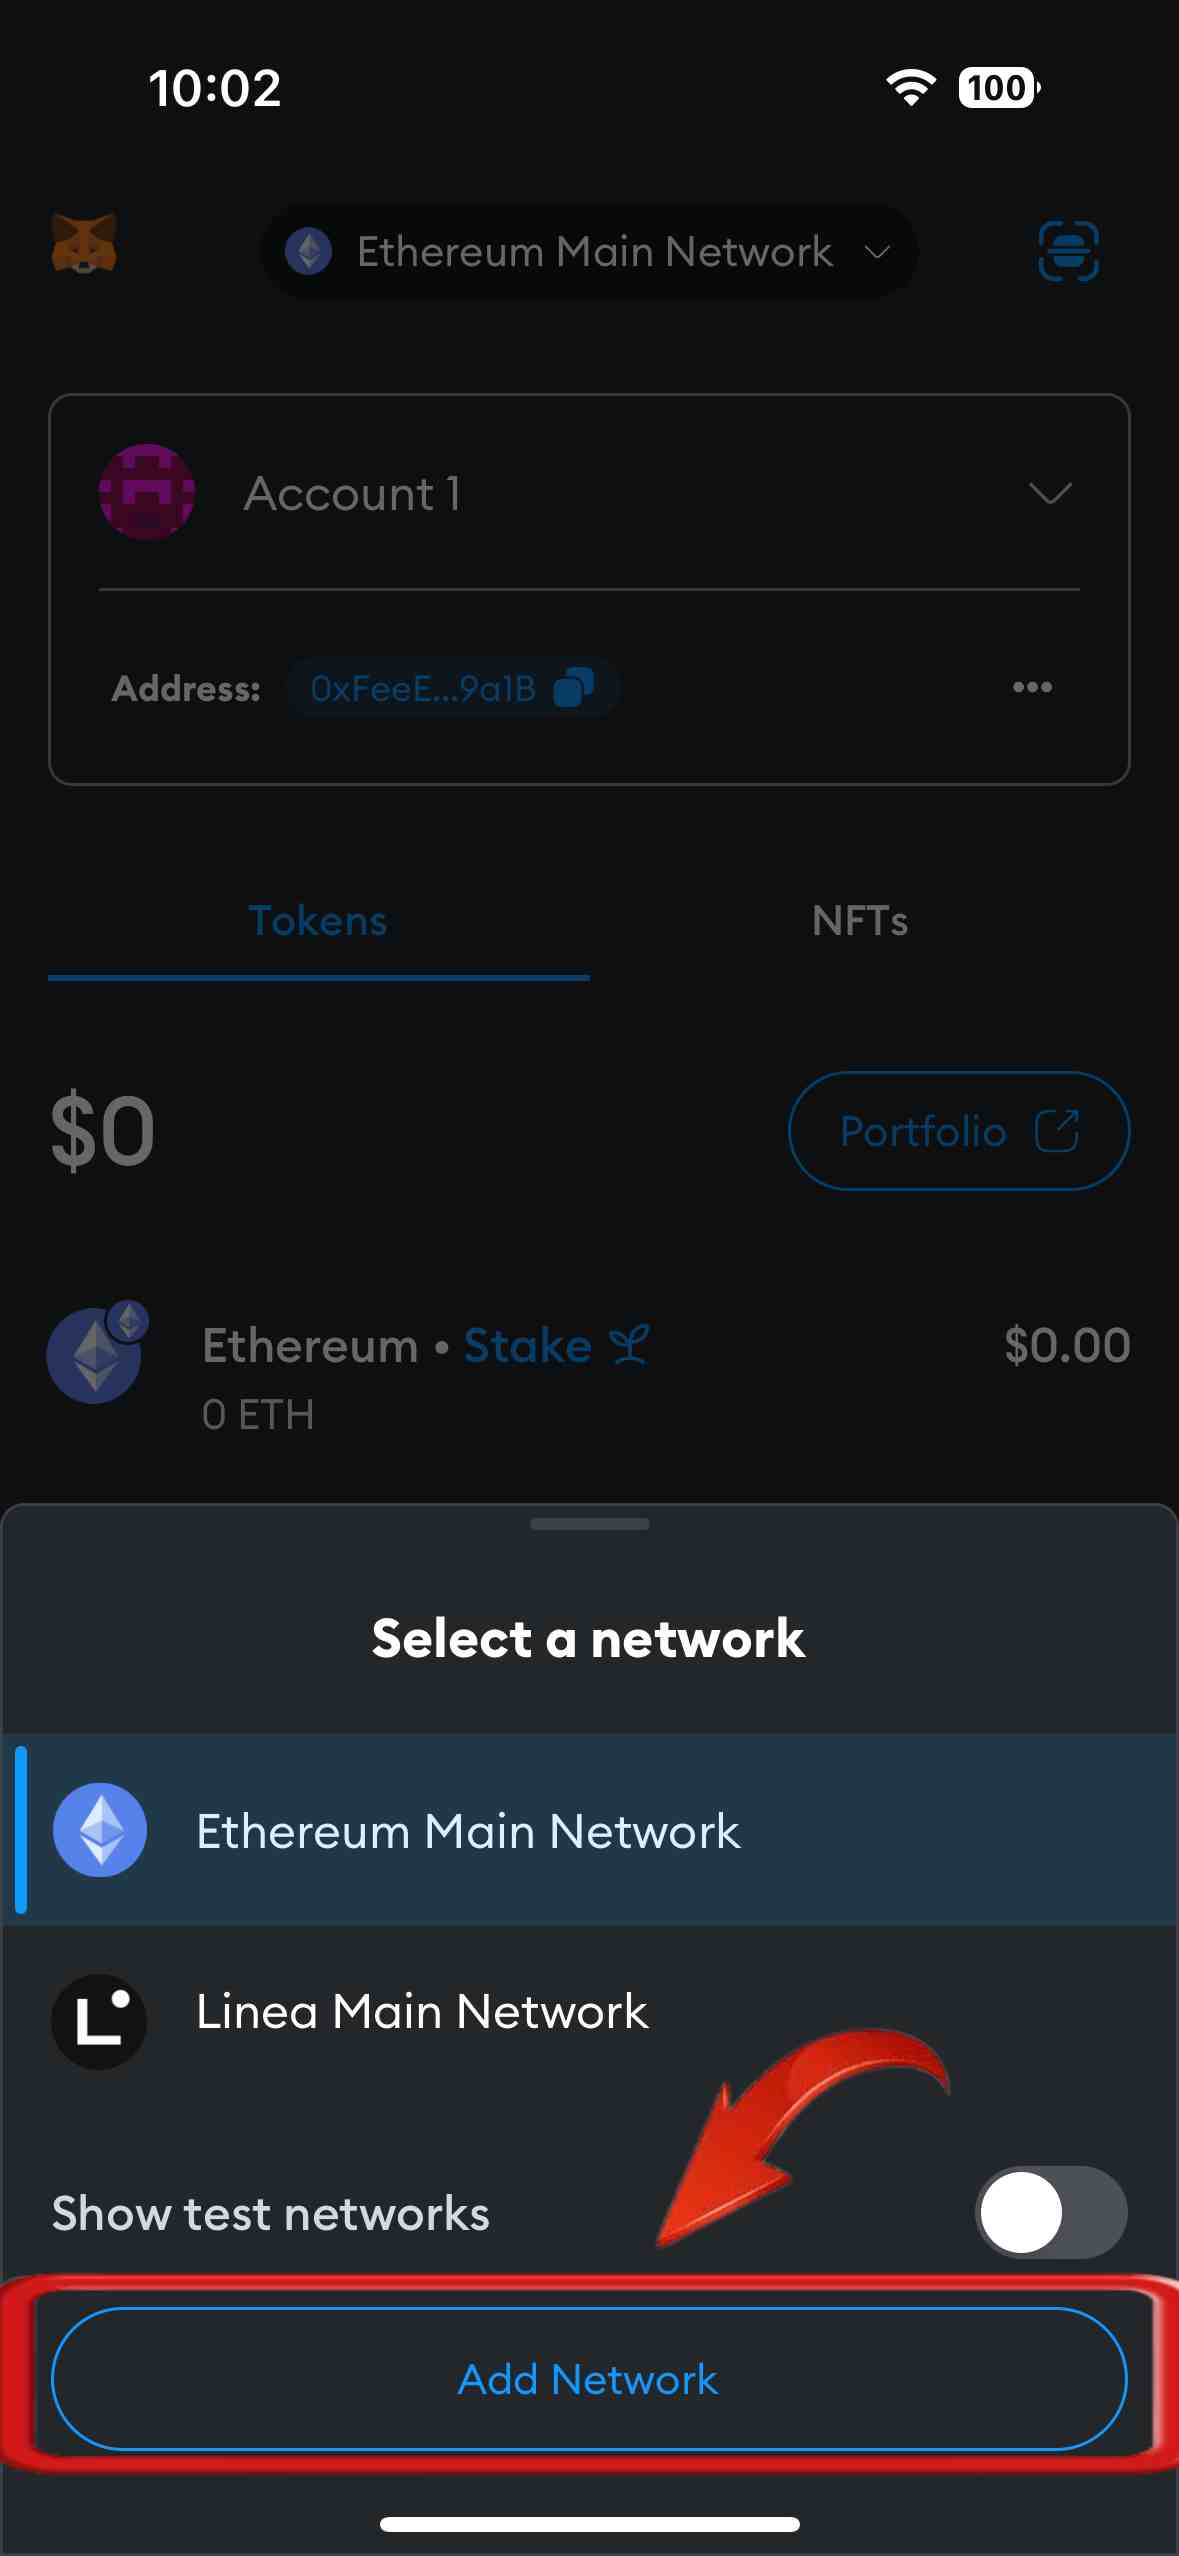
Step 3: Then, click on the “Add Network” button to include a new network in your MetaMask wallet.
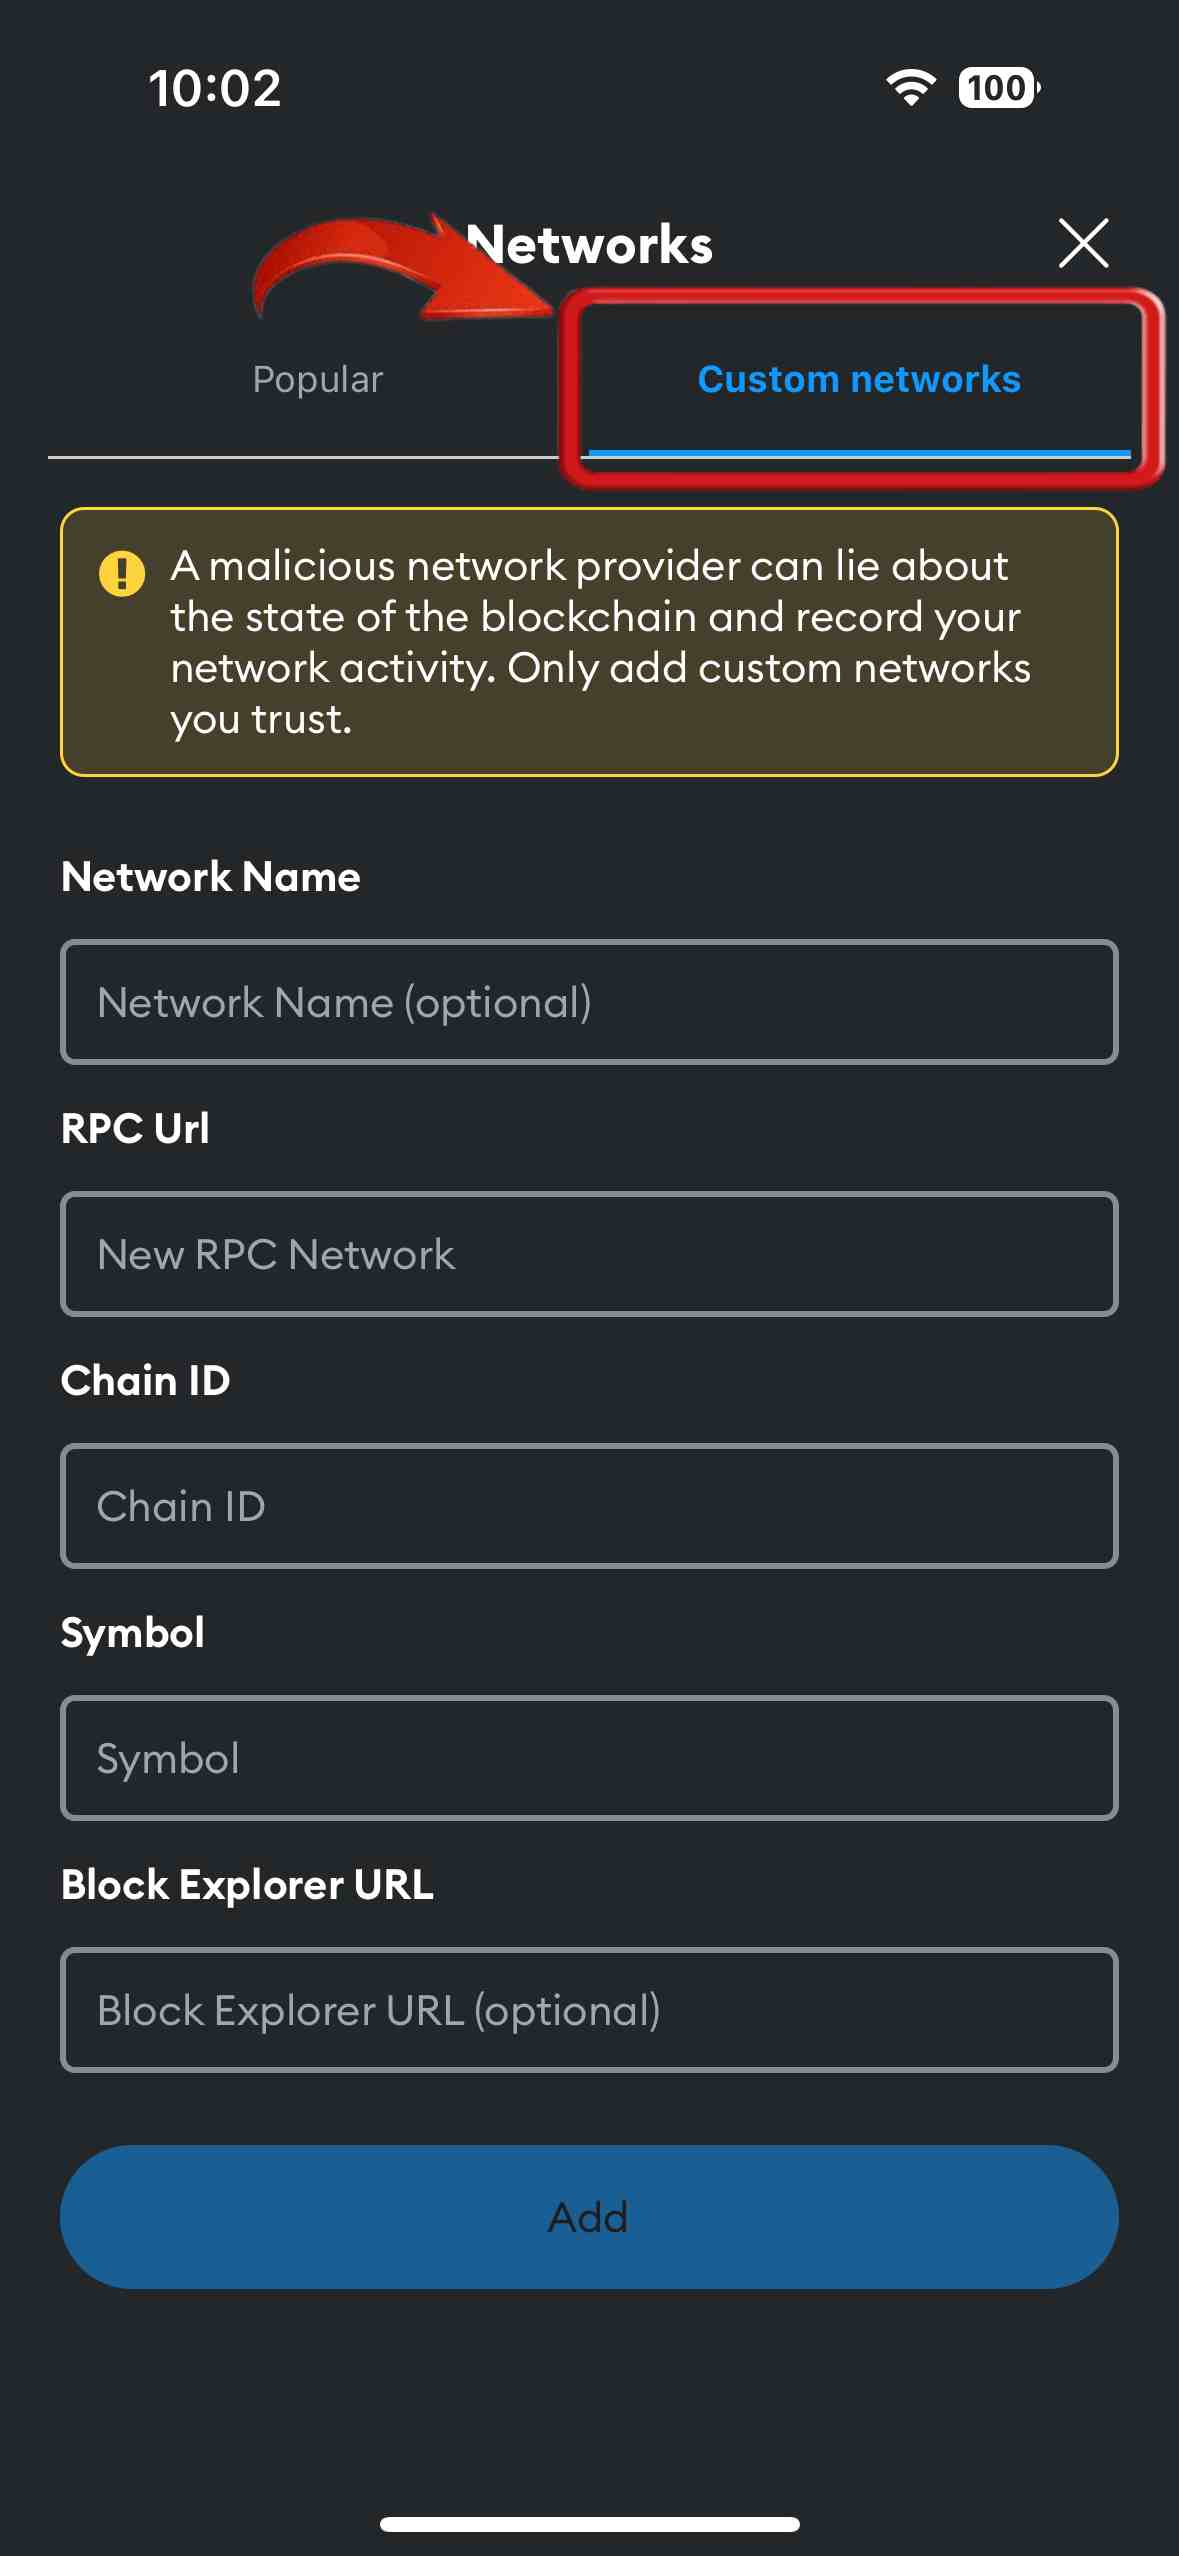
Step 4: Navigate to the “Custom Networks” tab and input the details for the Base Network.
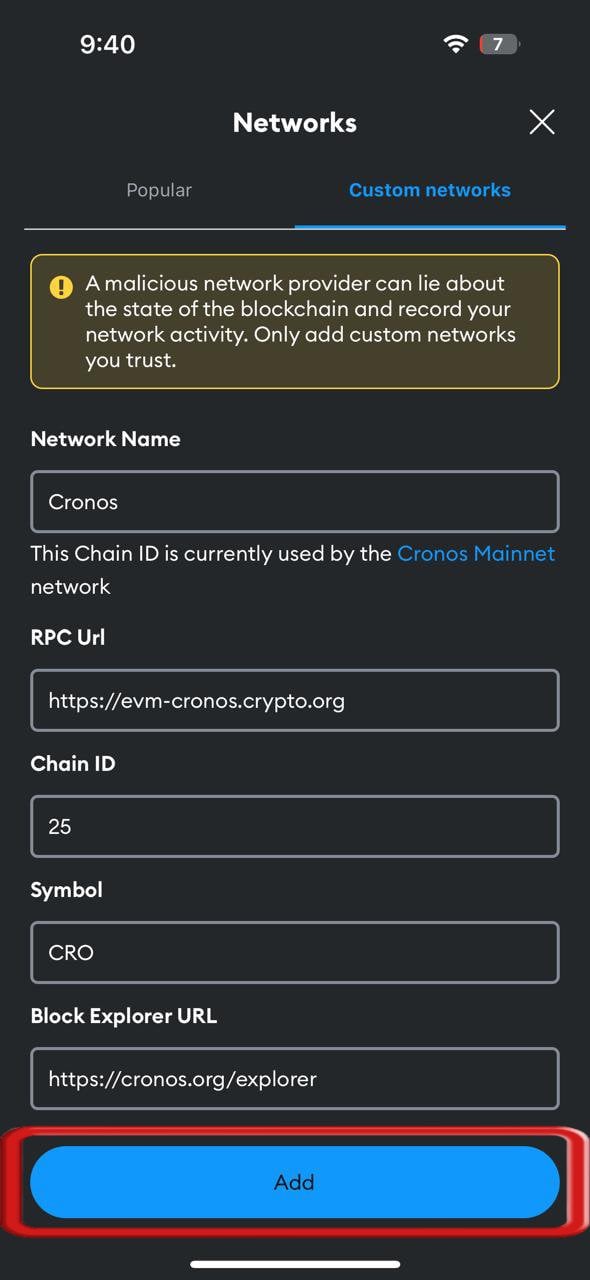
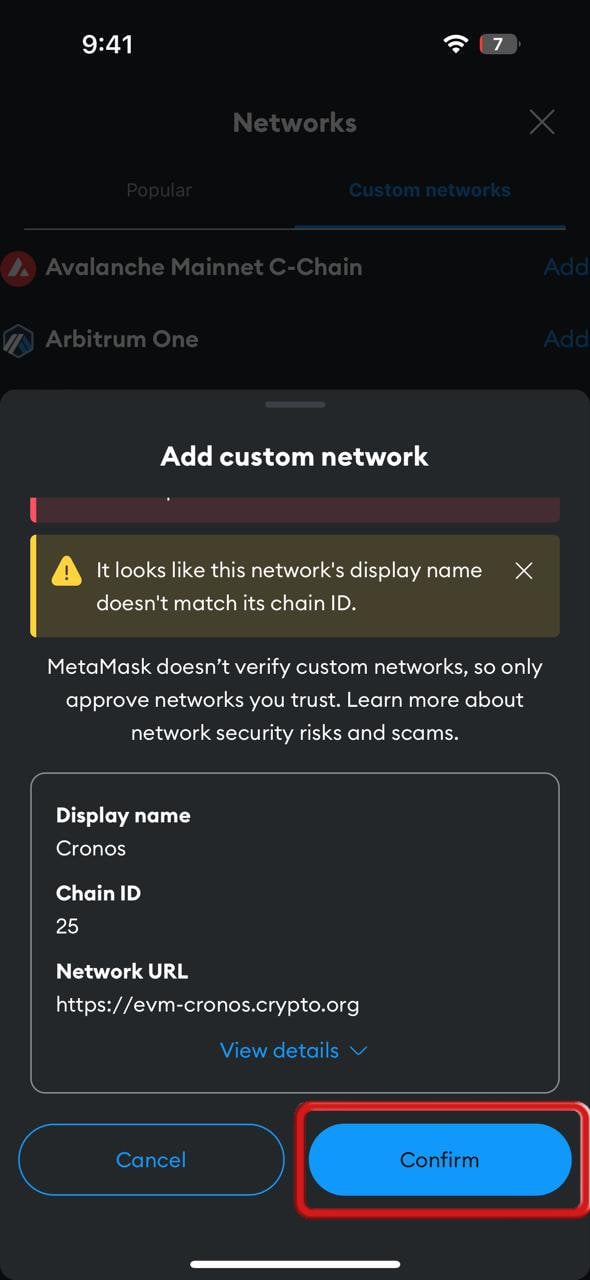
Step 5: Verify that the Cronos network details entered are accurate, then click “Add”.
Step 6: You will be asked to confirm adding the Cronos Network to your MetaMask wallet. Tap “Confirm” to successfully add the Cronos Network to MetaMask on your mobile device.
Add Cronos Testnet to MetaMask
If you are a developer or tester, you might find adding the Cronos Testnet to your MetaMask wallet essential for experimenting with DApps and smart contracts without using real funds. The testnet offers a safe and cost-effective platform to trial new features and ensure everything works correctly before deploying on the mainnet.
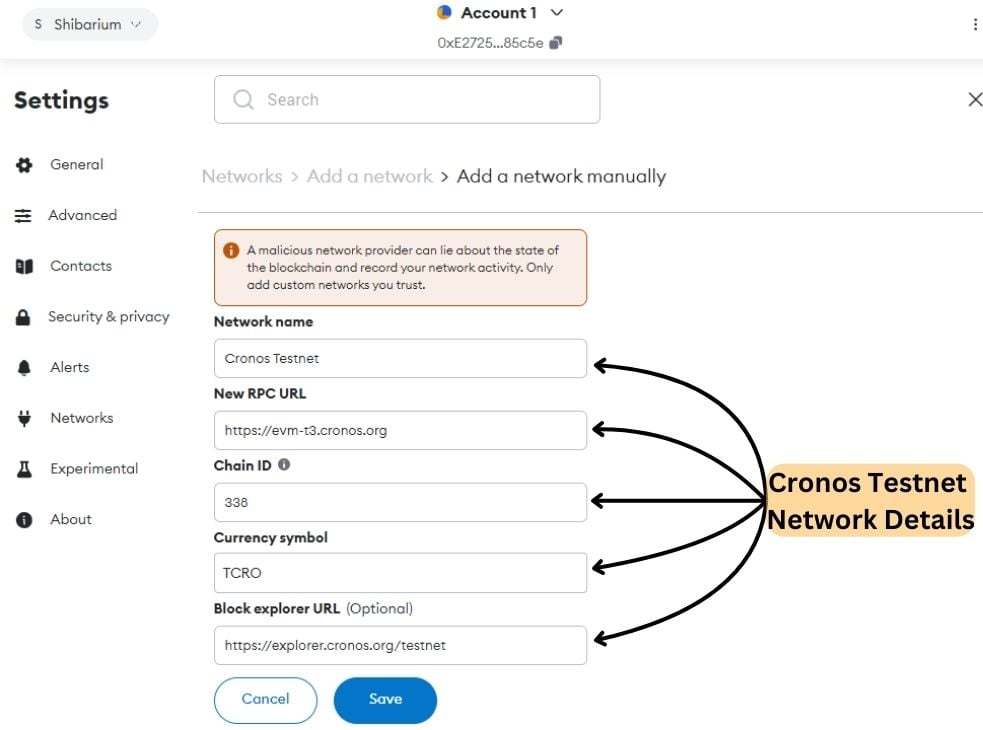
The Cronos testnet can be added to MetaMask manually, but this time you will only need to add the test network details.
- Network name: Cronos Testnet
- New RPC URL: https://evm-t3.cronos.org
- Chain ID: 338
- Currency symbol: TCRO
- Block explorer URL (Optional): https://explorer.cronos.org/testnet
How to Use Cronos on MetaMask
The Cronos network is powered by the CRO token, which serves as its gas fee currency. When making transactions on the Cronos network using your MetaMask wallet, you must ensure you have sufficient CRO tokens available. These tokens can be easily acquired from centralized exchanges such as Coinbase, Bitget, OKX and Kucoin. After purchasing, you can seamlessly transfer them to your MetaMask wallet.
Once you have CRO tokens for gas, you can interact with various Cronos ecosystem components, including decentralized applications (dApps), CroSwap, metaverse projects, and the latest CRO bridge. If you plan to store other tokens on the Cronos network, you may need to manually add tokens to MetaMask to display your holdings accurately.
Remember to always verify your network settings and gas fees before confirming any transactions on the Cronos network through MetaMask.
FAQs
1. Is CRO supported on MetaMask?
Yes, CRO is supported on MetaMask. As the native token for both the Cronos and Crypto.org chains, it is essential to add the Cronos Network to MetaMask for faster accessibility to use CRO or access any of the DApps built on the Cronos chain.
2. Which chain is Cronos on?
Cronos operates at the convergence of Ethereum and Cosmos. It is an EVM-compatible chain developed on the Cosmos SDK, an open-source blockchain framework utilizing the Tendermint consensus engine, enabling it to leverage the advantages of both ecosystems.
3. What are the benefits of Cronos?
The main benefits of Cronos typically include:
- EVM compatibility
- Fast and low-cost transactions
- Interoperability with other chains
- Strong security
- Support for DeFi, GameFi, and NFTs
- Growing ecosystem
Bottomline
Once you master configuring different networks on MetaMask, transacting specific coins across networks becomes easier with minimal fees. Adding the Cronos Network enhances your interaction with Cronos-based DApps and broadens access to more blockchain applications. With low fees, interoperability, and support for DeFi and NFTs, Cronos is a valuable addition to your wallet.

