ArbitrumOne is the top Ethereum layer 2 and today we will discuss how to bridge from the Ethereum base layer (L1) to ArbitumOne (L2).
What is Arbitrum
Arbitrum is a blanket term for roll-ups and other technologies developed by Arbitrum Inc.
The ArbitrumOne roll-up which is the primary focus of this guide is a layer-2 scaling solution for Ethereum.
Layer 2 is a term that refers to a host of modular scaling solutions that scale blockchains by performing one of the four functions of a blockchain (Execution, Validity, Ordering and Data Avalability (DA)) on a separate blockchain.
Arbitrum is an optimistic rollup which means it scales Ethereum by batching transactions and posting them to the L1 as a single transaction. This spreads out the L1 transaction fee over all the transactions in the batch (usually 100s), making Arbitrum 100s of times cheaper than using the Ethereum L1.
The “optimistic” part in the name comes from how Arbitrum manages fraud-proofs but that discussion is beyond the scope of this guide.
Let’s look at how to bridge to Arbitrum.
How to bridge to Arbitrum
There are many bridges available to bridge to Arbitrum, each with different fees, features and UX. In this guide, two of the most popular bridges, including the official Arbitrum bridge will be covered:
- Official Arbitrum Bridge
- Owlto Bridge
In addition to these two bridges, we’ll also discuss a third method to obtain ArbitrumETH without bridging.
The Arbitrum Bridge
The official Arbitrum bridge allows you to bridge tokens between the Ethereum L1 and Arbitrum other Arbitrum chains, let’s look at how to use it:
1. Go to the official Arbitrum Foundation Website Bridge
Please make sure to use official links only to prevent a wallet compromise. The home page should look like this:
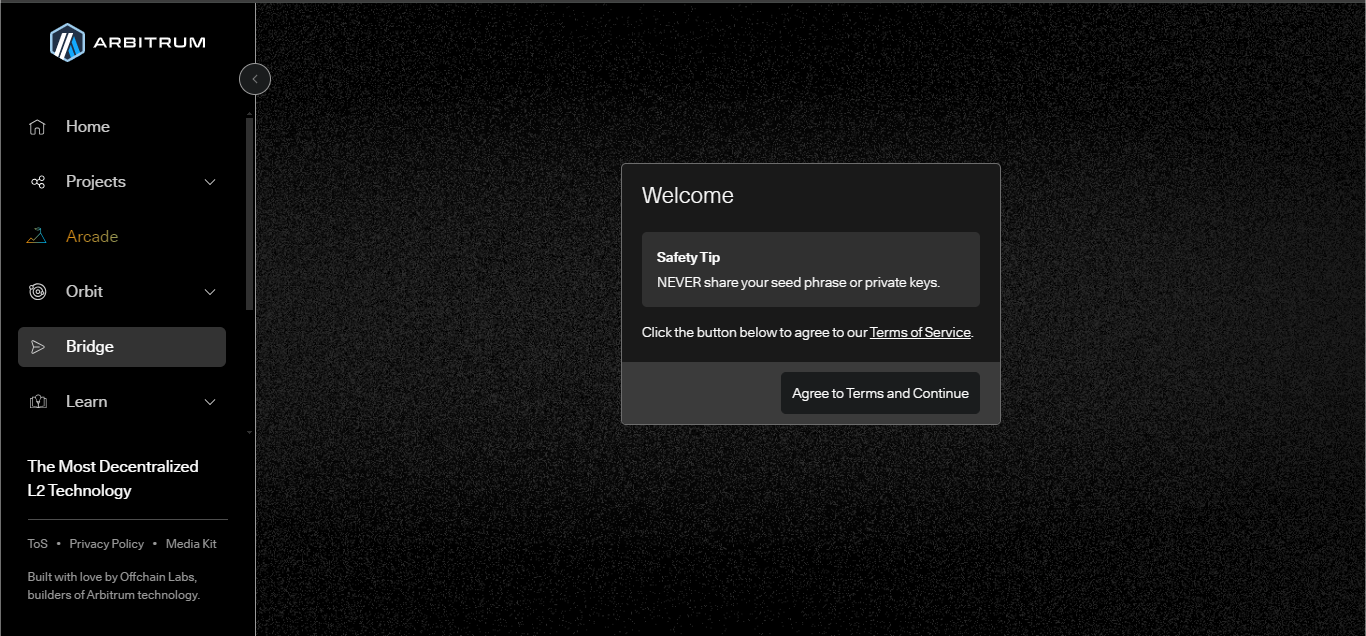
2. Connect Wallet
The website should automatically request a wallet connection but if it doesn’t, click the connect wallet button in the upper left corner of the homepage:
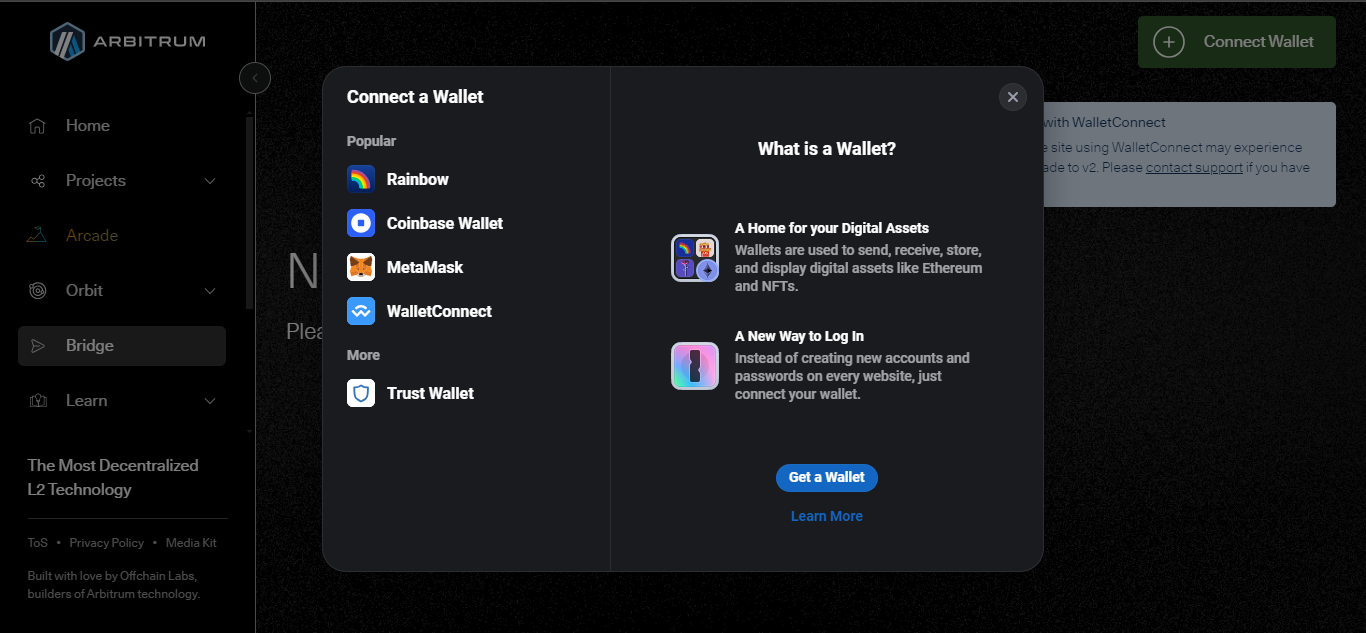
3. Sign approval message
Sign the approval message that pops up after clicking connect wallet
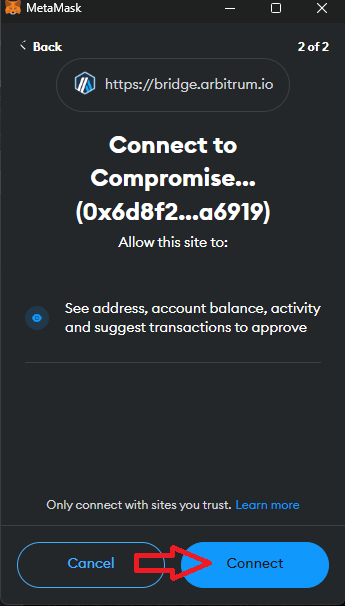
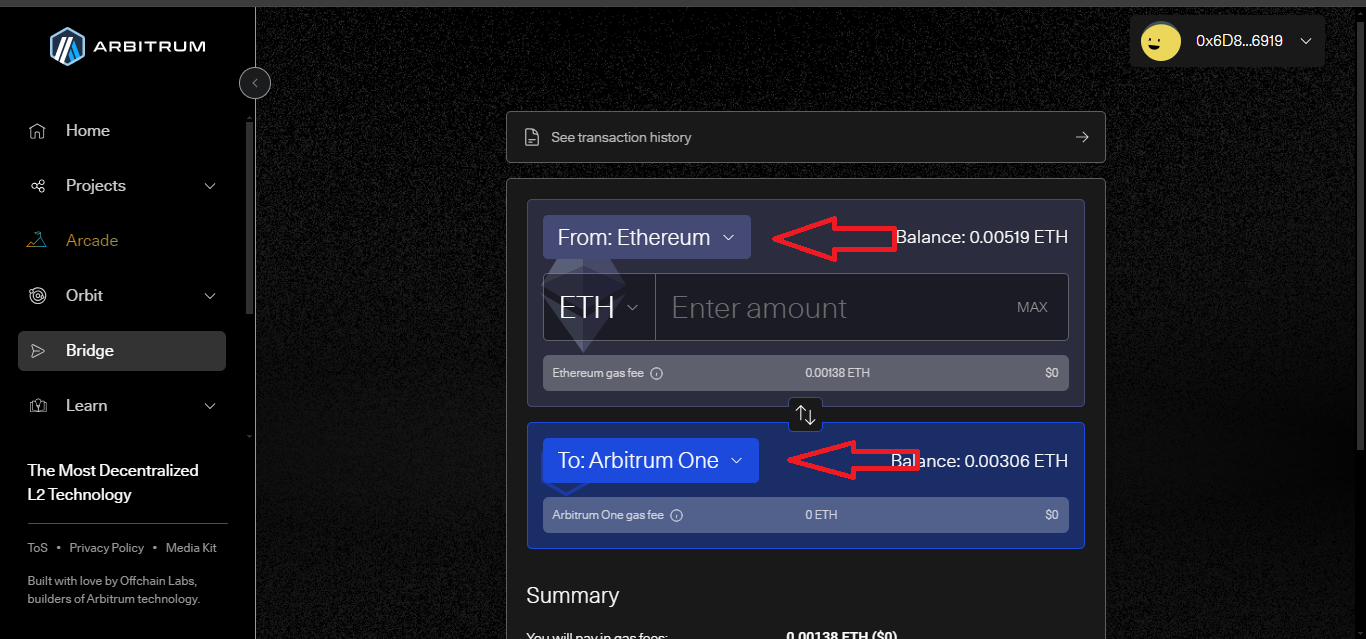
4. Click on “From” and “To” and select chains.
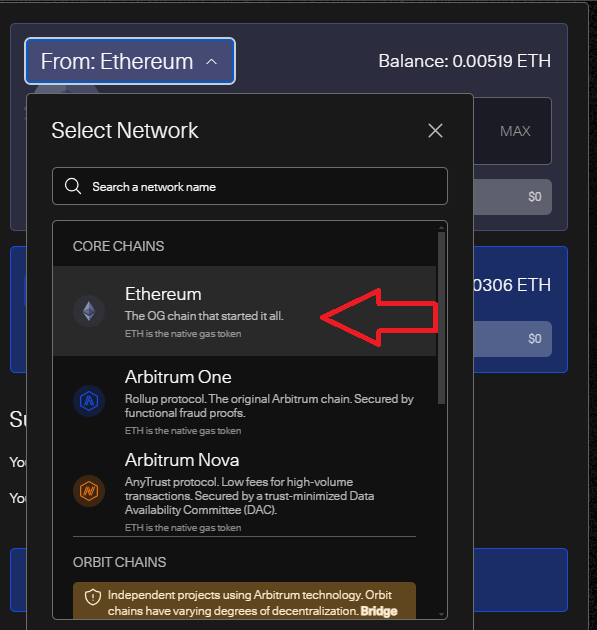
Click on the From and To sliders and select the chain you’d like to bridge from and ArbitrumOne as the “To” chain. The number of chains you can bridge from using the official bridge are limited. But it works perfectly for bridging from the Ethereum L1
Select Ethereum in the drop-down menu.
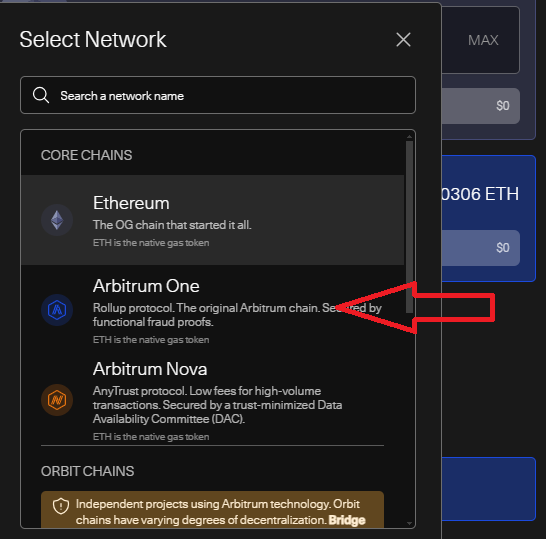
After selecting the “From” chain, click on the “To” chain and select ArbitrumOne.
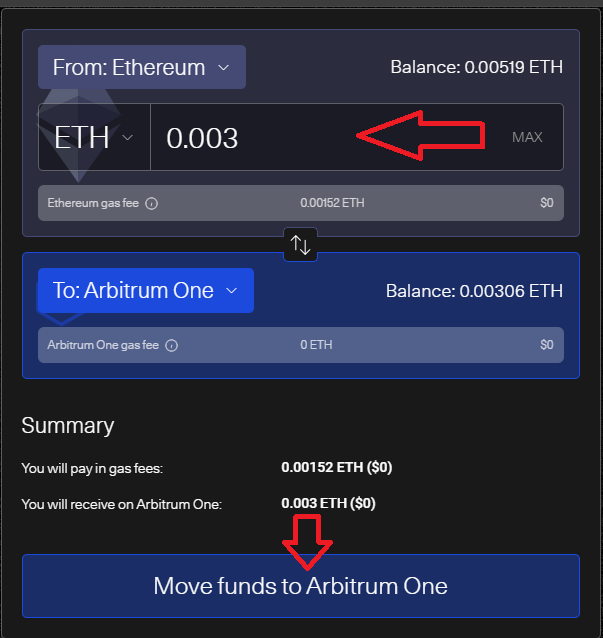
5. Enter amount and Click “Move Funds to Arbitrum One”
Enter the amount of ETH you wish to bridge to and Click on Move Funds to Arbitrum One.
6. Sign the Transaction
Your wallet will show a pop-up, review and authorize the transaction. Make sure not to alter the “Send amount” at this stage or the transaction will fail.
Also be careful of gas fees.
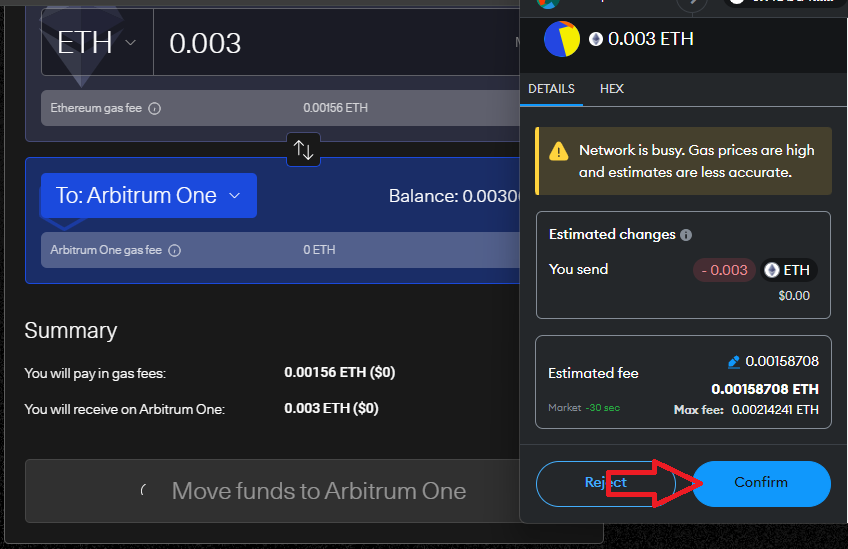
7. Switch to ArbitrumOne Network and wait for your tokens
After completing the bridge, head to your wallet and switch to the ArbitrumOne network. After a short while, your ArbitrumETH will show up in your wallet.
If the gas fees incurred by this method are too high for you, then the next bridge is recommended.
The Owlto Bridge
The Owlto bridge is another multi-chain and multi-rollup bridge that allows you to bridge between different L1s and L2s. Bridging to Arbitrum via Owlto is much cheaper than using a traditional bridge. Follow these steps to use the Owlto Bridge:
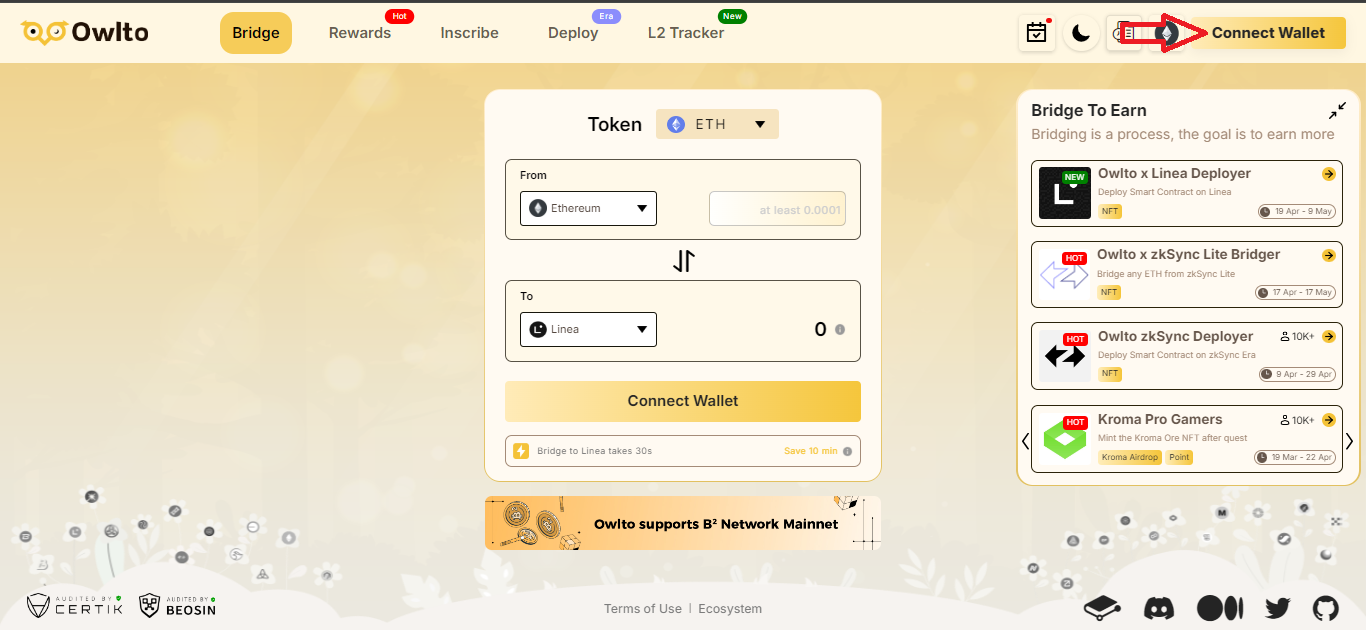
1. Go to the official Owlto Bridge
Please make sure to use official links only to prevent a wallet compromise. The home page should look like this:

2. Connect Wallet
Click the connect wallet button in the upper left corner of the homepage.
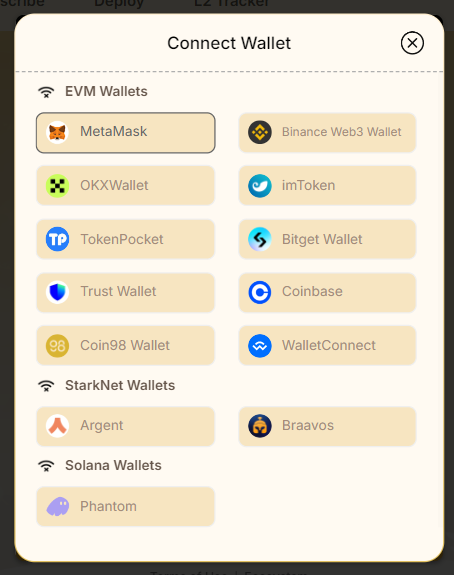
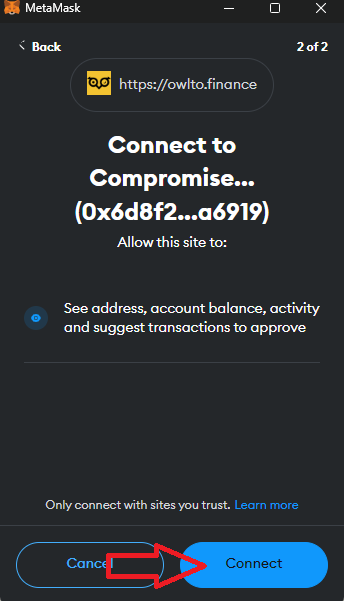
3. Sign approval message
Sign the approval message that pops up right after clicking connect wallet.
4. Click on “To”
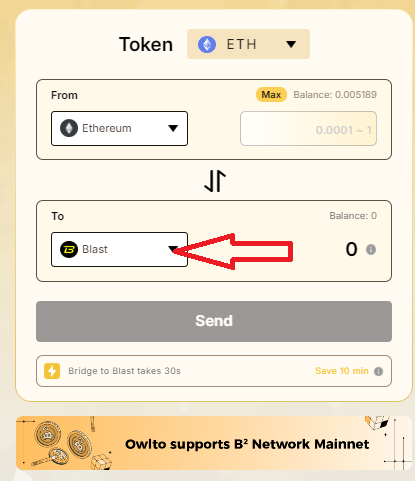
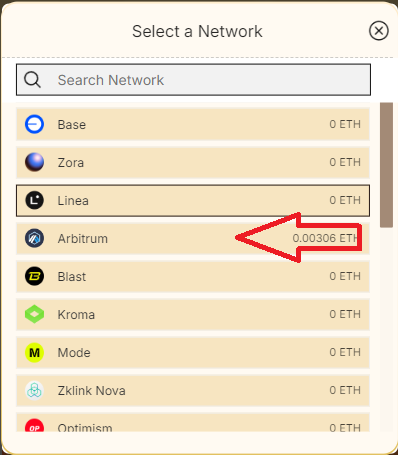
5. Choose Arbitrum
Select Arbitrum from the pop-up menu
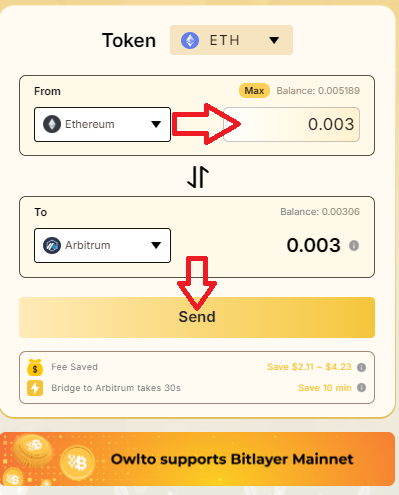
6. Enter amount and Click “Send”
Enter the amount of ETH you wish to bridge to and Click on send.
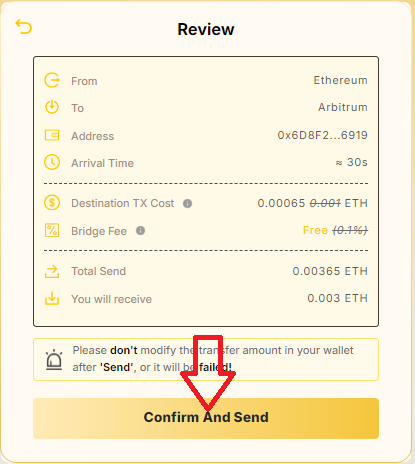
7. Review Transaction and Click on “Confirm and Send”
You’ll get a breakdown of the bridging transaction, review it and click on “Confirm and Send”
8. Sign the Transaction
Your wallet will show a pop-up, review and authorize the transaction. Make sure not to alter the “Send amount” in your wallet at this stage or the transaction will fail.

7. Switch to the ArbirtumOne Network and wait for your tokens
After completing the bridge, head to your wallet and switch to the Arbitrum Onee network. After a short while, your Arbitrum ETH will show up in your wallet.
What are Bridging Fees?
When the ETH is bridged to a layer 2, it is temporarily locked up in a smartcontract. This smartcontract mints an equivalent amount of ETH on the Layer-2, in this case ArbitrumOne. It then sends the tokens to the wallet that initiated the bridge. That’s a basic overview of how most bridges work. The problem is that bridging is a multi-step process and requires a significant amount of computation, most of which happens on the L1, hence the high fees.
Using the third option detailed below allows you to skip bridging fees entirely.
Sending Arbitrum ETH directly from a CEX.
Bridging fees can get expensive, especially for larger sums, if you don’t mind using a Centralized Exchange, you can purchase ArbitrumETH directly on the platform.
Be careful now to confuse Arbitrum ETH with the ArbitrumOne native token $ARB.
In addition to CEX, there are numerous other on-ramps that you can use. Centralized Exchanges like Coinbase and Binance allow you to buy ArbitrumETH on their platforms. MoonPay, OnRamp, Ramp and Transak are the other recommended onramps. Using any of these tools will allow you to buy Arbitrum ETH with fiat or any other cryptocurrency and skip the bridging fees entirely.
Here’s a short guide for Binance users, other platforms should follow a similar process.
To get ArbitrumETH with this method, you need ETH on Binance. You can also purchase or swap any other tokens for ETH. Here’s how to get the ETH on Arbitrum:
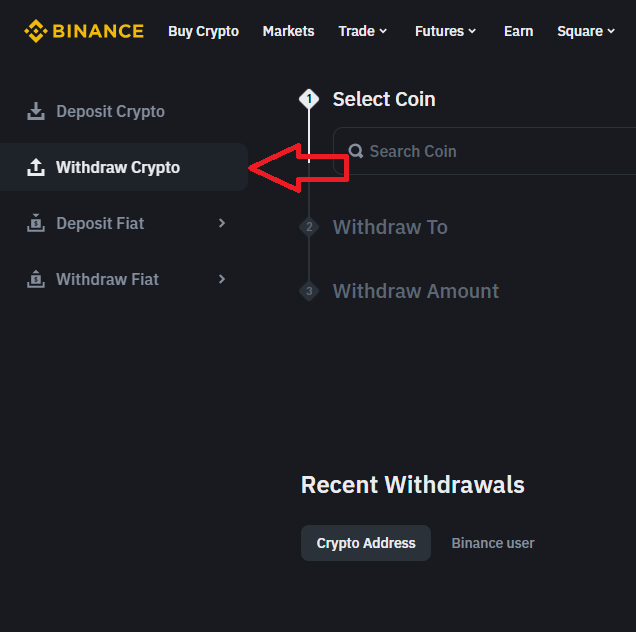
1. Navigate to Withdraw Crypto
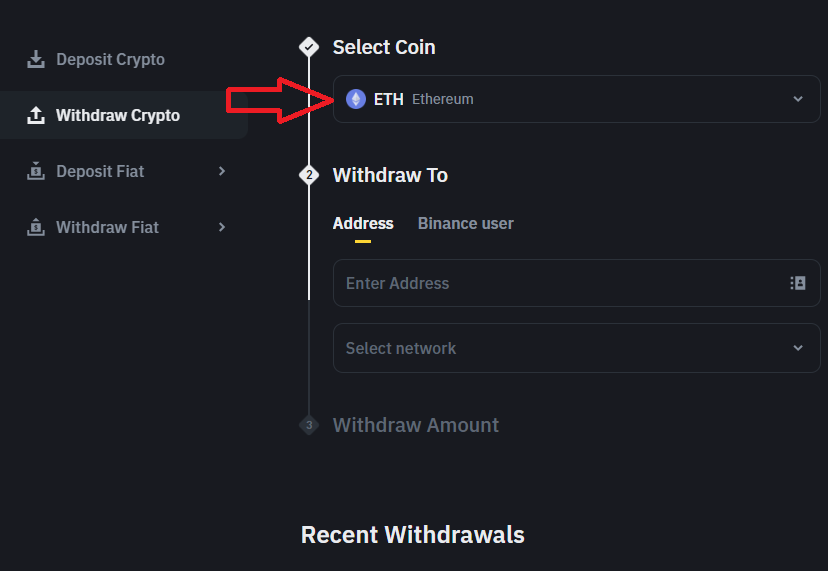
2. Select Coin
Click the select coin dropdown and choose Ethereum.
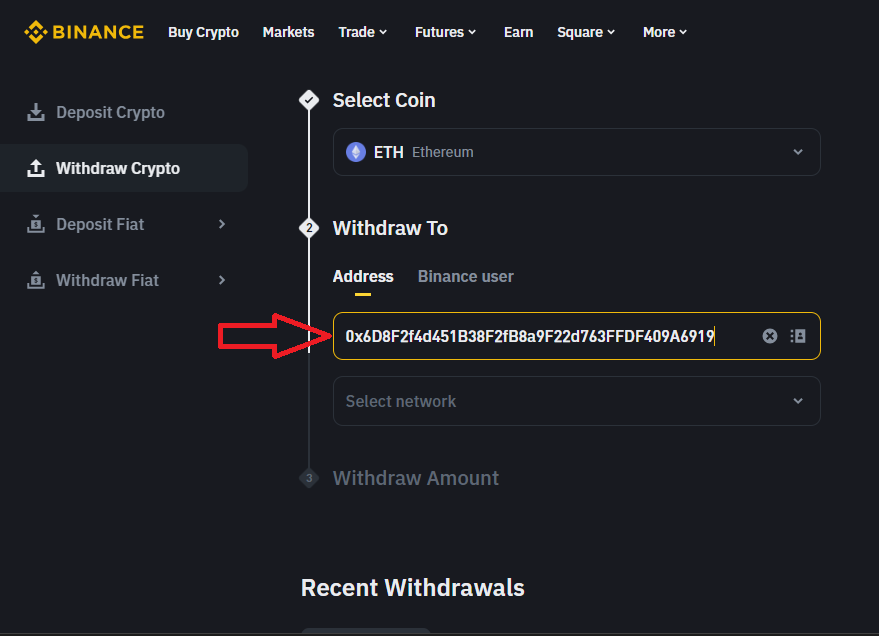
3. Enter Destination Address
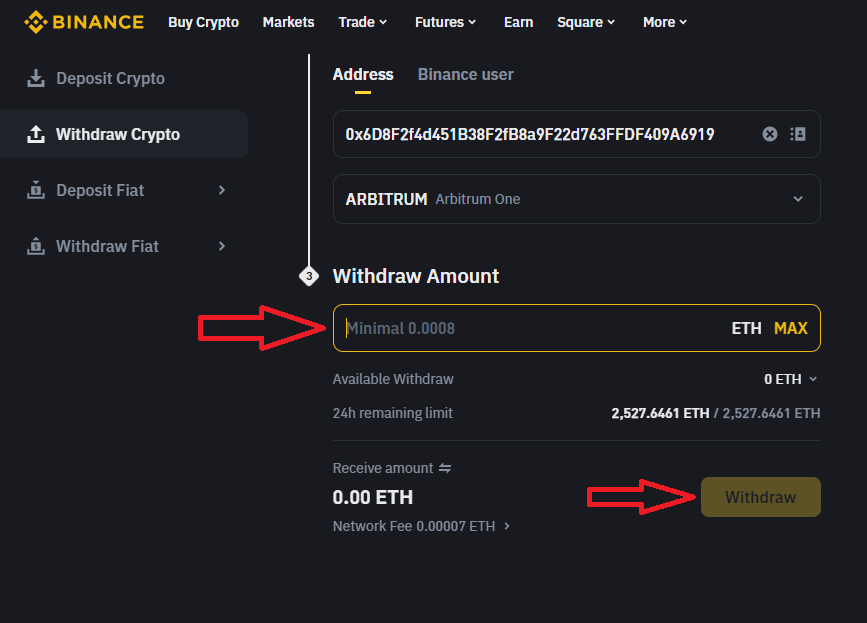
Enter the address of the wallet where you want to receive the funds. Make sure to copy (and not manually type out) the wallet address.
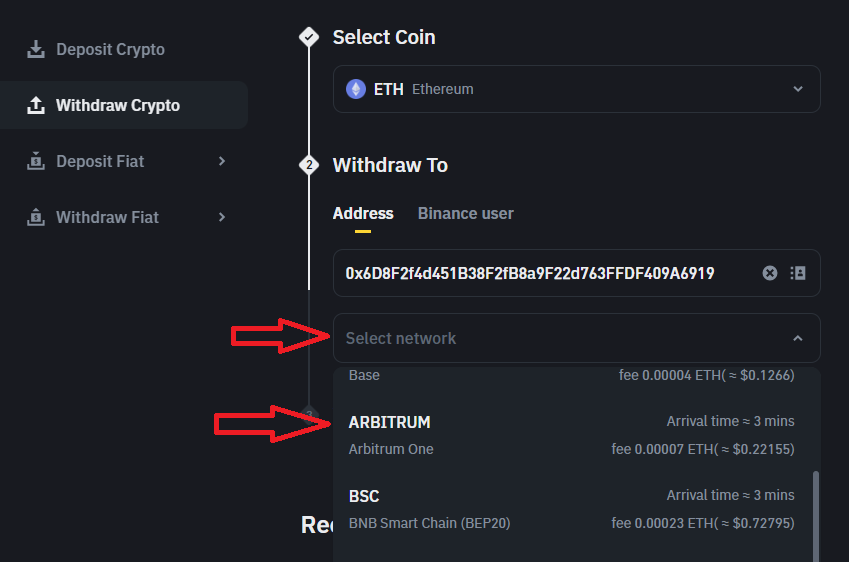
4. Click Select Network
Click select network and navigate to ArbitrumOne.
5. Enter the amount of ETH you want to withdraw and click withdraw.
6. Authenticate the withdrawal
After clicking on Withdraw, Binance will ask you to authenticate the withdrawal. Proceed as appropriate.
7. Wait for your tokens
After completing the withdrawal, wait a few minutes and the ArbitrumETH will show up in your wallet.
Summary
Layer-2s are an innovative solution to the blockchain trilemma. They help blockchains scale performance and benefit from the blockchains’s security and decentralization. In this article, we’ve looked at the ArbitrumOne layer 2 and two methods to bridge to it. We’ve also considered obtaining ArbitrumETH by direct purchase. Arbitrum is a great way to experience the Ethereum ecosystem without the high fees and now you have all the tools you need. That’s all for this guide.


