A transfer of assets between blockchains would ordinarily be impossible. This has however been made practical through a process known as bridging. In this article we provide a step by step guideline on how to bridge from Polygon to Solana.
Polygon and Solana operate on separate block chain networks. Bridging from Polygon to Solana therefore entails the performance of an inter chain transaction between Polygon (which operates on the Ethereum blockchain) and Solana (which operates on the Solana blockchain). For the purpose of this article, the native tokens of Polygon (MATIC) and Solana (SOL) would be used to perform the transfer of assets.
How to Bridge from Polygon to Solana
Since polygon and Solana exist on different blockchain networks, it requires the use of a cross chain bridge. A cross chain bridge is basically a decentralized app that allows for the transfer of assets between two distinct blockchain networks (this is a gross oversimplification but you get the point). This article provides a guide for one of the most widely used cross chain bridges that allows for a transfer of assets between Polygon and Solana. The cross chain bridges that would be utilized for the purpose of this guide is Rango Exchange.
Bridging through Rango Exchange
Rango exchange is a decentralized application that allows for various cross chain transactions, including the transfer of assets from Polygon to Solana. To bridge from Polygon to Solana through Rango exchange, follow these steps;
- Visit the official Rango Exchange Website
- Select Chains and Tokens
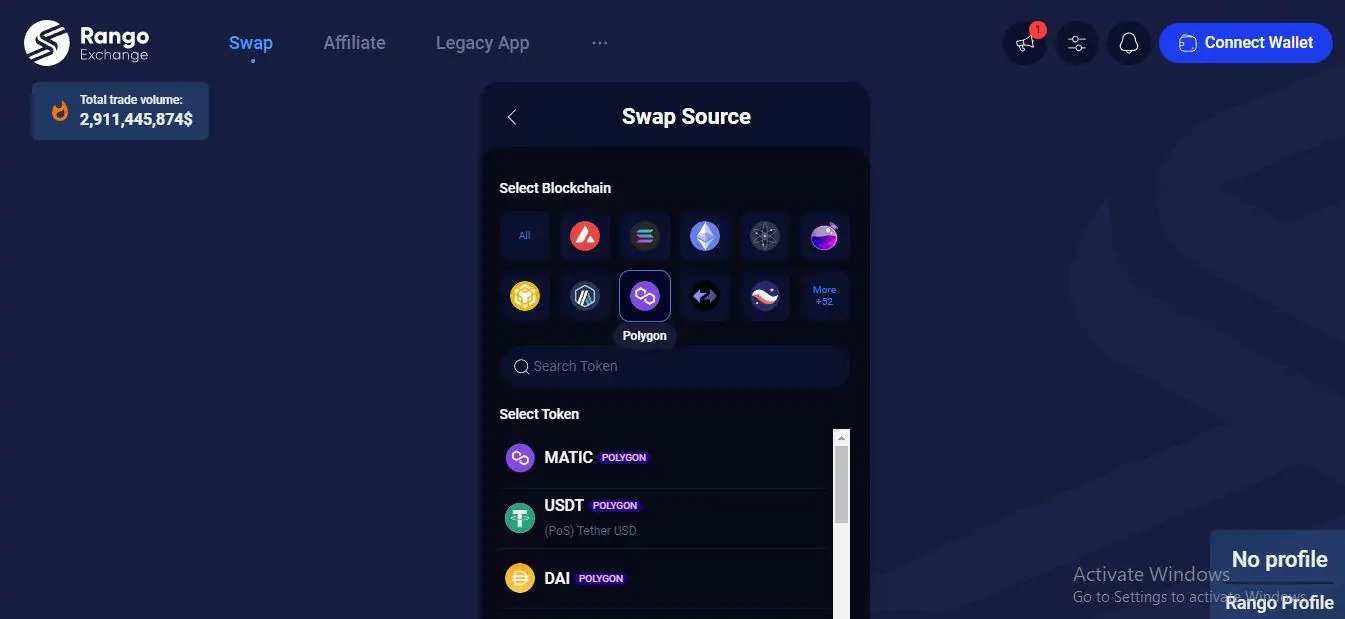
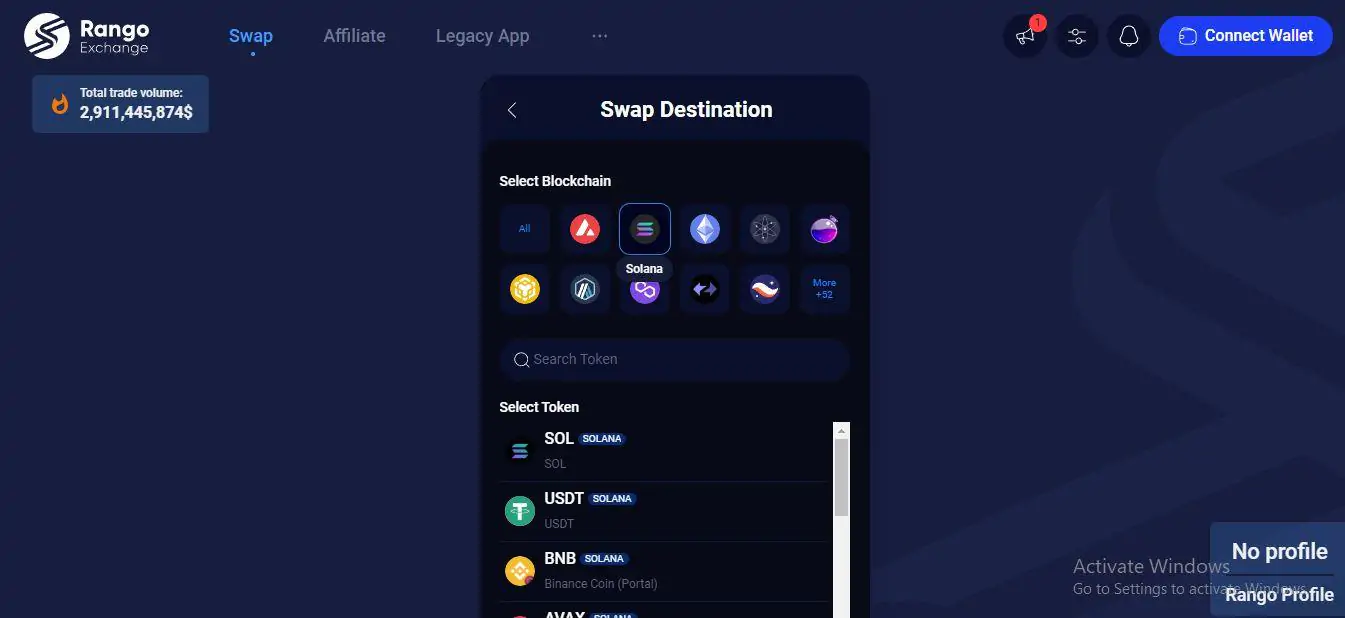
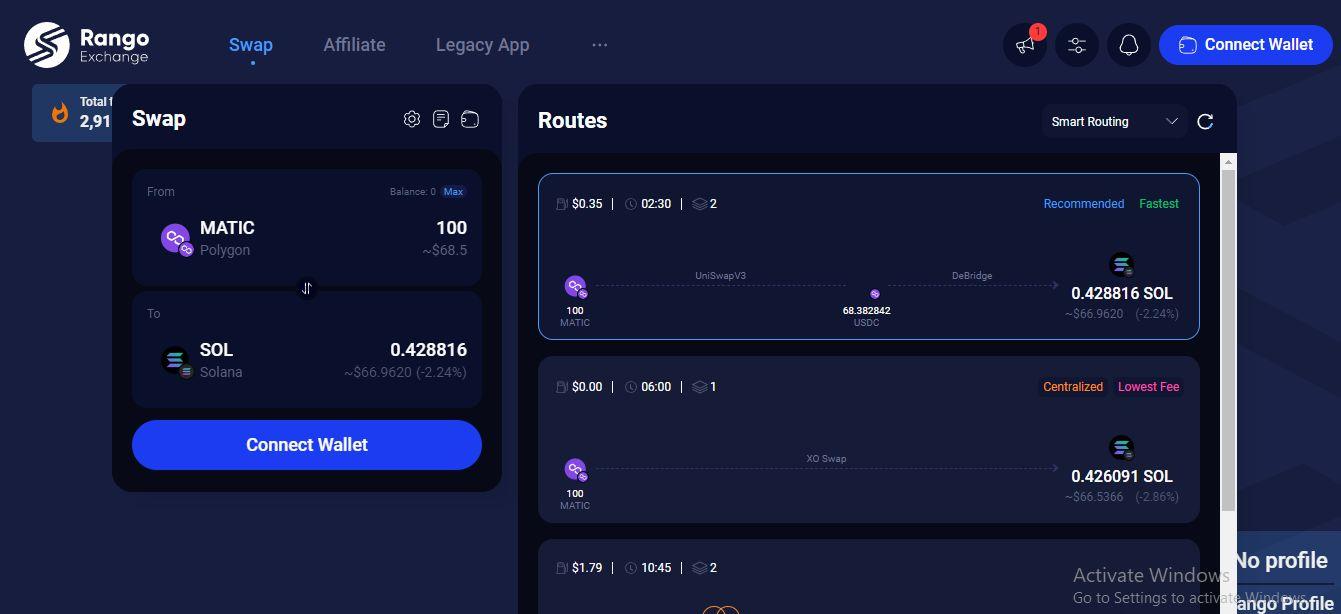
Note that the previous link transports you the website and automatically selects AVAX and SOL as the tokens being bridged to and from. We’re however attempting to bridge from Polygon to Solana so the next step would be to select the Polygon chain and MATIC token as the swap source and the Solana and SOL token as the swap destination
1. Enter Amount You Wish to Transfer:
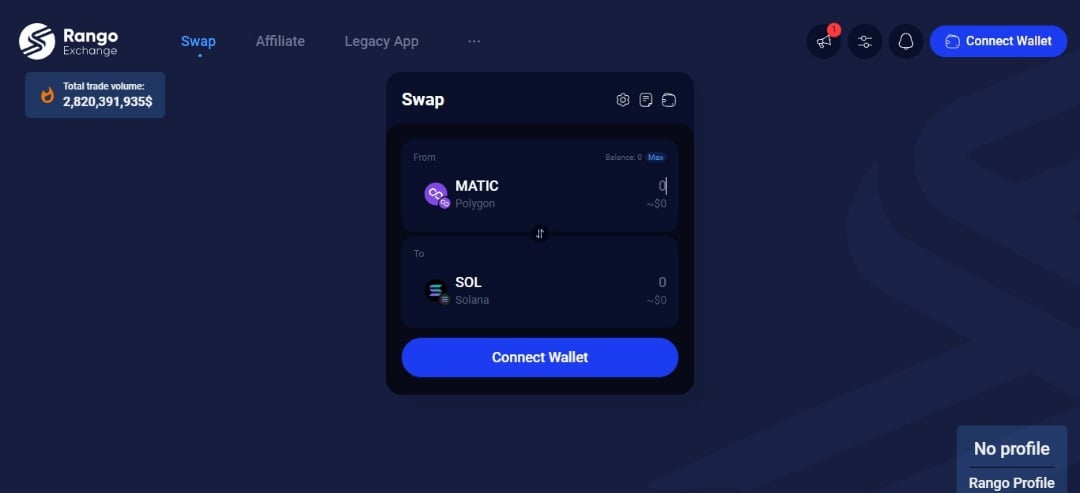
This step is pretty straightforward and only requires you to enter the amount of the MATIC token you want to bridge to SOL
2. Select the Desired Route:
This step involves you selecting the route through which the assets would be transferred through. Each route has its advantages and disadvantages, some routes take a shorter amount of time but come with higher gas fees so be sure to select the route that best suits you.
3. Connect your Wallets:
Since you’re performing a cross chain bridge, you’d need wallets compatible with the tokens you’re bridging from and to. For this guide, we’d be utilizing metamusk as a Polygon (MATIC) compatible wallet and Phantom as a Solana (SOL) compatible wallet.
To connect the metamusk wallet click on the connect wallet button and select the metamusk wallet icon. This should activate the metamusk wallet extension on your browser with a “connect” option. Select this option to connect your metamusk wallet.

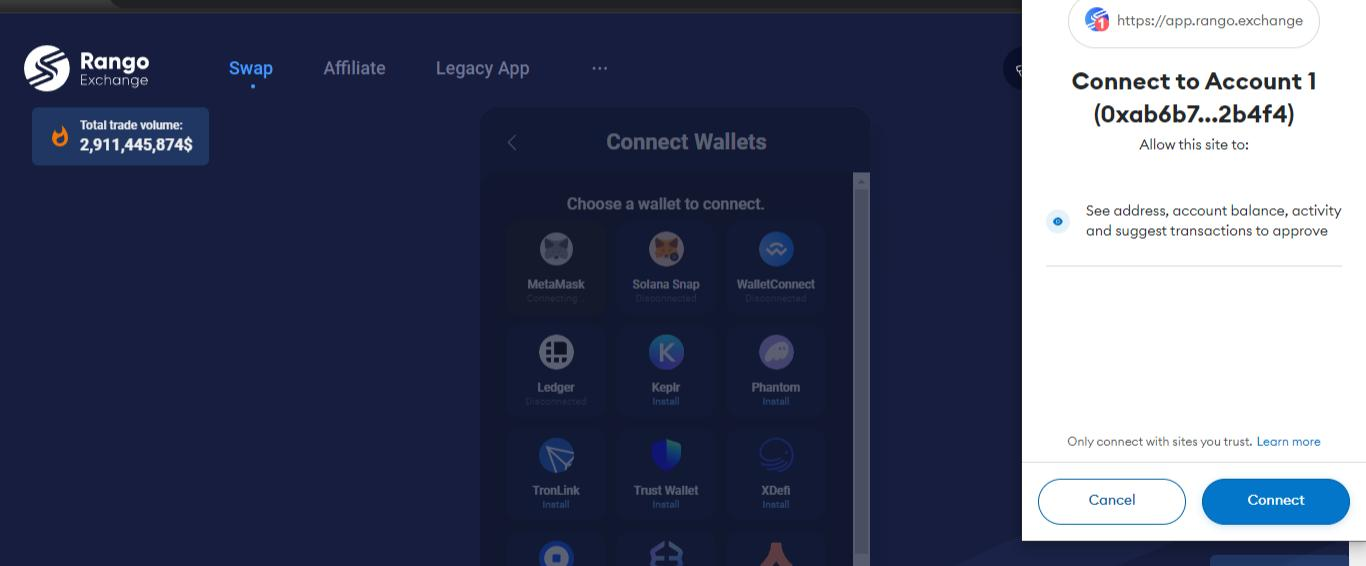
Repeat a similar process to connect your phantom wallet.
In a situation where the site asks you to install an extension after you’ve already done so, reload/refresh the site.
4. Confirm the Transaction:
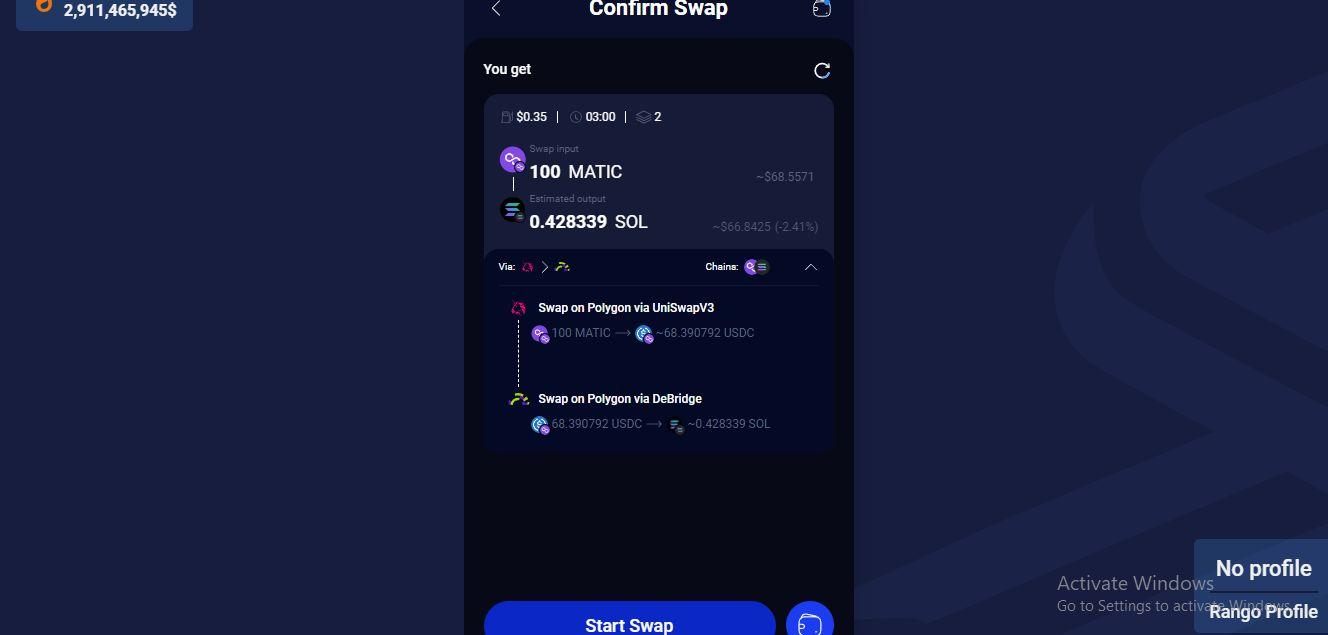
Click on “start swap” and wait for the transaction to reflect in your wallet
Summary
In summary, cross chain transactions which would ordinarily be impossible have been facilitated through decentralized exchange apps. Rango Exchange can also be used to bridge other chains besides Polygon and Solana. It is important for each individual to select the route that best suits their needs. Other platforms such as Mayan Finance also over cross chain bridging services.

