Casper, a Turing-complete smart contract platform, hasn’t made a significant impact yet, with only a handful of dApps in its ecosystem. If you’re considering moving away from Casper to explore other blockchains that offer more opportunities, it’s entirely understandable. In this guide, we will learn how users can bridge from Casper to Solana, one of the most popular and rapidly growing blockchains in the crypto space.
Can I Bridge from Casper to Solana?
Bridging from Casper to Solana is possible through Allbridge, a cross-chain bridge within the Solana ecosystem. While Allbridge allows users to move assets from Casper to Solana, there is a limitation: it only supports bridging the ABR token, Allbridge’s native token.
Important: Be cautious of scams when using unfamiliar bridges or websites. Connecting to unverified platforms risks exposing your funds to theft.
How to Bridge from Casper to Solana
So, the task at hand is to bridge from Casper to Solana, and the solution lies in using Allbridge. However, there’s a minor hurdle to consider: you’ll need to download the Casper Wallet, the only wallet compatible with Casper that supports bridging to Solana via Allbridge. For the Solana side, users have a couple of options. You can use the Phantom wallet, which is fully compatible with the Solana network, or, if you’re a MetaMask user, you can utilize the Solflare Snap as your Solana wallet.
How to Create a Casper Wallet
For those new to the Casper Wallet, it’s a secure self-custody wallet designed for the Casper blockchain, offering a streamlined way to manage CSPR tokens, interact with dApps, and sign transactions. With features such as secure storage audited by Halborn, NFT support, and integration with most dApps on the Casper network, it provides a robust solution for managing your assets.
Additionally, Casper Wallet is available as a Chrome extension, enhancing accessibility and ease of use. Here’s how to create an account and start using Casper Wallet:
Step 1: First, navigate to the Google Chrome Web Store where you can add the Casper Wallet Extension to your Chrome browser.

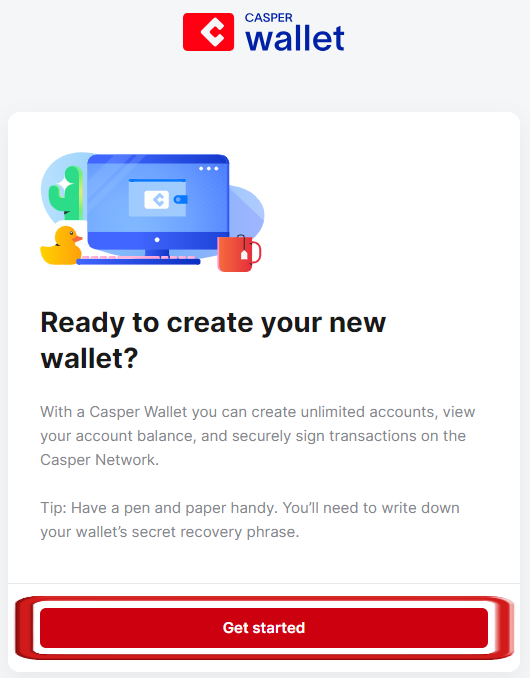
Step 2: Once added, a new Casper Wallet tab will open in your browser. To create a new Casper Wallet, click on “Get Started”.
Step 3: The first step to creating a new Casper Wallet is setting up a strong password. Enter a password for your Casper wallet, then click on “Create Password”.
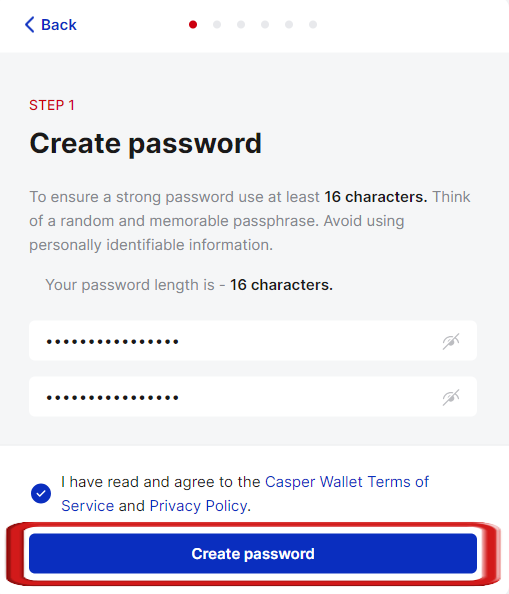
Note: Casper Wallet requires a 16-character password, so make sure it’s long and includes a mix of numbers, letters, and special characters.
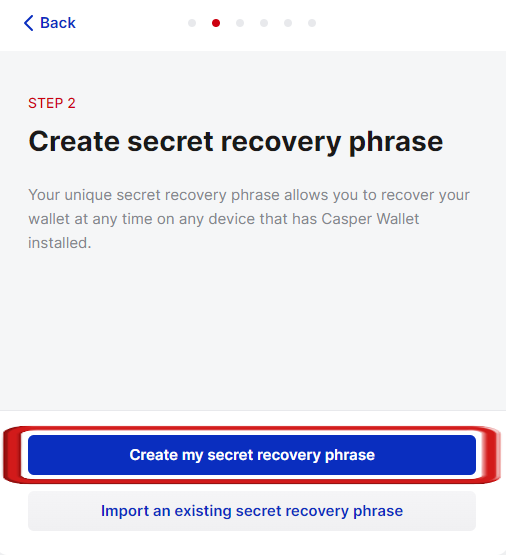
Step 4: After creating the password, users need to generate a recovery phrase to ensure they can recover their wallet if needed. Simply click on “Create my secret recovery phrase” to proceed.
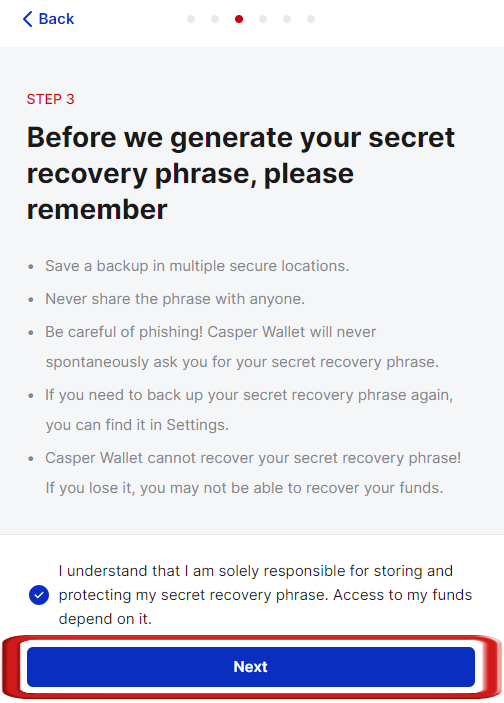
Step 5: The recovery phrase cannot be recovered if lost. Make sure to read the disclaimer, then click on “Next”.
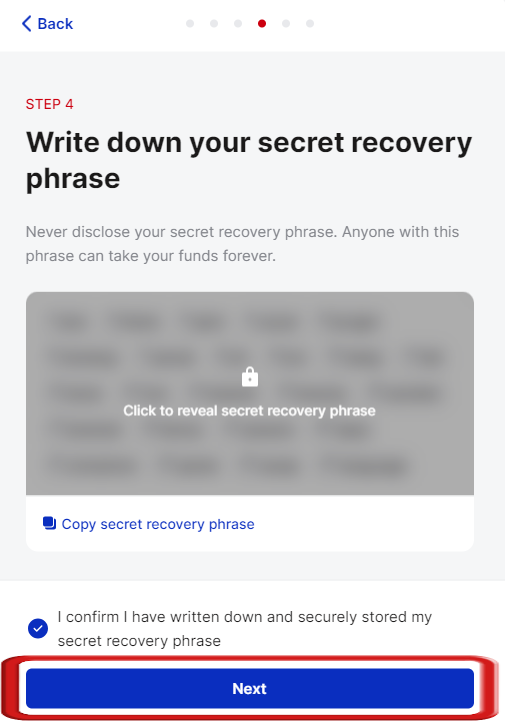
Step 6: Reveal your recovery phrase and keep it safe. Users can write it down or take a screenshot, then click on “Next”.
Step 7: To ensure the recovery phrase has been saved, Casper will ask you to complete your recovery phrase as an added security measure. Fill in the recovery phrase and click on “Confirm”.

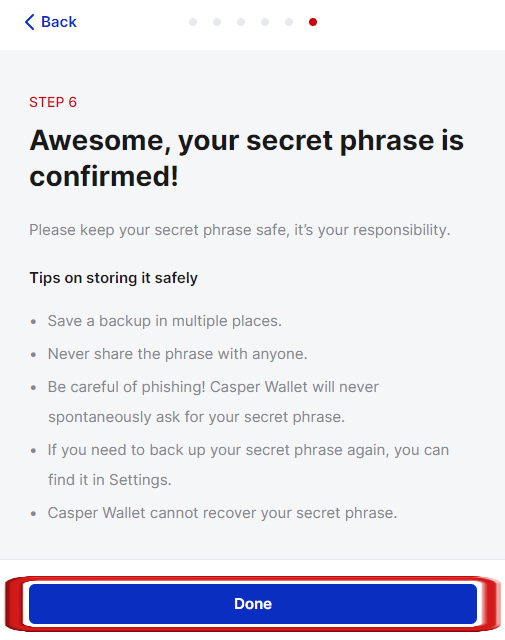
Step 8: After the recovery phrase is confirmed, review a few safety tips from the Casper team on keeping your wallet secure, then click on “Done”.
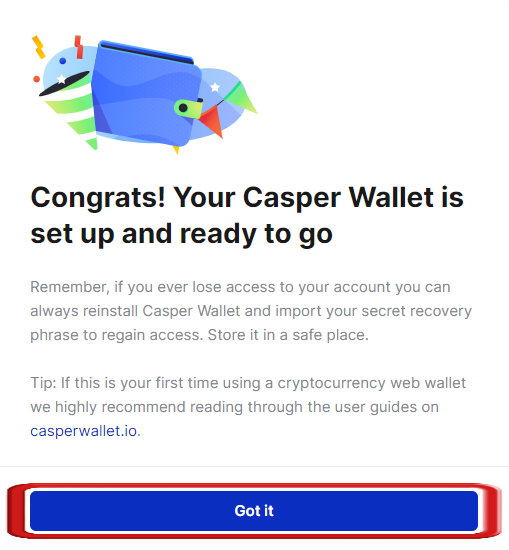
Step 9: Your wallet is now created. Simply click on “Get it” to close the Casper New Wallet window.
Step 10: The Casper Wallet extension will now appear in your Google Chrome Extensions. Make sure to pin the extension for easier access.

With the Casper Wallet extension now installed and ready for use, let’s move on to the next step: using Allbridge to bridge assets from Casper to Solana.
Bridge from Casper to Solana using Allbridge
The Casper Wallet extension was essential before moving on to the next step: using Allbridge. Allbridge is a reliable bridge for transferring assets between various blockchains, including both EVM and non-EVM networks. It ensures fast transactions by handling two separate transactions—one on the source blockchain and one on the destination chain.
A Bridge Fee is charged for each bridge transfer, involving two transactions: a Send transaction on the source chain and a Receive transaction on the destination chain. The fee is only paid for the Send transaction and is charged in the same token being transferred. For Casper, the fee is 0.1%, while for Solana, it’s 0.3%.
Now, let’s move on to the steps for bridging from Casper to Solana using Allbridge.
Step 1: Let’s start by navigating to the Allbridge platform, where we will bridge from Casper to Solana.
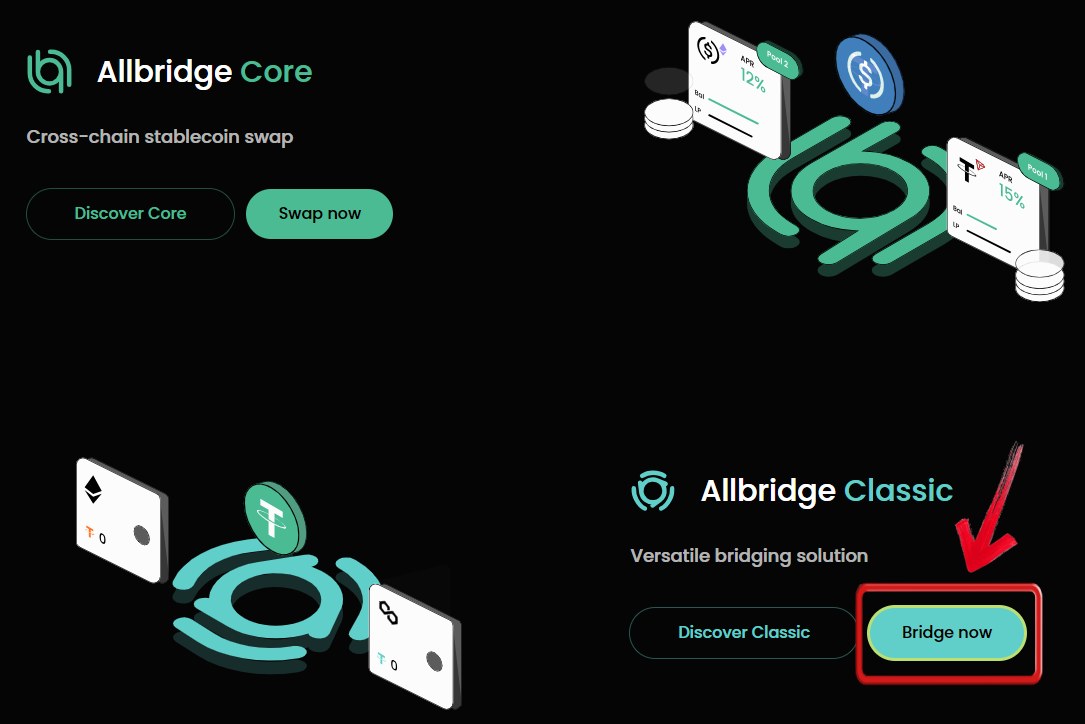
Step 2: Scroll down and click on the “Bridge Now” button.
Step 3: Next, we will select the networks to bridge. Choose Casper and Solana.
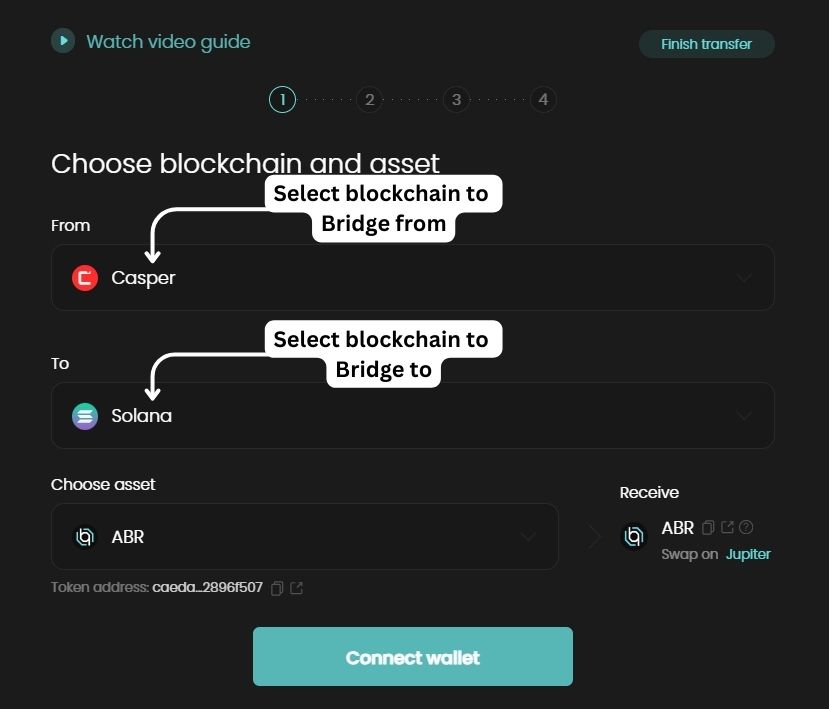
Step 4: After selecting the networks, we usually select the token to bridge. However, on Allbridge, the only token that can be bridged from Casper to Solana is the native ABR token, which will be selected by default.
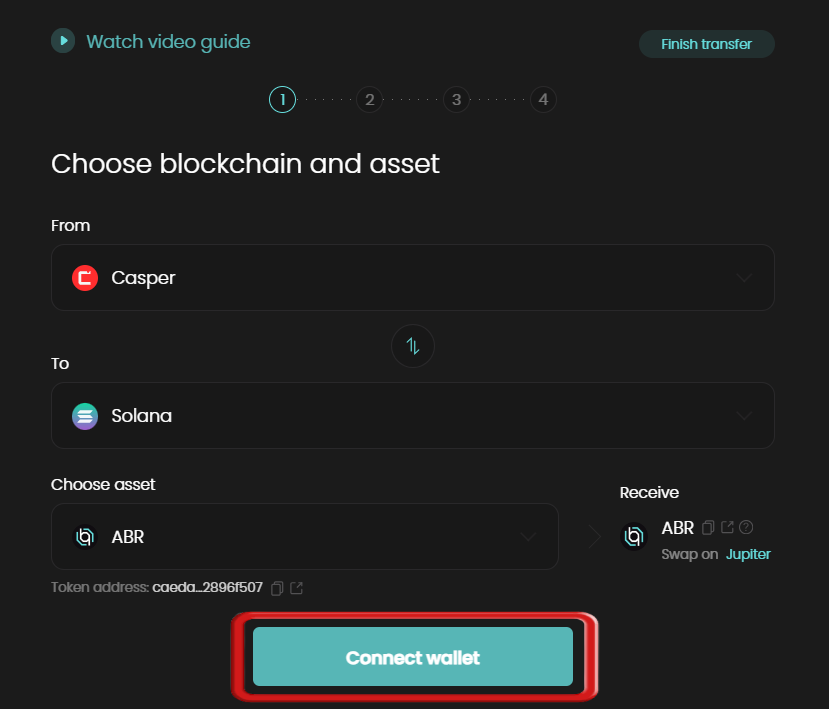
Step 5: Click on the “Connect Wallet” button to connect Allbridge to your Casper Wallet.
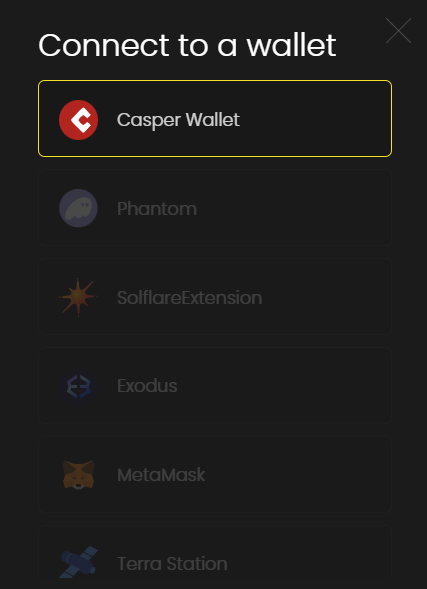
Step 6: Now, select “Casper Wallet” from the list of wallet options.
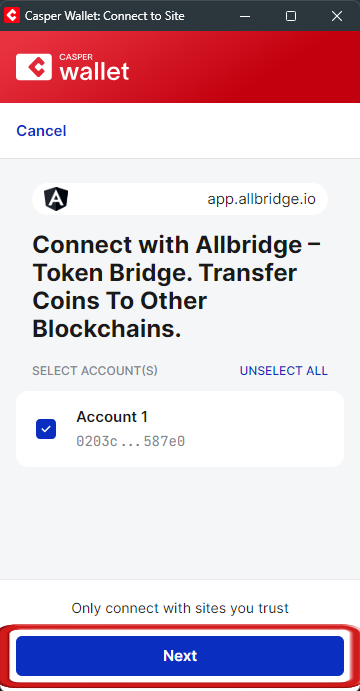
Step 7: The Casper Wallet extension will pop up. Select the Casper wallet account you wish to connect with Allbridge and then click on “Next”.
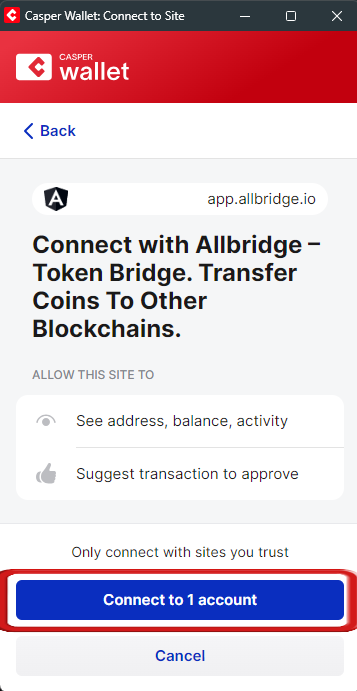
Step 8: Confirm the connection between Casper Wallet and the Allbridge website by clicking on the “Connect to 1 account” button.
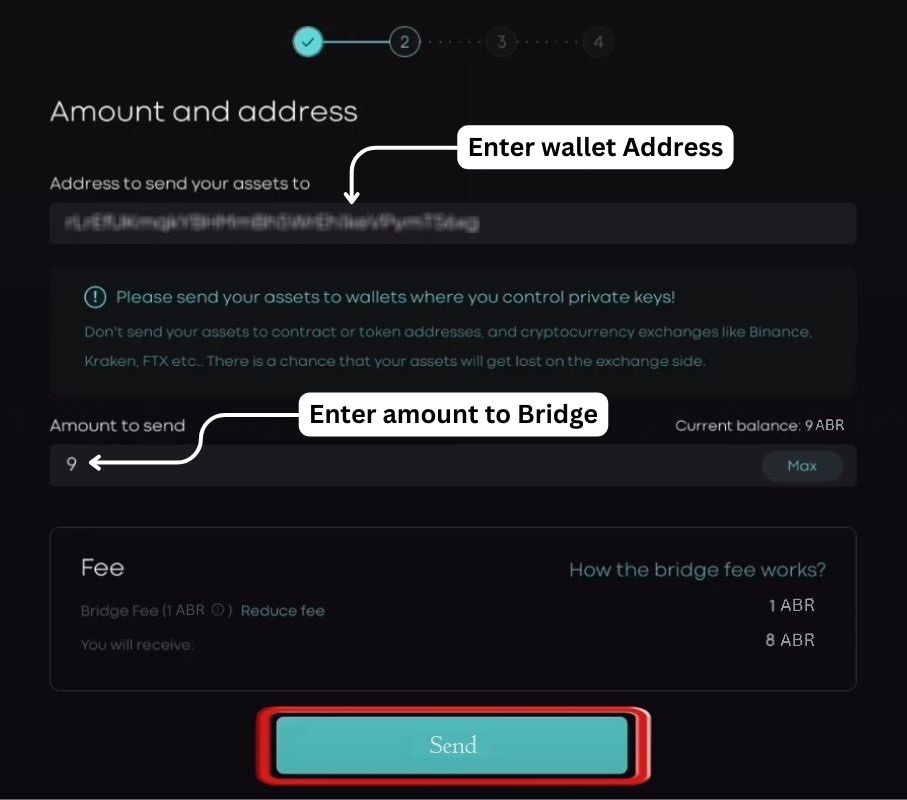
Step 9: Now, paste your Solana wallet address to receive ABR tokens after bridging. Users can use the Phantom wallet, or MetaMask users can use the Solflare Snap for this step.
Step 10: After pasting the wallet address, enter the amount of ABR tokens you wish to bridge and then click on “Send”.
Step 11: Approve Transaction on your Casper Wallet Extension to continue.
Step 12: Allbridge will begin bridging the tokens, but the process isn’t complete yet. Copy the “Tx ID” (Transaction ID), then click on “Continue” to connect your destination wallet, the Solana Wallet.
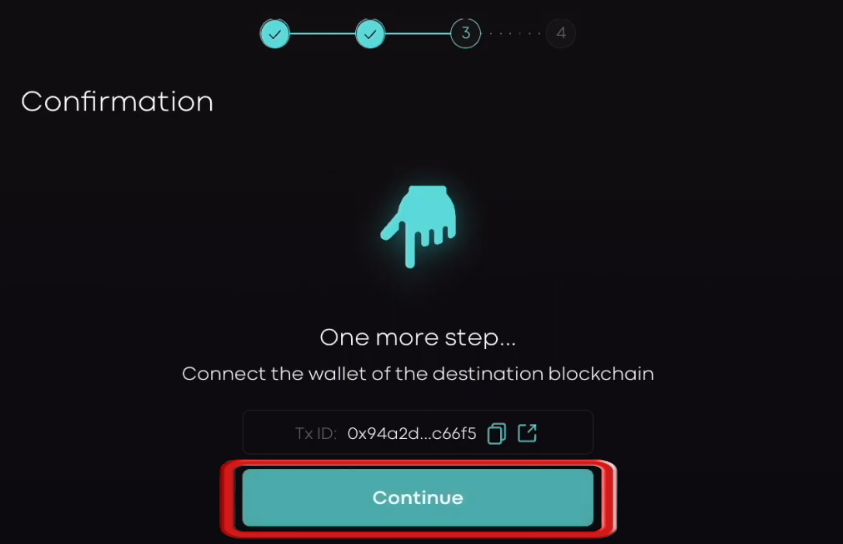
Step 13: Once the tokens have been received, click on the “Receive” button to complete your bridge from Casper to Solana.
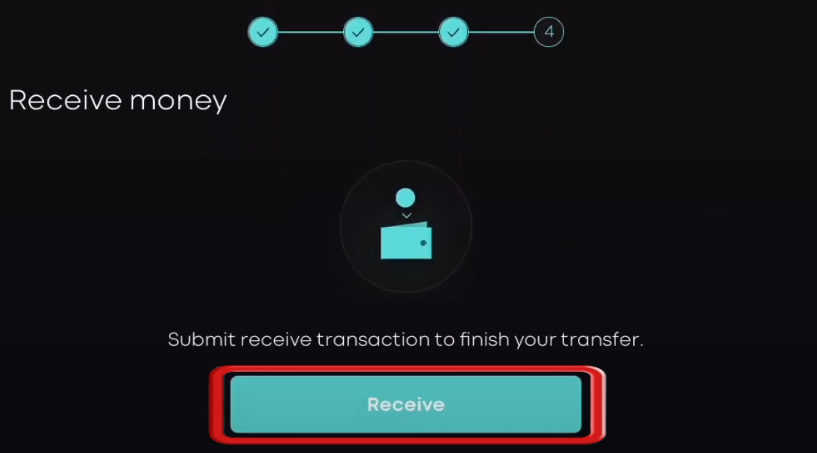
With this process, your assets are efficiently moved from Casper to Solana with minimal fees using Allbridge. For those seeking a more straightforward method to transition from the Casper network to the Solana ecosystem, centralized exchanges offer a convenient solution. Platforms like OKX, Bitget, and Bybit allow you to trade both CSPR and SOL tokens seamlessly. You can sell your CSPR tokens, purchase SOL, and transfer the SOL to a compatible wallet such as Phantom. From there, you can engage with the Solana ecosystem by staking, swapping, or buying NFTs.
Bottomline
Although we know that bridging from Casper to Solana is only achievable through Allbridge, which is a relatively secure and easy-to-use platform, it’s crucial to remain vigilant during the transfer process. Scams are prevalent, and if anything seems suspicious, you might want to consider using a centralized exchange as an alternative approach.
FAQs
1. How long does it typically take for the assets to arrive on the Solana network after bridging?
The bridging process using Allbridge can vary in time depending on network congestion and transaction confirmations. Generally, it should take only a few minutes, but in some cases, it might take longer. You can track the transaction status using the provided Tx ID to get updates on the progress.
2. Can I reverse a bridge transaction from Casper to Solana if I make a mistake?
Unfortunately, blockchain transactions are irreversible. Once you initiate a bridge transaction, it cannot be undone. It’s crucial to double-check all details, including the recipient address and amount, before confirming the transaction.
3. What are the risks associated with using cross-chain bridges like Allbridge?
Using cross-chain bridges like Allbridge comes with certain risks. Despite its reliability, users should be cautious of potential security weaknesses and the risk of phishing scams. Always confirm that you are on the official Allbridge website and double-check that your wallet connection is secure before proceeding with any transfers.

