
Claiming to be the fastest parallel blockchain in the crypto space, the SEI blockchain has been making waves with its rapidly growing ecosystem since its launch. In this guide, we’ll explore how to add SEI to MetaMask, allowing you to interact with the SEI ecosystem using your MetaMask wallet.
Does MetaMask Support SEI?
MetaMask is compatible with all EVM-based blockchains, so adding SEI to your MetaMask wallet is straightforward and can be done in just a few easy steps.
About SEI
Sei is a cutting-edge blockchain that merges Solana’s speed with Ethereum’s flexibility through its unique parallelized EVM. It offers impressive innovations like 400ms transaction finality, parallel processing for Ethereum apps, and enhanced data handling with SeiDB. The Sei Ecosystem is a dynamic hub, featuring tools like Sei Bridge for cross-chain asset transfers, Sei Explorer for detailed blockchain insights, and staking options for governance.
SEI tokens can be bought on centralized exchanges such as Binance or Bybit and then transferred to your MetaMask wallet via the SEI network. MetaMask users can add the SEI network by either manually entering the network details or using a blockchain explorer like Seitrace.
SEI Network Details
To add the SEI network to MetaMask, users must ensure the network details are accurate to avoid connecting to the wrong network. Here are the correct details for the SEI network:
- Network Name: Sei Network
- Network URL: https://evm-rpc.sei-apis.com
- Chain ID: 1329
- Currency Symbol: SEI
- Block Explorer URL: https://seitrace.com
How to Add SEI to MetaMask
There are multiple ways to add SEI tokens to MetaMask, each with its own advantages for users. The ultimate goal is to integrate SEI with MetaMask. This guide will cover two popular methods: manually adding the network or using a blockchain explorer for greater precision.
Add SEI Network to MetaMask Manually
MetaMask users who prefer using the extension can opt for the manual method to add the SEI network to their wallet. One of the main benefits of this approach is the ability to personalize the network name, making it easier to identify when switching networks in MetaMask.
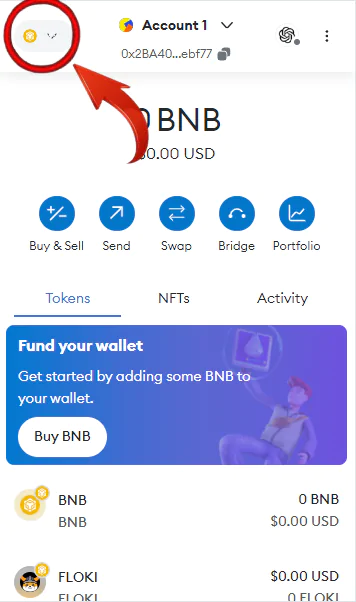
Step 1: Click the MetaMask icon in your Google extensions bar to open the extension.
![]()
Step 2: Go to the “Networks” dropdown menu in MetaMask to reveal network options.
Step 3: Click on the “Add Network” button from the dropdown menu.
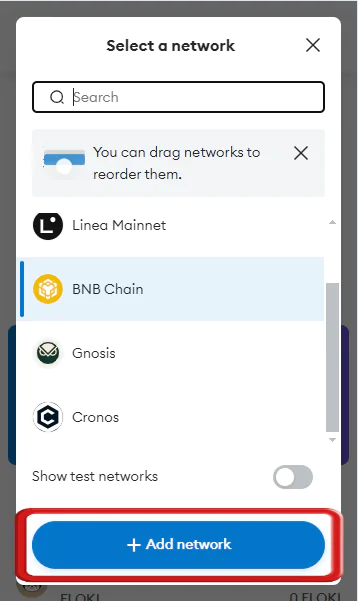
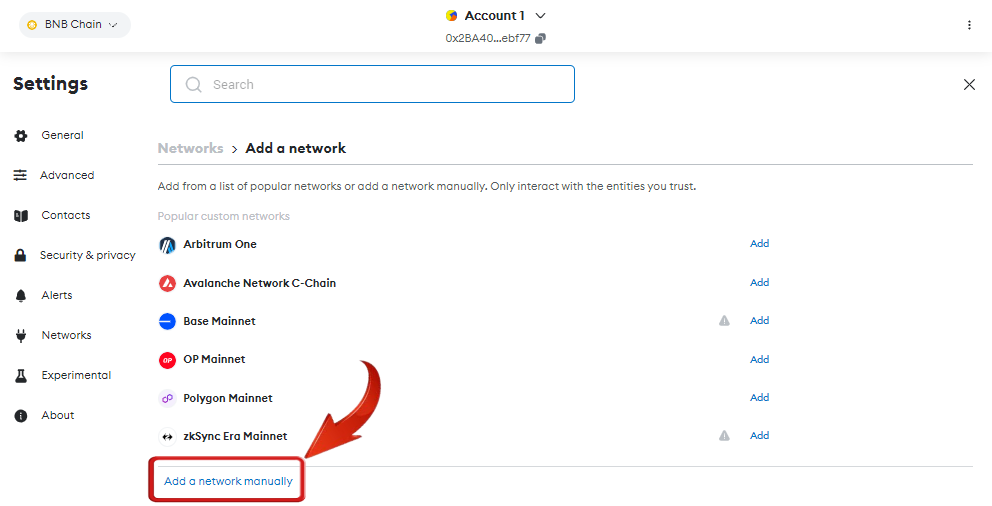
Step 4: A new tab will appear. Choose “Add a network manually” to start the process for adding the SEI network.
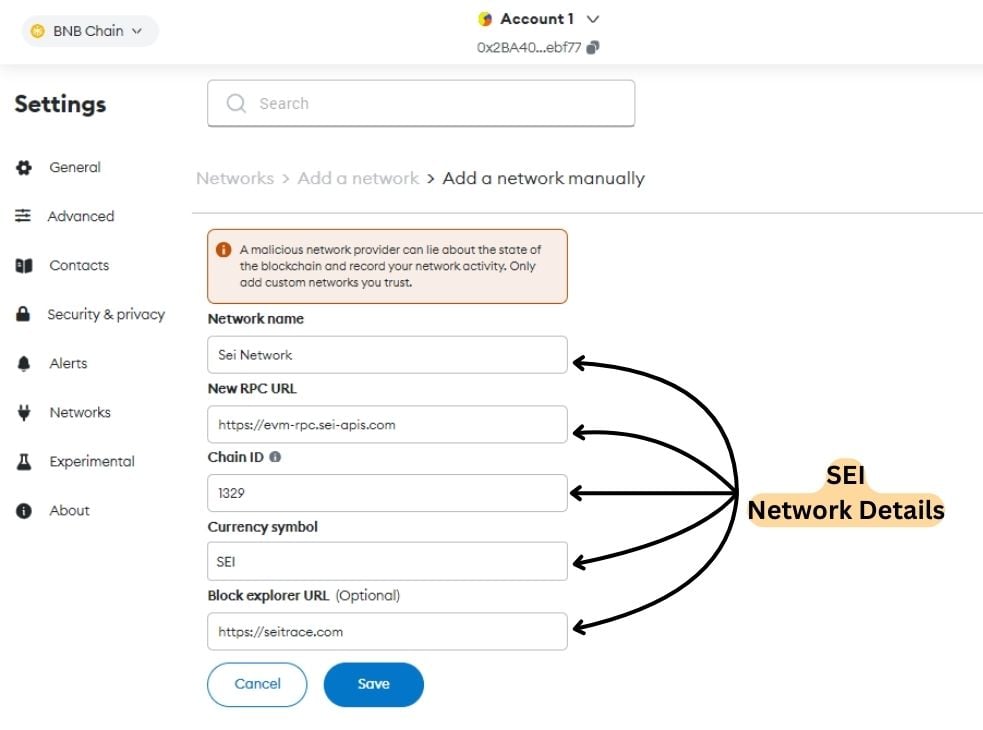
Step 5: Input the SEI network details into the fields provided to finalize the setup.
- Network Name: Sei Network
- Network URL: https://evm-rpc.sei-apis.com
- Chain ID: 1329
- Currency Symbol: SEI
- Block Explorer URL: https://seitrace.com
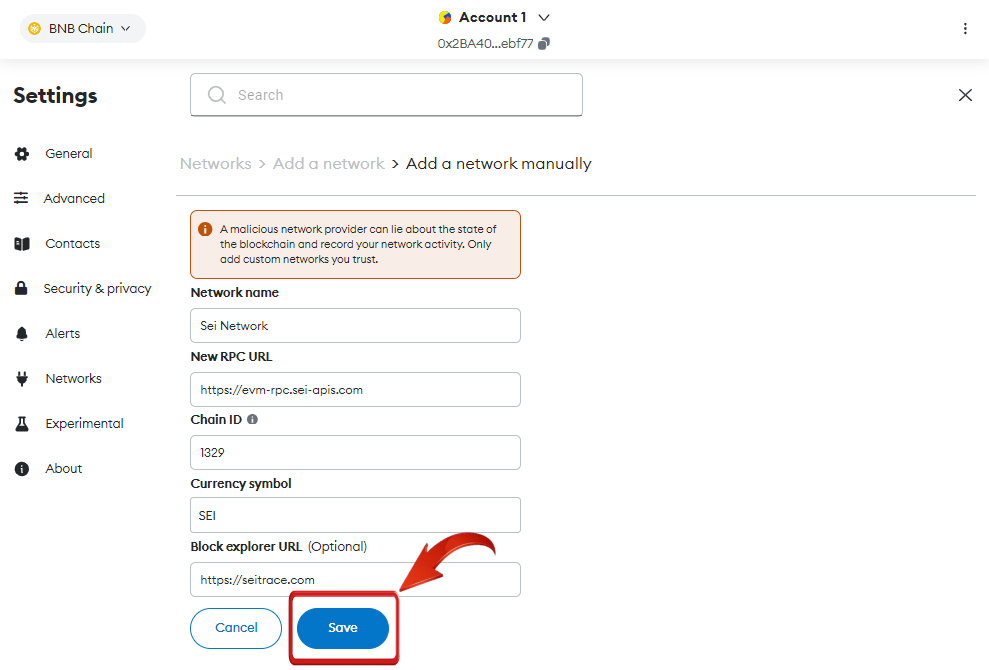
Step 6: Once you’ve input the network details, press “Save” to add the SEI network to your MetaMask setup.
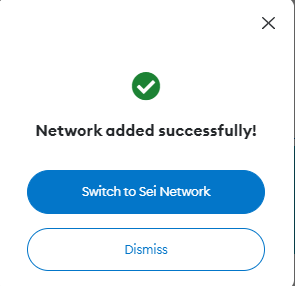
Step 7: After adding the network, MetaMask will prompt you to switch to SEI. Click “Switch Network” now or select it later from the “Network” dropdown.
The process of adding the SEI network to MetaMask is simple—think of it as filling out a form with the right network details.
Add SEI Network to MetaMask using Blockchain Explorer
For MetaMask users who prefer a quicker method to add SEI, the SEI blockchain explorer provides a straightforward, efficient, and secure option.
Step 1: Open your web browser and navigate to Seitrace.
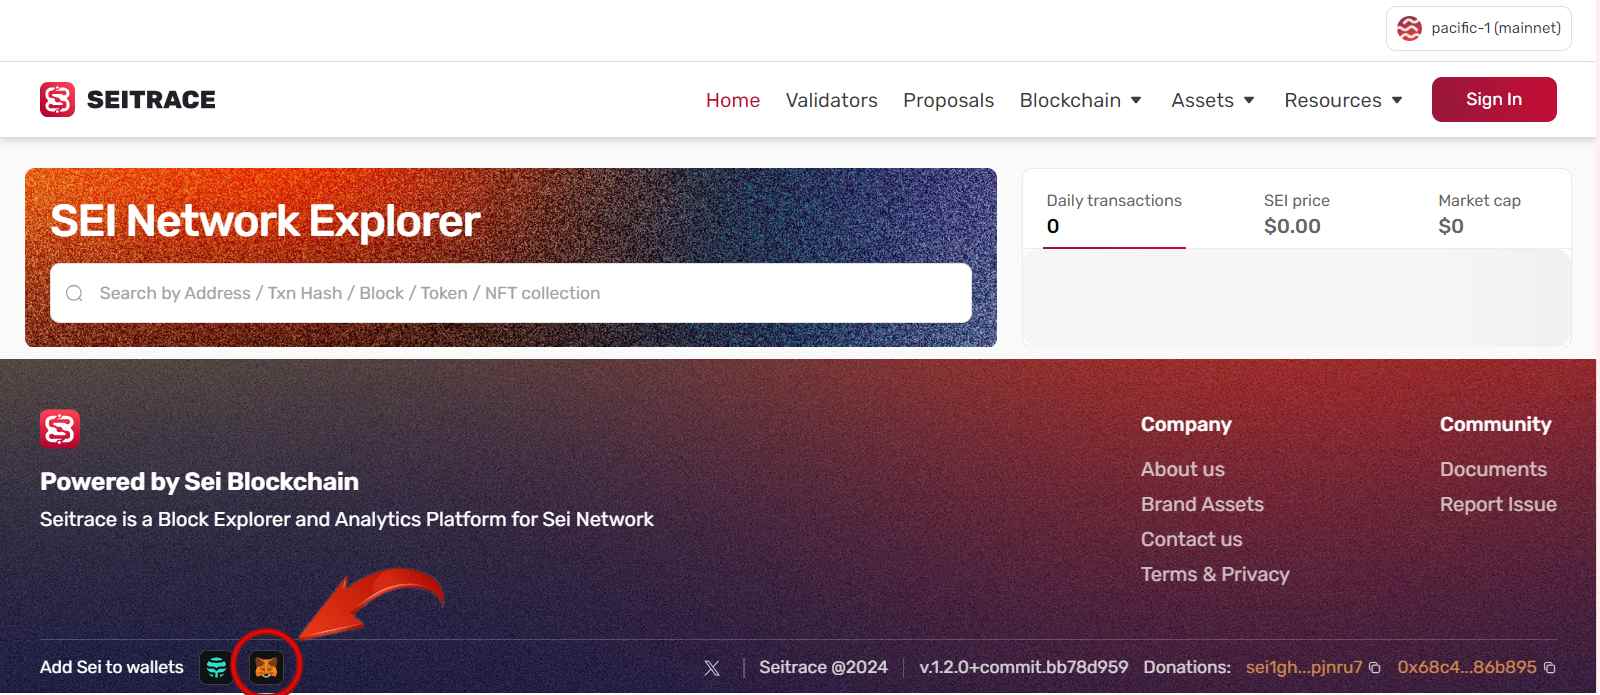
Step 2: Scroll to the bottom of the Seitrace page and select “Add to MetaMask” to link the SEI Network.
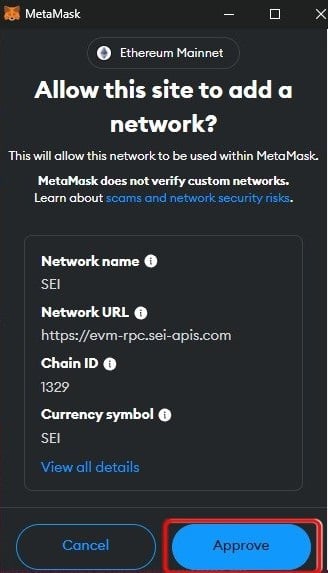
Step 3: MetaMask will display a pop-up. Click “Approve” to add SEI to your wallet.
Step 4: After approval, you can click “Switch Network” to immediately switch to SEI or stay on your current network.

Once SEI is added, you can manage your SEI tokens directly in MetaMask. If they’re not visible, you can add them manually to see your holdings. Moreover, MetaMask supports bridging from SEI to other blockchains, including Base network.
Connecting to the SEI Network via MetaMask
Connecting to the SEI Network via MetaMask opens up access to a rapidly evolving parallel blockchain designed for diverse applications. SEI, dubbed the “Decentralized NASDAQ,” is revolutionizing digital asset trading, supporting decentralized finance (DeFi), NFTs, and gaming. By integrating SEI with MetaMask, users can seamlessly engage with a range of consumer apps, from micropayments and social media platforms to gaming and supply chain solutions. Adding SEI to MetaMask enhances your ability to manage assets, interact with innovative dApps, and explore the full potential of the SEI ecosystem.
Difference Between Pegged-SEI Token and SEI Network
Pegged-SEI on the Binance Smart Chain is a wrapped version of SEI, used for swaps and staking within that network’s ecosystem, with fees paid in BNB. The original SEI token, however, allows access to the full SEI Network, where users can swap, stake, and engage with dApps, paying gas fees in SEI. The choice depends on whether users want to participate in the Binance Smart Chain ecosystem or SEI’s more extensive offerings.
Bottomline
By integrating SEI with MetaMask, users can not only seamlessly engage with the SEI ecosystem, but efficiently manage their assets, and thus diversify their interactions across range of dApps, from DeFi platforms to NFT marketplaces. Adding SEI to MetaMask unlocks easy access to SEI’s innovative blockchain features and applications, significantly enhancing your experience in the decentralized space.
FAQs
1. Can I use MetaMask to interact with SEI-based dApps directly?
- Yes, Once Connected:Once you’ve added the SEI network to MetaMask, you can connect your wallet to any SEI-based dApp directly from within the dApp’s interface, just like you would on other EVM-compatible networks.
- Manage Assets & Interact:This allows you to manage your SEI tokens, participate in DeFi protocols, trade NFTs, and engage with the full range of SEI’s decentralized applications.
2. How do I troubleshoot if I’m having issues adding SEI to MetaMask or interacting with the SEI network?
- Check Network Details:Ensure you’ve entered the correct SEI network details in MetaMask.
- Clear Cache & Data:Clear your browser’s cache and data or try a different browser if you’re experiencing connectivity issues.
- Reset Account: If the issue persists, try resetting your MetaMask account. Remember to have your seed phrase handy for recovery.
3. How does staking work on SEI, and can it be done through MetaMask?
Staking SEI tokens involves participating in network security and governance while earning rewards. Although MetaMask holds SEI tokens, staking usually requires connecting to SEI’s staking interface or delegating to a validator via SEI’s official portal. Staking details, such as minimum amounts and reward rates, may vary from other networks, so it’s essential to review SEI’s staking requirements before getting started.
4. Are there any security considerations when adding SEI to MetaMask?
When adding SEI to MetaMask, ensure you are using the correct network details to avoid connecting to a fraudulent network. Always verify the Network URL, Chain ID, and other details against trusted sources like official SEI documentation or blockchain explorers. Be cautious of phishing sites that may attempt to trick you into entering sensitive information. Using MetaMask’s built-in security features, like setting up a strong password and enabling two-factor authentication, further protects your assets.