

As the Avalanche ecosystem advances into crucial areas like RWA, AI, and gaming, and forms partnerships with major institutions such as Mastercard and Tencent, crypto users are eager to connect with it. This guide will show you how to use MetaMask to interact with Avalanche. We’ll walk through the simple steps to add Avalanche to your MetaMask wallet.
Does MetaMask Support Avalanche?
MetaMask supports all EVM-compatible blockchains, and since Avalanche is one of them, you can easily add it to MetaMask using a few simple steps.
About Avalanche
Avalanche is a blockchain ecosystem with three main networks: the X-Chain for transactions, the P-Chain for staking, and the C-Chain for dapps. The C-Chain, compatible with MetaMask, uses the Snowman consensus protocol for fast, efficient transactions. It supports up to 4,500 transactions per second and has under 2-second finality. Avalanche emphasizes interoperability with Ethereum through Solidity and hosts a variety of dapps. To interact with Avalanche, you’ll need AVAX, its native token.
AVAX tokens can be acquired from centralized exchanges like Binance or KuCoin and then moved to your MetaMask wallet via the Avalanche network. To add the Avalanche network to MetaMask, users can either input the network details manually or utilize a blockchain explorer such as Snowtrace.
Avalanche Network Details
When adding the Avalanche network to MetaMask, it’s important to verify the network details to ensure you connect to the right network. Below are the correct Avalanche network details:
- Network name: Avalanche (C-Chain)
- RPC: https://api.avax.network/ext/bc/C/rpc
- Chain ID: 43114
- Currency symbol: AVAX
- Block explorer: https://snowtrace.io/
How to Add Avalanche to MetaMask
We can add Avalanche tokens to MetaMask using several methods, each offering unique benefits for MetaMask users. Regardless of the method, the goal remains the same: adding Avalanche to MetaMask. In this guide, we will explore two of the most common approaches: the manual method and using a blockchain explorer for added accuracy.
Add Avalanche Network to MetaMask Manually
MetaMask users who are familiar with the MetaMask extension can use the manual method to add the Avalanche network to their wallet. The main advantage of this approach is the ability to customize the network’s name for easier identification when switching networks in MetaMask.
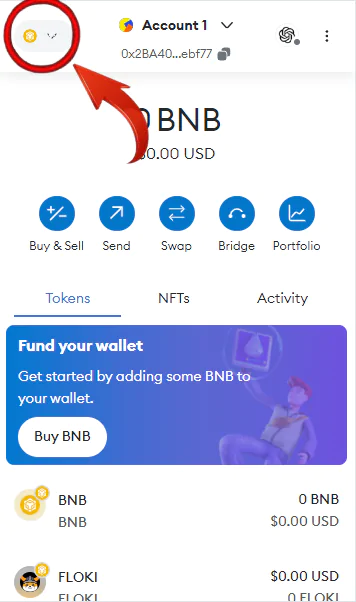
Step 1: Open the MetaMask extension by clicking its icon in the Google extension bar.
![]()
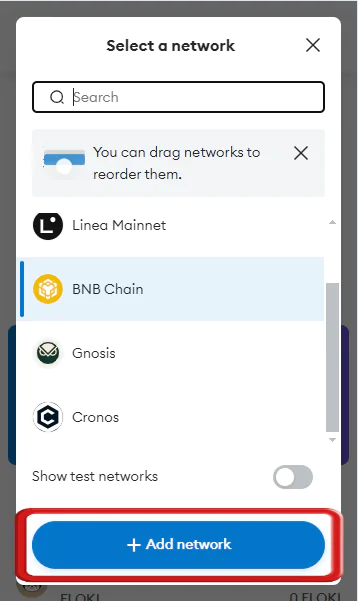
Step 2: Select the “Networks” dropdown menu in the MetaMask extension to view available networks.
Step 3: Choose the “Add Network” option from the dropdown menu.
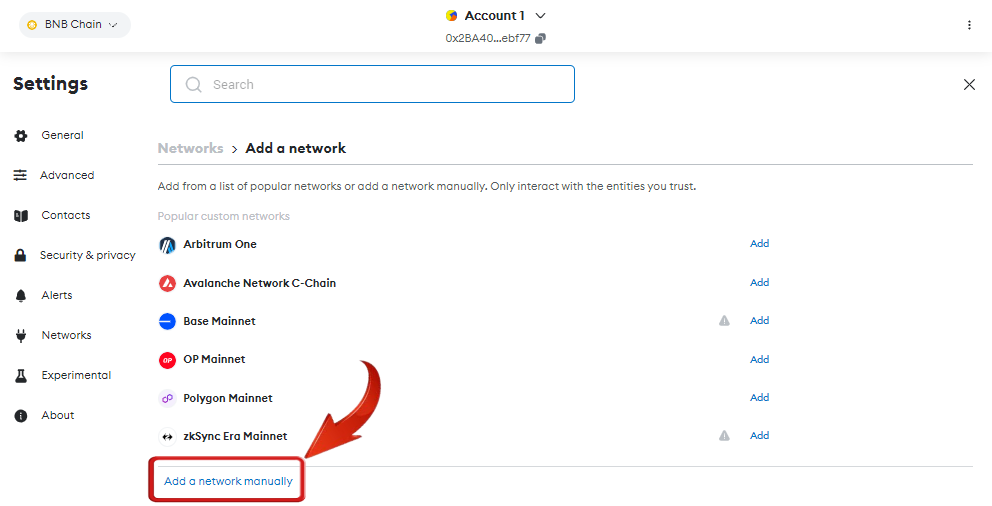
Step 4: MetaMask will open in a new tab. Click on “Add a network manually” to start adding the Avalanche network.
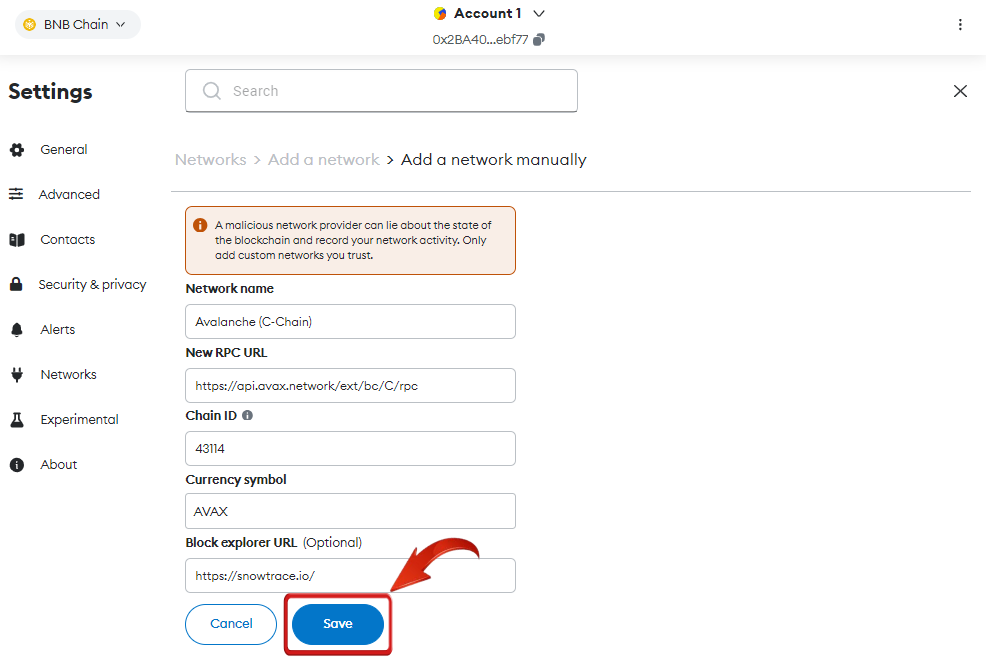
Step 5: Fill in the Avalanche network details in the specified fields to finalize the setup.
- Network name: Avalanche (C-Chain)
- RPC: https://api.avax.network/ext/bc/C/rpc
- Chain ID: 43114
- Currency symbol: AVAX
- Block explorer: https://snowtrace.io/
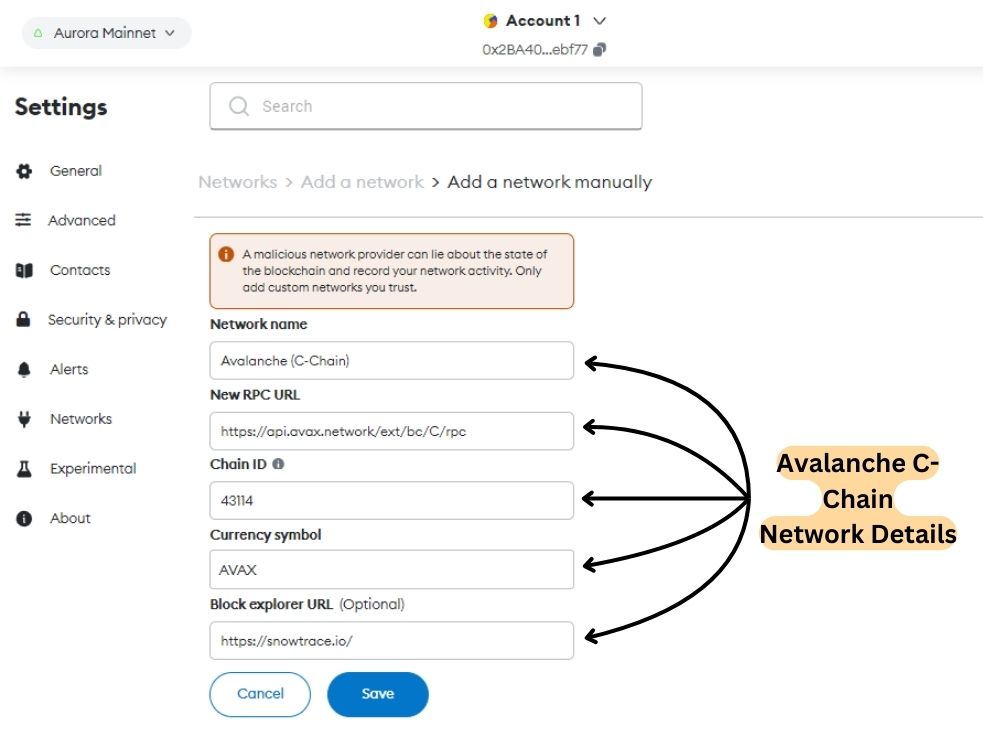
Step 6: Click “Save” after entering the network details to successfully add Avalanche C-Chain to MetaMask.
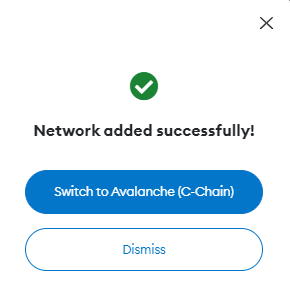
Step 7: Once the network is added, MetaMask will prompt you to switch to the Avalanche network. Click “Switch Network” to change immediately, or do it later via the “Network” dropdown in the MetaMask extension.
Adding the Avalanche network to MetaMask is straightforward and requires no technical expertise—just like filling out a form once you have the network details.
Add Avalanche Network to MetaMask using Blockchain Explorer
MetaMask users can easily and securely add Avalanche using the Avalanche blockchain explorer, offering a direct and convenient solution.
Step 1: Open your web browser and go to the Snowtrace website.
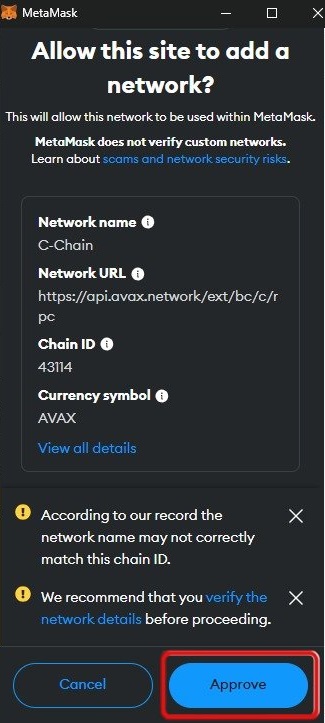
Step 2: Scroll to the bottom of the Snowtrace homepage and click “Add to MetaMask” to connect the Avalanche Network.

Step 3: A MetaMask pop-up will appear. Click “Approve” to add the Avalanche network to your wallet.
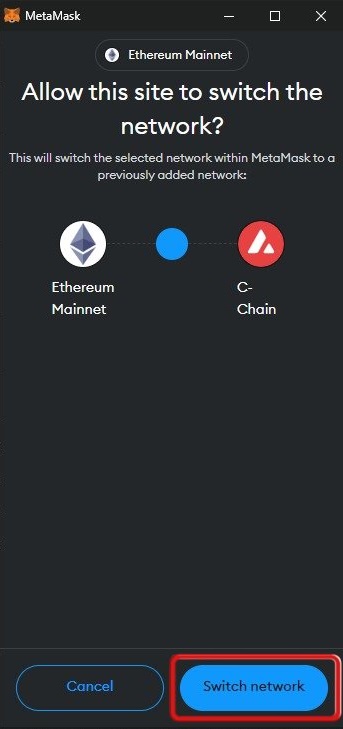
Step 4: Once approved, you can choose to switch to the Avalanche network immediately by clicking “Switch Network”. This is optional; you can remain on your current network if you wish.
After adding Avalanche, you can manage your Avalanche-based tokens within MetaMask. If these tokens don’t show up automatically, you can manually add them to view your holdings. Additionally, you can use MetaMask or external bridges to transfer tokens from Avalanche to other blockchains like Binance Smart Chain, or bridge to non-EVM compatible blockchains such as Solana.
Accessing Avalanche Network on MetaMask
Accessing the Avalanche Network on MetaMask opens up a powerful blockchain ecosystem that’s becoming a hub for gaming dApps and beyond. Avalanche stands out with its innovative technology, offering scalability without sacrificing decentralization, which means you get fast transaction speeds and low costs. It’s compatible with applications from other blockchains, enabling seamless integration.
Plus, Avalanche allows you to create your own tokens and subnetworks, enhancing your interaction with its diverse ecosystem. Adding Avalanche to MetaMask lets you fully engage with these opportunities and efficiently manage your assets within this dynamic network.
Difference Between Pegged-AVAX Token and Avalanche Network
Understanding the difference between Pegged and original tokens is crucial. A Pegged-AVAX token on the Binance Smart Chain represents an AVAX token within that chain’s ecosystem and can be swapped or staked there. In contrast, holding the original AVAX token on the Avalanche Network allows full access to Avalanche’s Ecosystem, including swapping, staking, and using dApps. Gas fees also vary: AVAX is used for fees on Avalanche, while BNB is required for Pegged-AVAX on the Binance Smart Chain
Bottomline
Adding Avalanche to MetaMask offers several benefits and is straightforward, especially if you’re looking to engage with Avalanche’s ecosystem. MetaMask serves as a hub for storing and managing tokens, thanks to its compatibility with EVM-compatible blockchains. Integrating Avalanche with MetaMask is a significant advantage, allowing users to hold assets and interact with dApps built on the Avalanche blockchain.
FAQs
1. Besides the C-Chain, can I add other Avalanche networks (X-Chain, P-Chain) to MetaMask?
- C-Chain Focus: MetaMask is primarily designed for interacting with EVM-compatible blockchains. While the Avalanche C-Chain is EVM-compatible, the X-Chain and P-Chain use different protocols.
- Alternative Wallets: To manage assets and interact with the X-Chain and P-Chain, you’ll need to use a dedicated Avalanche wallet like the official Avalanche Wallet.
2. What should I do if my AVAX tokens don’t appear in MetaMask after transferring from an exchange?
If your AVAX tokens don’t show up in MetaMask after transferring from an exchange, first ensure that you’ve added the Avalanche network to MetaMask correctly. If the network is added, but tokens are still missing, you might need to manually add the AVAX token. To do this, click “Import Tokens” at the bottom of the MetaMask interface, then enter AVAX’s contract address and other relevant details. This should make your AVAX balance visible. If issues persist, check the transaction status on Snowtrace to confirm its completion.
3. Can I participate in Avalanche staking through MetaMask?
Yes, you can participate in Avalanche staking using MetaMask. However, staking on Avalanche is done via the P-Chain, and MetaMask only supports the C-Chain. To stake AVAX, you’ll need to move your tokens to a wallet that supports the P-Chain, such as the Avalanche Wallet. You can then delegate your AVAX to a validator to earn rewards. MetaMask can still be used to manage AVAX on the C-Chain for DeFi activities and interacting with dApps.
4. Are there any risks associated with using MetaMask on the Avalanche network?
Using MetaMask on the Avalanche network is generally safe, but like all blockchain activities, it comes with certain risks. One risk is connecting to malicious or phishing sites that could compromise your wallet. To mitigate this, always double-check the URLs and ensure you’re interacting with trusted dApps. Additionally, when adding custom networks, verify the network details to avoid connecting to fake or incorrect networks. It’s also crucial to back up your MetaMask wallet’s seed phrase securely and be cautious of scams targeting MetaMask users.