Summary
Does Hyperliquid Require KYC?
Hyperliquid does not require any KYC. You can simply connect your wallet to start trading on Hyperliquid. Alternatively, you can set up your Hyperliquid account using your email. However, since it’s a decentralized trading platform, it doesn’t ask for personal information, making the setup quick and hassle-free.
How to Get Started
Setting up Hyperliquid requires two essentials: a Web3 wallet and a centralized exchange account. In this guide, we’ll walk you through the entire setup process, including how to create a Web3 wallet like MetaMask and fund your account, ensuring you’re ready to start trading on Hyperliquid.
Setting Up Your Web3 Wallet
The first step is to set up a Web3 wallet. For this guide, we’ll use MetaMask, the most recommended wallet for EVM-compatible networks like Arbitrum. If you’re wondering why Arbitrum, it’s because Hyperliquid currently only supports the Arbitrum network, which is used for depositing funds into Hyperliquid’s Layer 1. Let’s get started:
Step 1: Open your browser and download the MetaMask wallet extension from the Chrome Web Store.
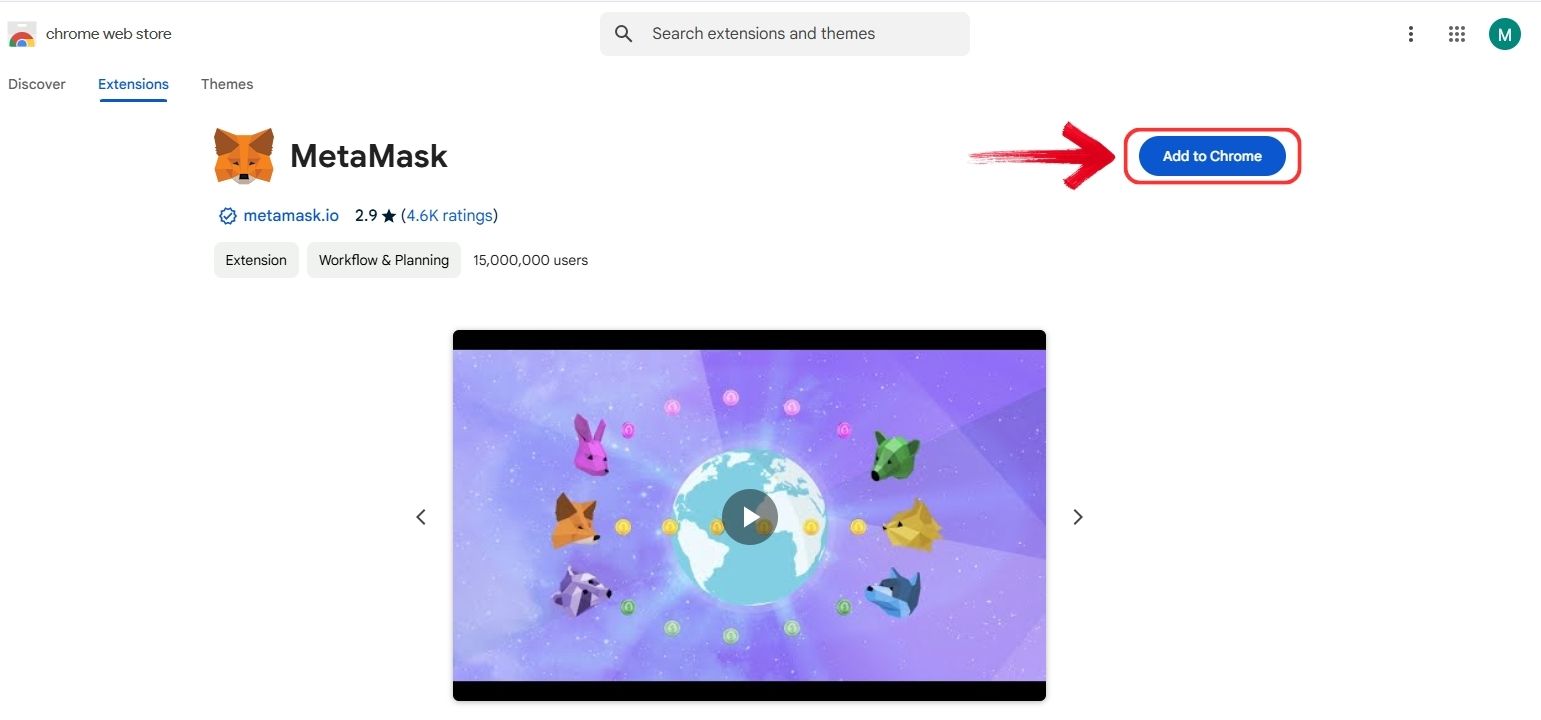
Step 2: Once the download is complete, the MetaMask extension will be added to Chrome, and a setup page will open in a new tab.
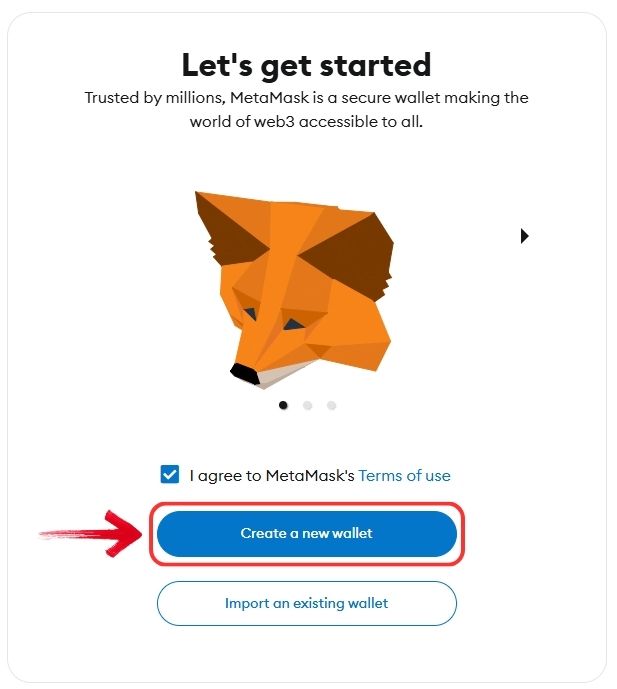
Step 3: To set up a new wallet, click “I agree to MetaMask”, then “Create a New Wallet”.
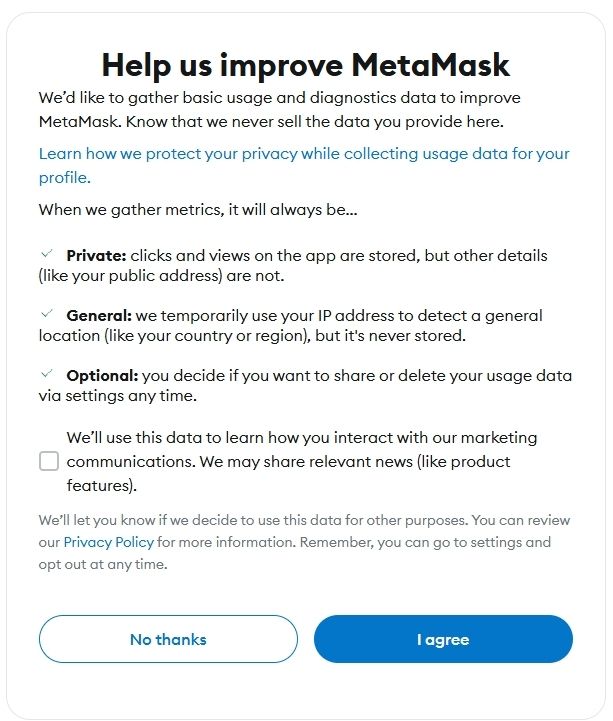
Step 4: Provide your consent for information sharing by selecting an option that suits you to proceed.
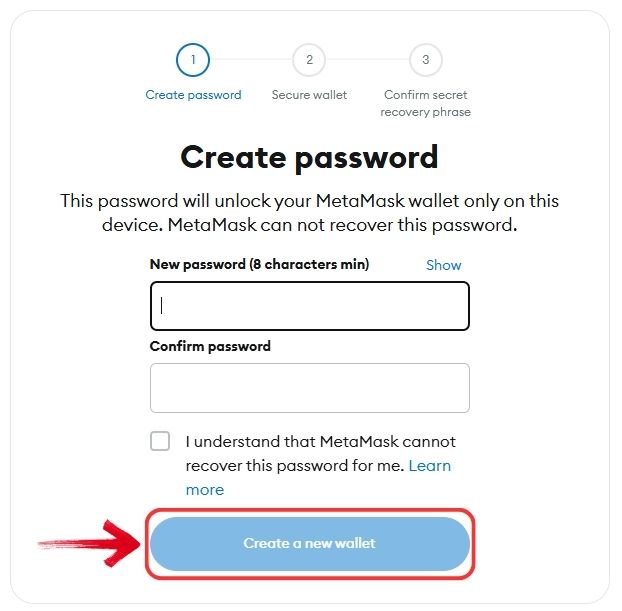
Step 5: Create a strong password and store it safely, as it cannot be recovered if lost. Once done, click “Create a New Wallet”.
Step 6: You’ll now see your Secret Recovery Phrase—a crucial 12-word phrase that lets you recover your wallet. Click “Secure My Wallet (Recommended)”.
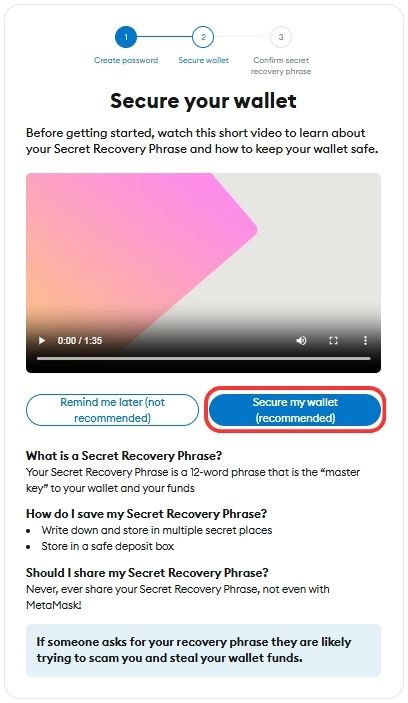
Step 7: Click “Reveal Secret Recovery Phrase” and store it securely. Important: Do not share this phrase with anyone, as it grants full access to your wallet and funds.
Step 8: Confirm your Secret Recovery Phrase by entering the missing words, then click “Confirm” to proceed.
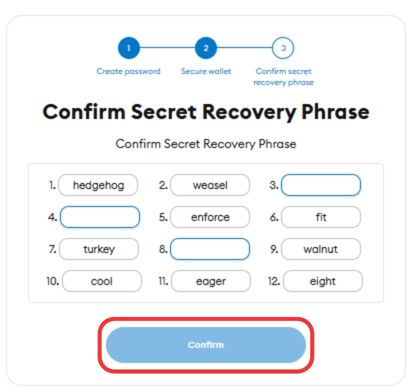
Step 9: Follow the on-screen instructions to complete your MetaMask setup.
With this, your MetaMask wallet is ready to store, send, and receive funds. The next step is to add the Arbitrum network to your wallet and fund it.
Adding the Arbitrum Network to MetaMask
Now that your wallet is set up, the next step is to add the Arbitrum network so you can send and receive funds. This can be done by clicking the “Add Arbitrum to MetaMask” button or by following our guide on adding the Arbitrum network to MetaMask.
Funding Your Account
With your MetaMask wallet ready to receive tokens on the Arbitrum network, the next step is to transfer some ETH to your wallet. Why ETH? The Arbitrum network requires ETH for gas fees (transaction fees). Even though gas fees are minimal (5-10 cents), ETH is necessary for any transaction.
To fund our wallet, we’ll use BloFin, a centralized exchange that supports the Arbitrum network.
Step 1: Open BloFin in your browser. If you don’t have an account, sign up using our referral link to get a bonus.
Step 2: Click the “Buy Crypto” tab in the top-left corner to purchase ETH using your debit or credit card.

Step 3: Enter the amount of ETH you want to buy and confirm the details before clicking “Buy Now”.
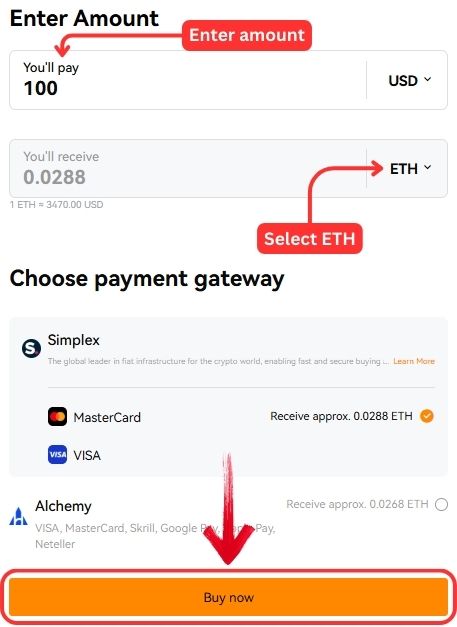
Step 4: Once the funds appear in your BloFin account, transfer the ETH to your MetaMask wallet. Click on “Asset” in the top-right corner, then select “Overview”.

Step 5: Click “Withdraw” in the overview window.

Step 6: In the withdrawal screen, select ETH as the crypto and “Arbitrum One” as the network.
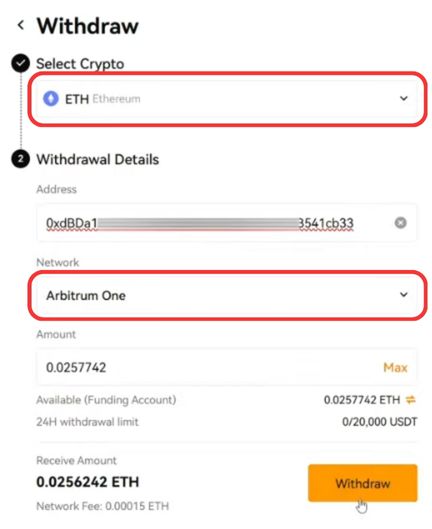
Step 7: Paste your Arbitrum network receiving address from the MetaMask wallet in the “Address” field.
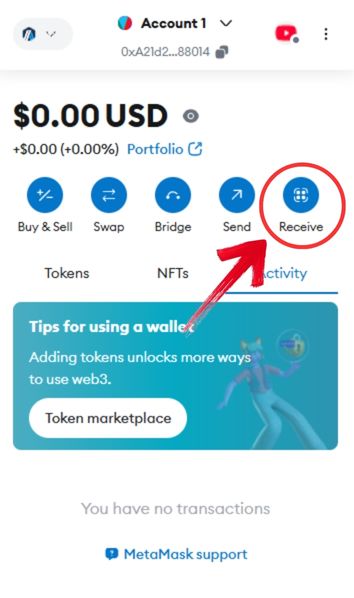
Step 8: Fill in the remaining details and click “Withdraw”.
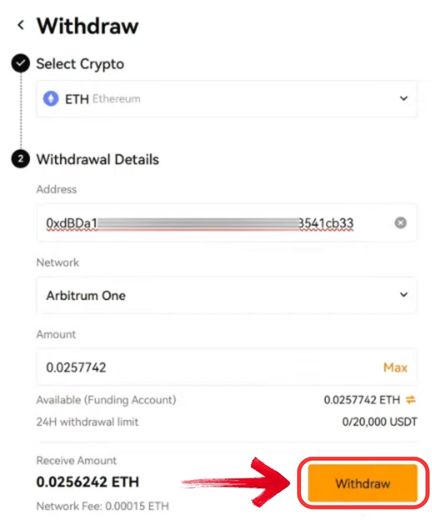
Withdrawals are typically instant but can take up to 5 minutes. Once the ETH is in your wallet, you can proceed to the next step.
Swapping ETH for USDC in MetaMask
Now that ETH is in your MetaMask wallet, the next step is to swap it for USDC. Hyperliquid only supports USDC pairs, so you’ll need USDC to trade. However, ETH is still required for gas fees on the Arbitrum network, even when swapping or depositing USDC into Hyperliquid.
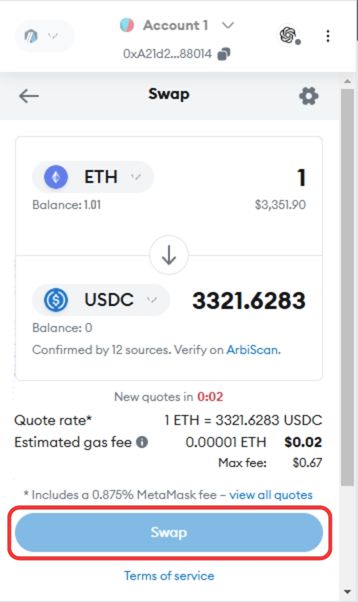
Step 1: Open the MetaMask extension and click on the “Swap” icon.
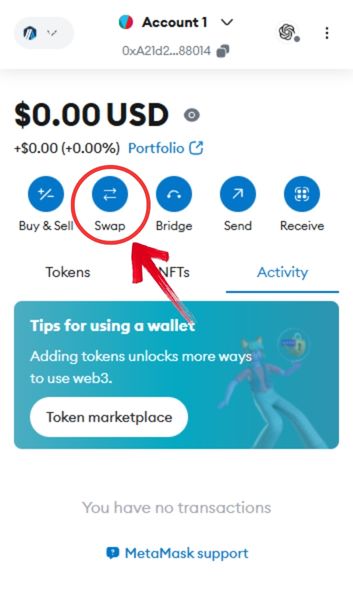
Step 2: Ensure the Arbitrum network is selected. Choose ETH in the “From” field and USDC in the “To” field to get swap quotes.
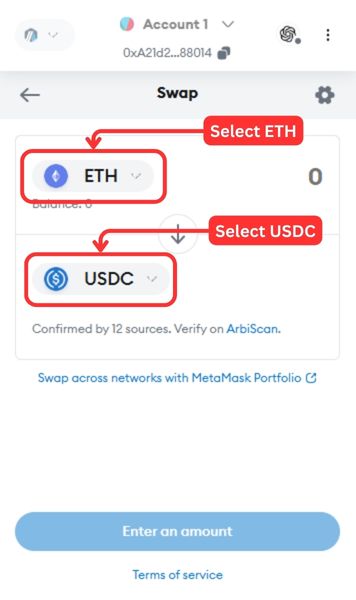
Step 3: Review the swap details and click “Swap” to confirm the transaction.
Start Trading on Hyperliquid
With USDC in your MetaMask wallet, you’re ready to start trading on Hyperliquid. Here’s how to connect your wallet and begin:
Step 1: Open the Hyperliquid platform in your browser. Use our referral link to get an exclusive 4% discount on every trade.
Step 2: Click the “Connect” button in the top-right corner of the app to link your wallet.
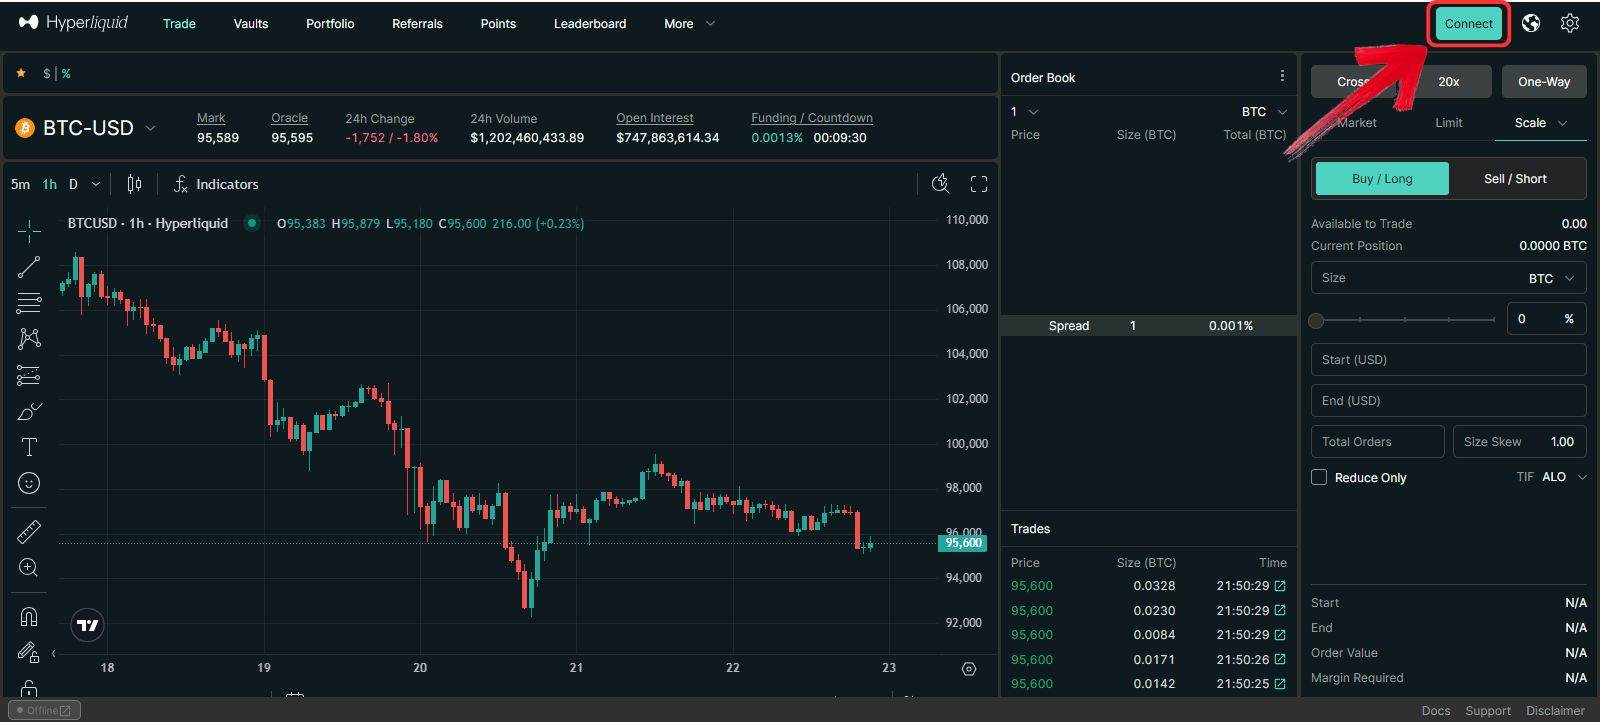
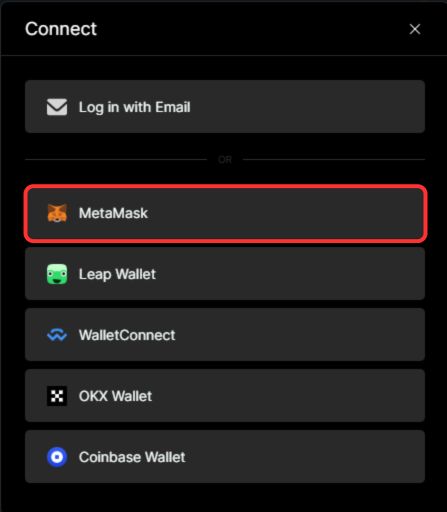
Step 3: A list of wallets will appear; select “MetaMask” to continue.
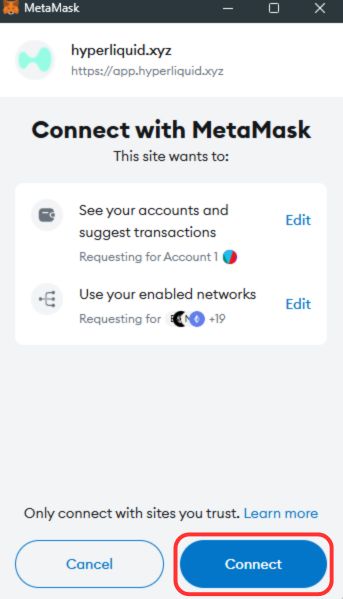
Step 4: The MetaMask extension will open. Click “Connect” to authorize linking your wallet with Hyperliquid.
Step 5: Click the “Enable Trading” button to start.
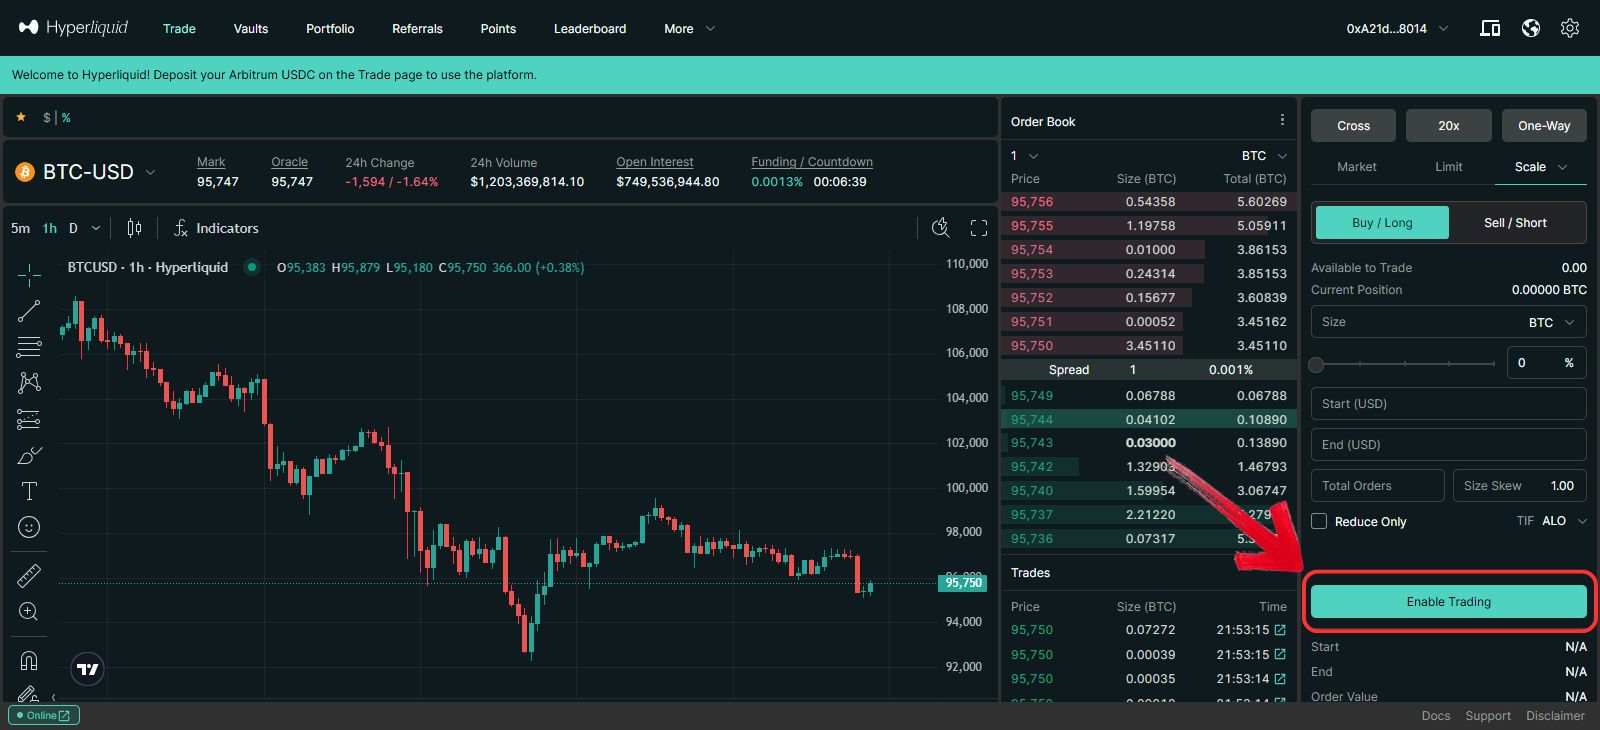
Step 6: A pop-up will appear asking you to establish a connection. Click “Establish Connection”.

Step 7: Confirm the connection by signing the request in MetaMask. This will allow Hyperliquid to access your wallet for transactions.
And that’s it! You’re now ready to explore all the features Hyperliquid has to offer. For more tips, check out our guides on trading strategies or generating passive income through copy trading on Hyperliquid.
Why use Hyperliquid?
Hyperliquid is a next-generation decentralized trading platform that combines the speed and ease of centralized exchanges with the transparency and security of decentralized systems. Here’s why traders prefer Hyperliquid:
- No Slippage Trades:Execute trades on-chain with zero slippage, ensuring precise pricing.
- Advanced Technology:Built on its own Layer 1 blockchain using BFT (Byzantine Fault Tolerance) consensus for fast, secure, and reliable transactions.
- Near-Instant Settlements:Optimized for low latency, offering trade settlements comparable to leading centralized exchanges.
- Low Fees: Competitive maker and taker fees of 0.01% and 0.035%, respectively.
- Wide Asset Range: Trade 11+ cryptocurrencies on the spot and over 149 perpetual contracts with up to 50x leverage.
- Decentralized Freedom: No KYC required—connect your Web3 wallet and trade securely without sharing personal data.
Bottomline
Hyperliquid bridges the gap between centralized and decentralized trading by offering speed, transparency, and security. With no KYC requirements and low fees, it’s an ideal platform for both novice and experienced traders. This guide simplifies the process, from setting up your wallet to transferring funds, while providing valuable lessons on blockchain networks. Start your trading journey with Hyperliquid and gain insights into decentralized finance along the way!
FAQs
1. What makes Hyperliquid different from other decentralized exchanges?
Hyperliquid offers zero-slippage trades, advanced Layer 1 blockchain technology with BFT consensus, and near-instant trade settlements. These features ensure a fast, secure, and efficient trading experience comparable to centralized exchanges.
2. Do I need ETH to trade on Hyperliquid?
Yes, ETH is required to pay gas fees for transactions on the Arbitrum network. While trading pairs are in USDC, ETH ensures smooth operations for swaps, deposits, and withdrawals.
3. Can I use Hyperliquid without a Web3 wallet?
Yes, you can set up a Hyperliquid account using an email address. However, for a fully decentralized experience, connecting a Web3 wallet like MetaMask is recommended.
4. Can I use USDT or other stablecoins instead of USDC on Hyperliquid?
Currently, Hyperliquid supports USDC pairs for trading. If you hold other stablecoins like USDT, you’ll need to swap them for USDC first.
5. What happens if I lose access to my Web3 wallet?
If you lose your Web3 wallet’s Secret Recovery Phrase, it cannot be recovered. Always store this phrase securely to ensure uninterrupted access to your funds.

