Bitunix is an emerging cryptocurrency trading exchange committed to creating convenient, secure, intelligent, and social financial tools. Its services encompass crypto spot and futures trading, helping users discover quality investment projects, and adopting efficient and stable trading strategies for profitability through holding and trading cryptocurrencies.
For more information, check out our Bitunix Review.
In this article, we’ll discuss Bitunix withdrawal options, withdrawal limits, and fees. We will also guide you through a step-by-step process of withdrawing your cryptocurrency using the various options available.
Bitunix Withdrawal Options
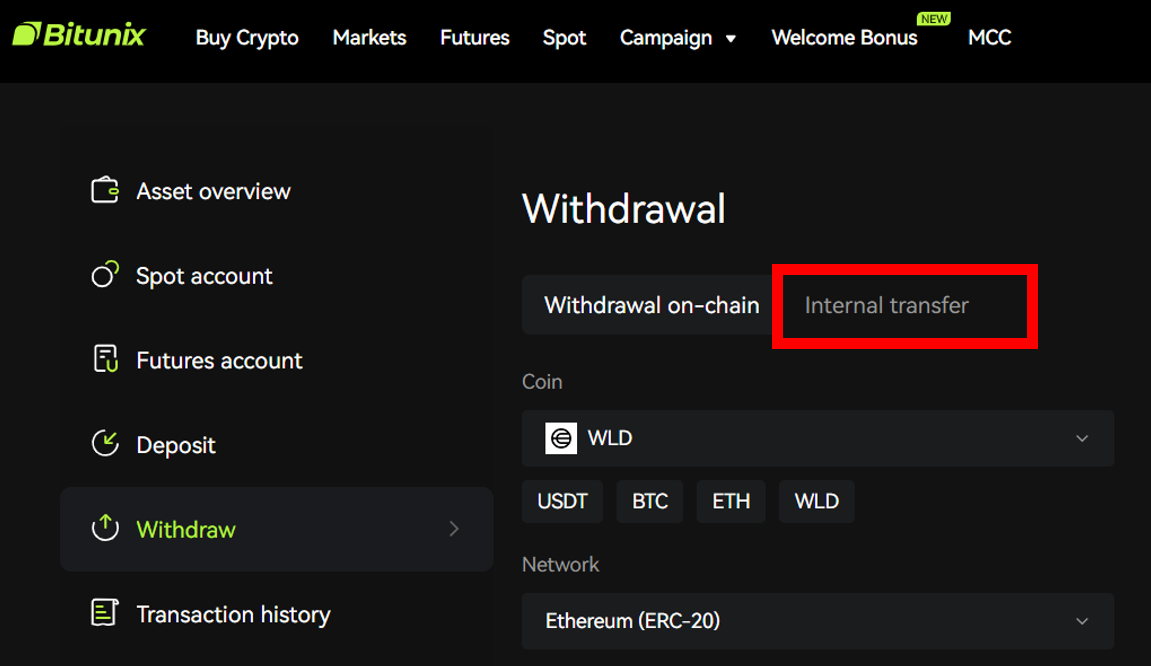
On Bitunix, there are two withdrawal options: on-chain or internal transfer. With on-chain transfer, Bitunix enables you to transfer cryptocurrency to a wallet address outside of Bitunix, while internal transfer allows you to transfer cryptocurrency to another Bitunix user.
Bitunix allows withdrawal of a wide range of cryptocurrencies, including major ones like USDT, BTC, ETH, and WLD.
However, on Bitunix, you cannot directly convert your cryptocurrency to cash and withdraw it to your bank. If you need to convert your cryptocurrency to cash, you’ll have to transfer the cryptocurrency out of Bitunix to a fiat withdrawal-supported exchange for conversion.
Bitunix Withdrawal Limits
Your Bitunix withdrawal limit is calculated in USDT equivalent and varies depending on your account status. A newly registered Bitunix account, not yet verified, has a 24-hour withdrawal limit of 10,000 USDT. However, once you set up mobile authentication, this limit increases to 20,000 USDT. After activating Google Authenticator, your 24-hour withdrawal limit rises to 50,000 USDT. This limit further increases to 2,000,000 USDT upon completing level 1 verification and activating multiple security verifications.
Bitunix charges a flat fee to cover the transaction costs of transferring cryptocurrency out of your Bitunix account. Withdrawal rates are determined by the blockchain network and may fluctuate due to factors such as network congestion. When you want to withdraw, always check for the most recent fee which is usually displayed on your withdrawal page. Below is a sample withdrawal fee, subject to change.
| Full Name | Token | Network | Withdrawal Fee(Unit: Token) |
|---|---|---|---|
| USD Tether
|
USDT Omni 20 | Ethereum (ERC-20)
Tron (TRC20) Arbitrum One Solana Polygon AVAX C-Chain |
5
1 1 1 1 1 |
| Solana | SOL | Solana | 0.008 |
| Ethereum | ETH | Ethereum (ERC-20) | 0.004 |
| Bitcoin | BTC | OMNI | 0.0004 |
Note
If you require a higher daily withdrawal limit, after completing KYC2 Advanced ID Verification, you’ll need to submit a ticket containing the following details: your Bitunix UID, the currency name for which you wish to increase the withdrawal limit, and your desired limit.
Bitunix Crypto Withdrawals
On-chain Withdrawal
Step 1: Log In to Your Account
You can log in to your account using your email and password, phone number and password, Google account, Apple ID, Facebook, or Twitter account. Additionally, you can log in with a QR code.
Step 2: Locate Where to Withdraw
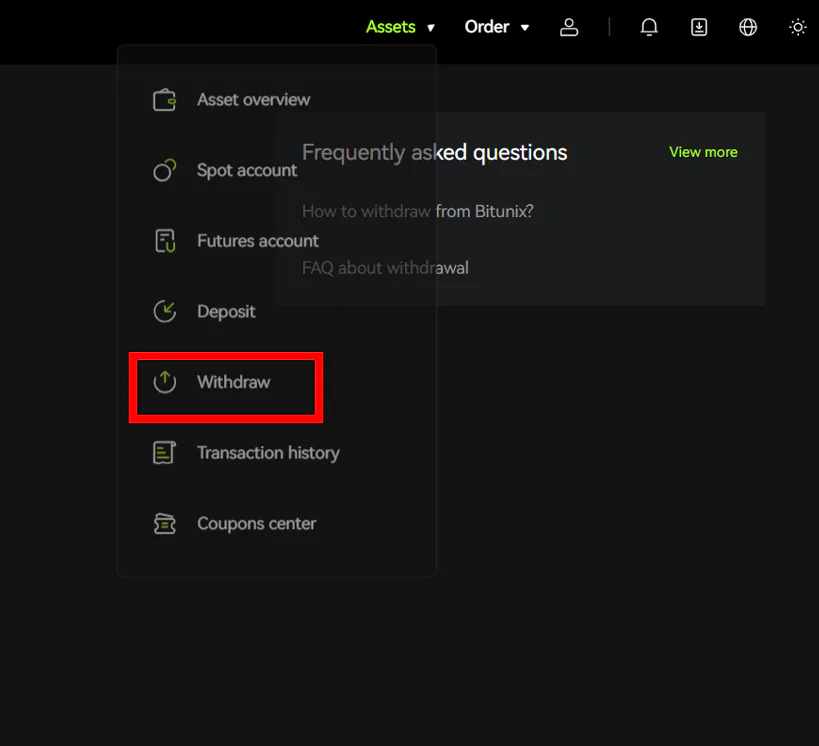
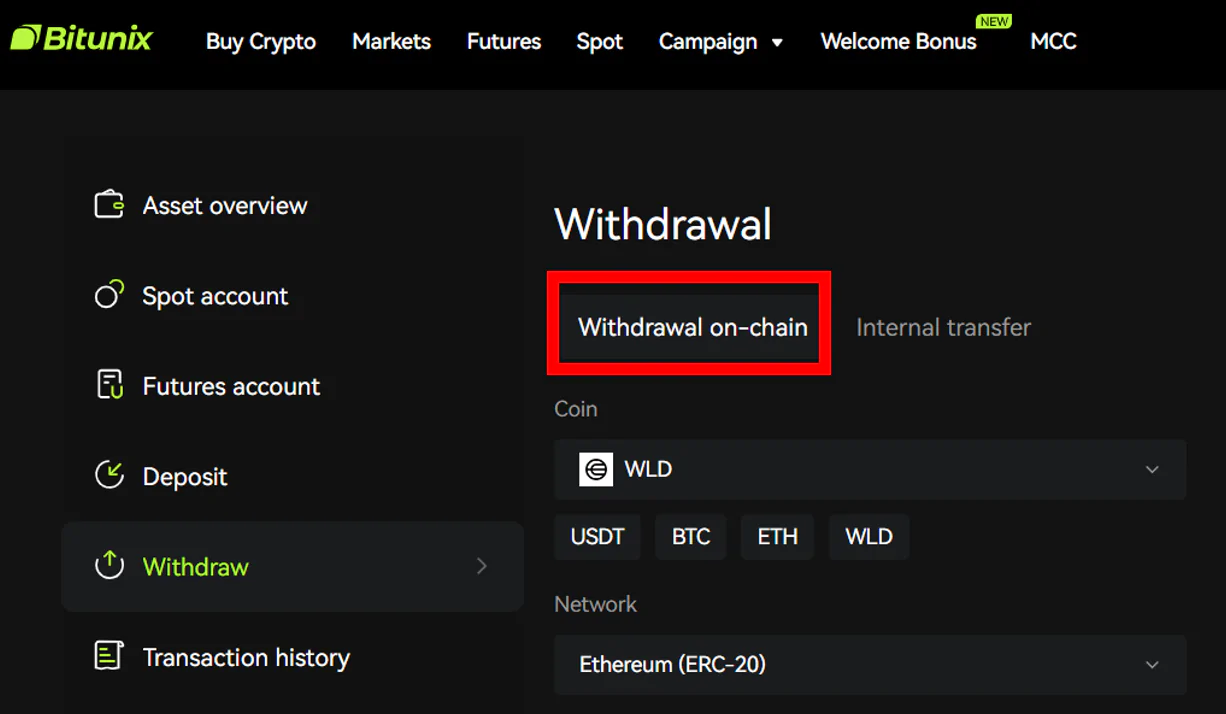
Place your cursor on “Asset,” located at the top right corner of your screen, and select “Withdraw” from the dropdown menu. Next, ensure that “Withdrawal on-chain” is selected.
Note
To ensure the safety of your fund make sure you enable at least two security options.
Step 3: Fill in the Necessary Details
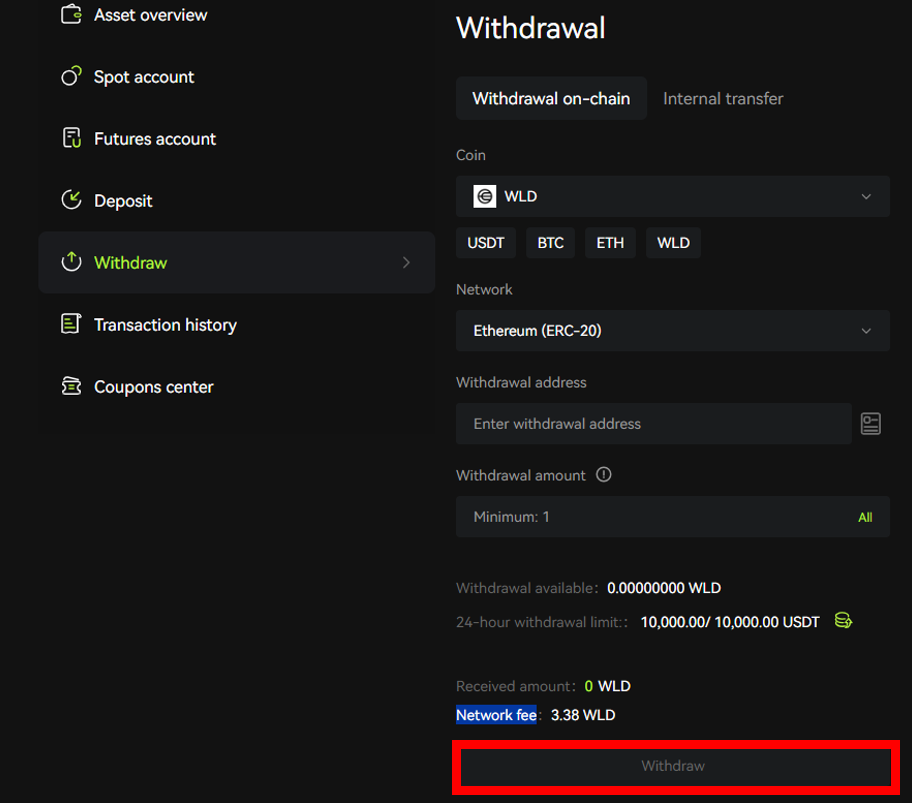
First, search and select the cryptocurrency you want to withdraw, or choose from the suggested options. Then, select the appropriate network for the transaction from the dropdown menu. Bitunix will list all networks supporting the selected cryptocurrency; choose one.
Next, enter the withdrawal address, which is the recipient’s address for the cryptocurrency transfer. Following this, input the amount of cryptocurrency you wish to send to the recipient.
While filling out this information, pay attention to key details on your withdrawal page: “Withdrawal available,” “24-hour withdrawal limit,” “Received amount,” and the “Network fee.” The network fee varies depending on the network used for the transaction.
After filling in the recipient’s details, double-check for accuracy. Once confirmed, click “Withdraw” to proceed with the transaction.
Step 4: Follow the Prompts
You will be prompted to provide details to authorize the transaction. Enter the code from your email or authenticator app and fill in any other required information. Then, click on “Submit.”
Internal Transfer
Step 1: Log In to Your Account
You can log in to your account using your email and password, phone number and password, Google account, Apple ID, Facebook, or Twitter account. Additionally, you can log in with a QR code.
Step 2: Locate Where to Withdraw
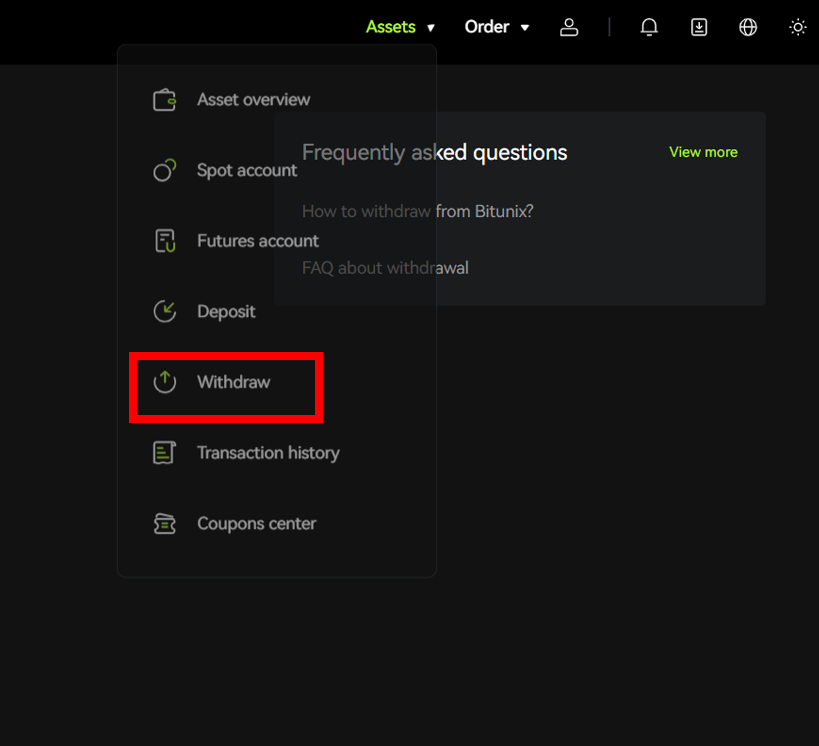
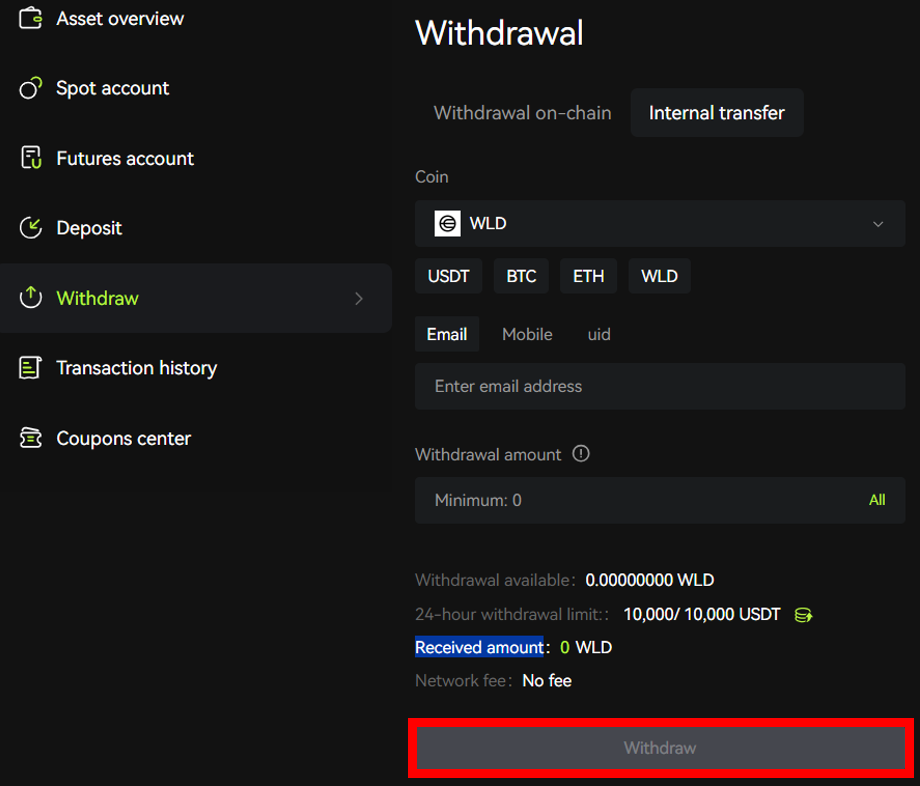
Place your cursor on “Asset,” located at the top right corner of your screen, and select “Withdraw” from the dropdown menu. After this, click on “Internal transfer.”
Step 3: Fill in the Necessary Details
First, search and select the cryptocurrency you want to withdraw or choose from the suggested option. Next, choose the type of detail you want to use—whether “Email,” “Mobile,” or “UID”—by clicking the respective tabs. Fill in the recipient details accordingly, then enter the “Withdrawal amount.”
Pay attention to the “Withdrawal available,” “24-hour withdrawal limit,” and “Received amount.” Since the transaction is free, you don’t need to worry about that aspect.
After filling in the necessary details, review them to ensure correctness. Once satisfied, click on “Withdraw.”
Step 4: Follow the Prompts
You will be prompted to provide details to authorize the transaction. Enter the code from your email or authenticator app and fill in any other required information. Then, click on “Submit.”
Bitunix Fiat Withdrawals
Currently, there is no fiat withdrawal option on Bitunix, so you’ll need to transfer your crypto to an exchange that supports fiat withdrawal. A recommended exchange for this is Coinbase.
Summary
Withdrawing on Bitunix is straightforward and easy. This withdrawal guide has covered what you need to know about on-chain withdrawal, internal transfers, and fiat withdrawal. If you encounter any issues during the withdrawal process, you can always consult their customer service, which operates 24 hours a day.
Occasionally, there may be instances where your transaction is delayed. In such cases, you should check the status. If your withdrawal status indicates “Withdrawal completed” or “Block has been confirmed,” it means the transaction has been processed by Bitunix and is now sent to the blockchain network for validation.
If the blockchain indicates that the funds have not arrived, then you should wait patiently for the network to validate the transaction. If it confirms that the funds have arrived but you still do not see any records of the funds, you should contact the recipient platform for assistance.

